
Requirements and Initial Concept
For this project, we were instructed to create a design for some sort of interactive product that involved a sensor and light, using the Arduino Uno for coding. For my initial idea, I decided to do a plant soil sensor to help with identifying if plants need to be watered or not. I wanted to make it portable and to have a more modern looking design, as other similar products on the market felt out of date, especially design wise.
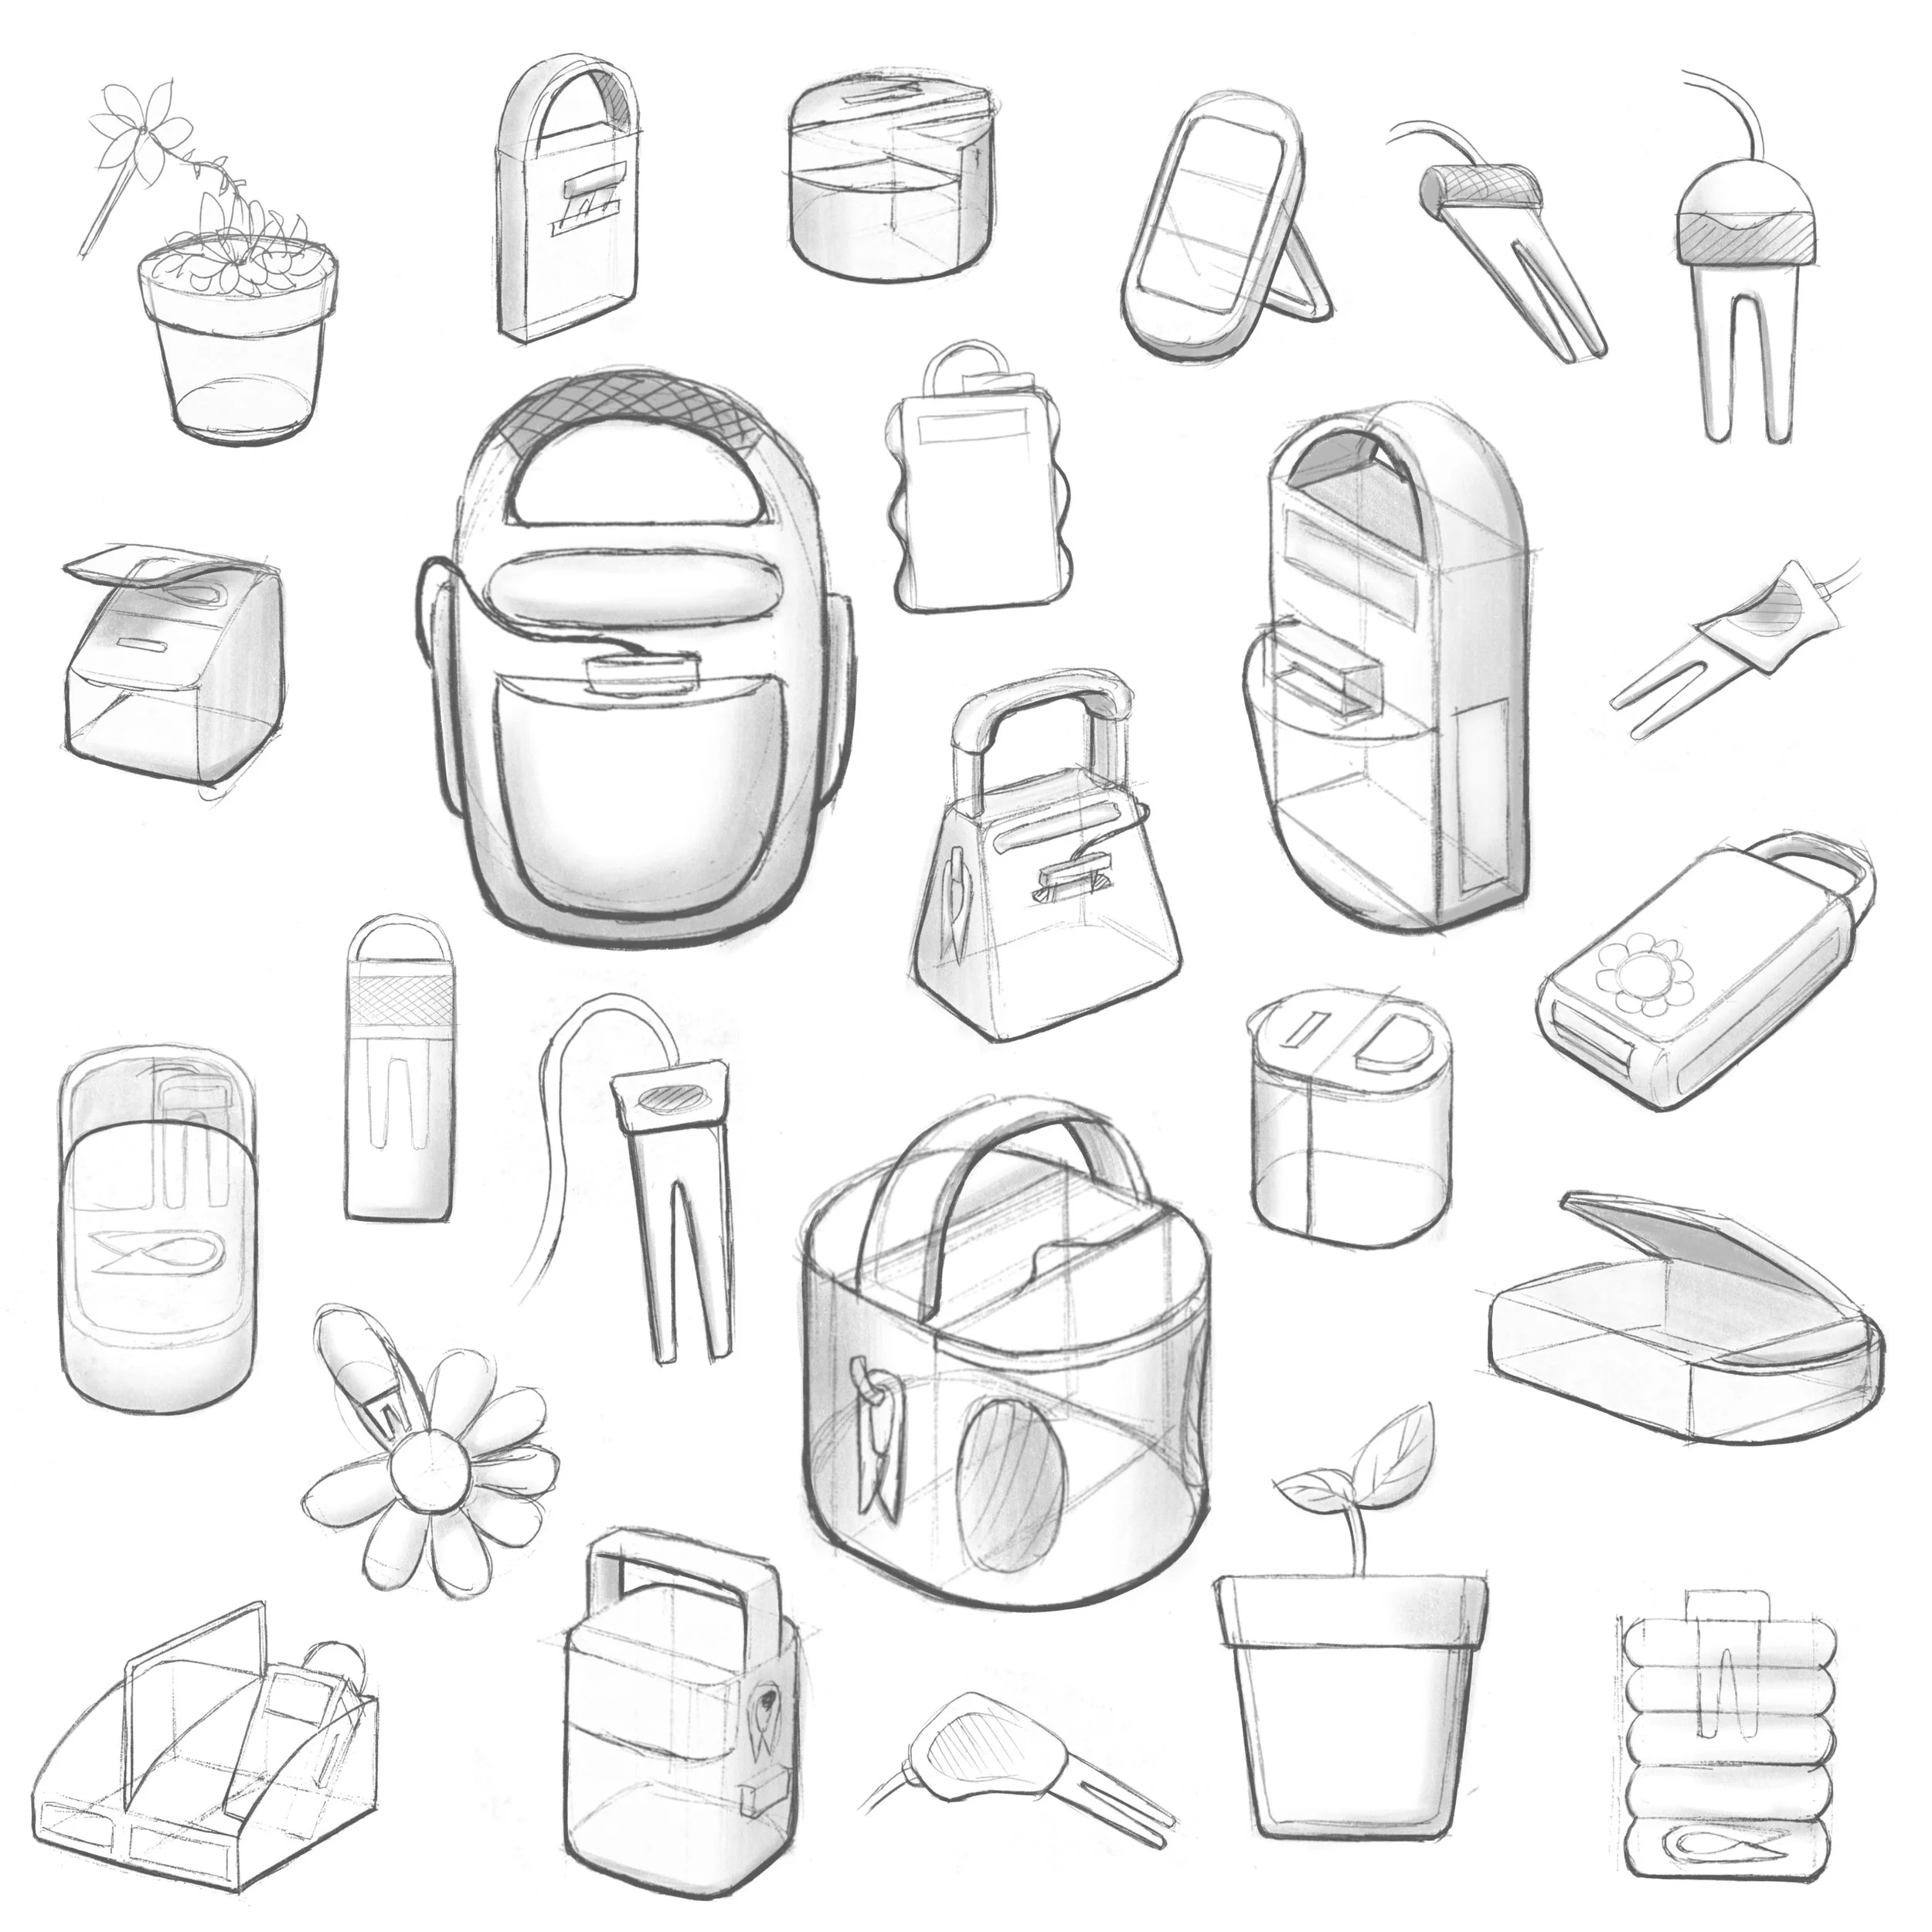
Initial Ideation
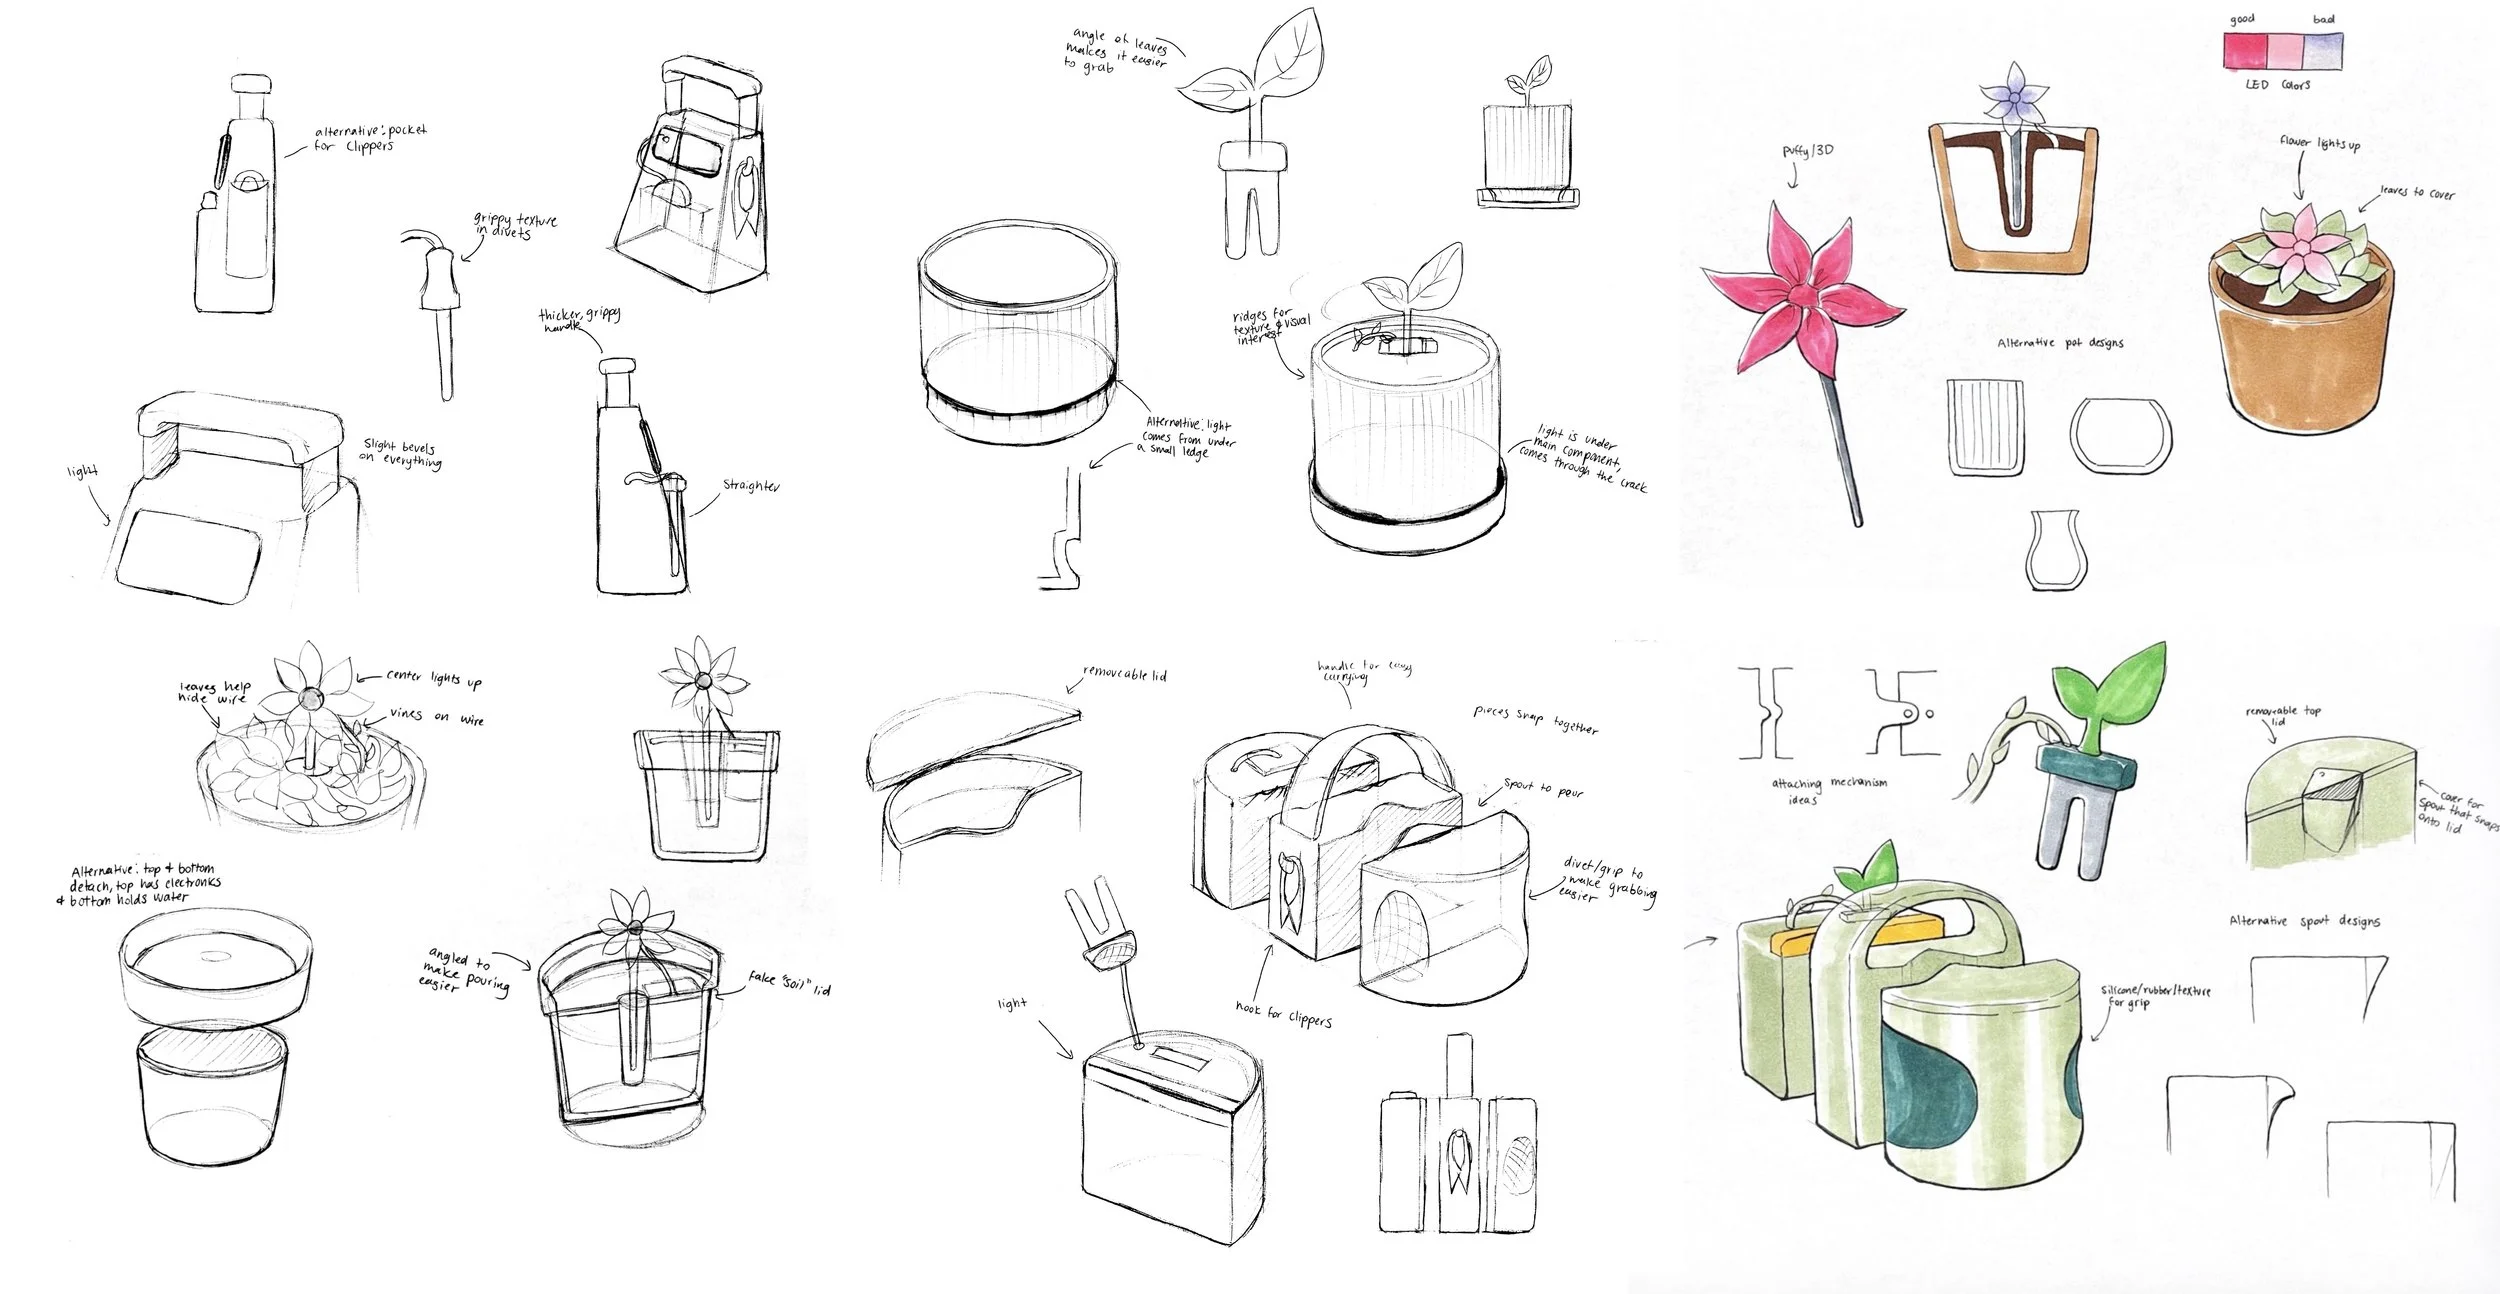
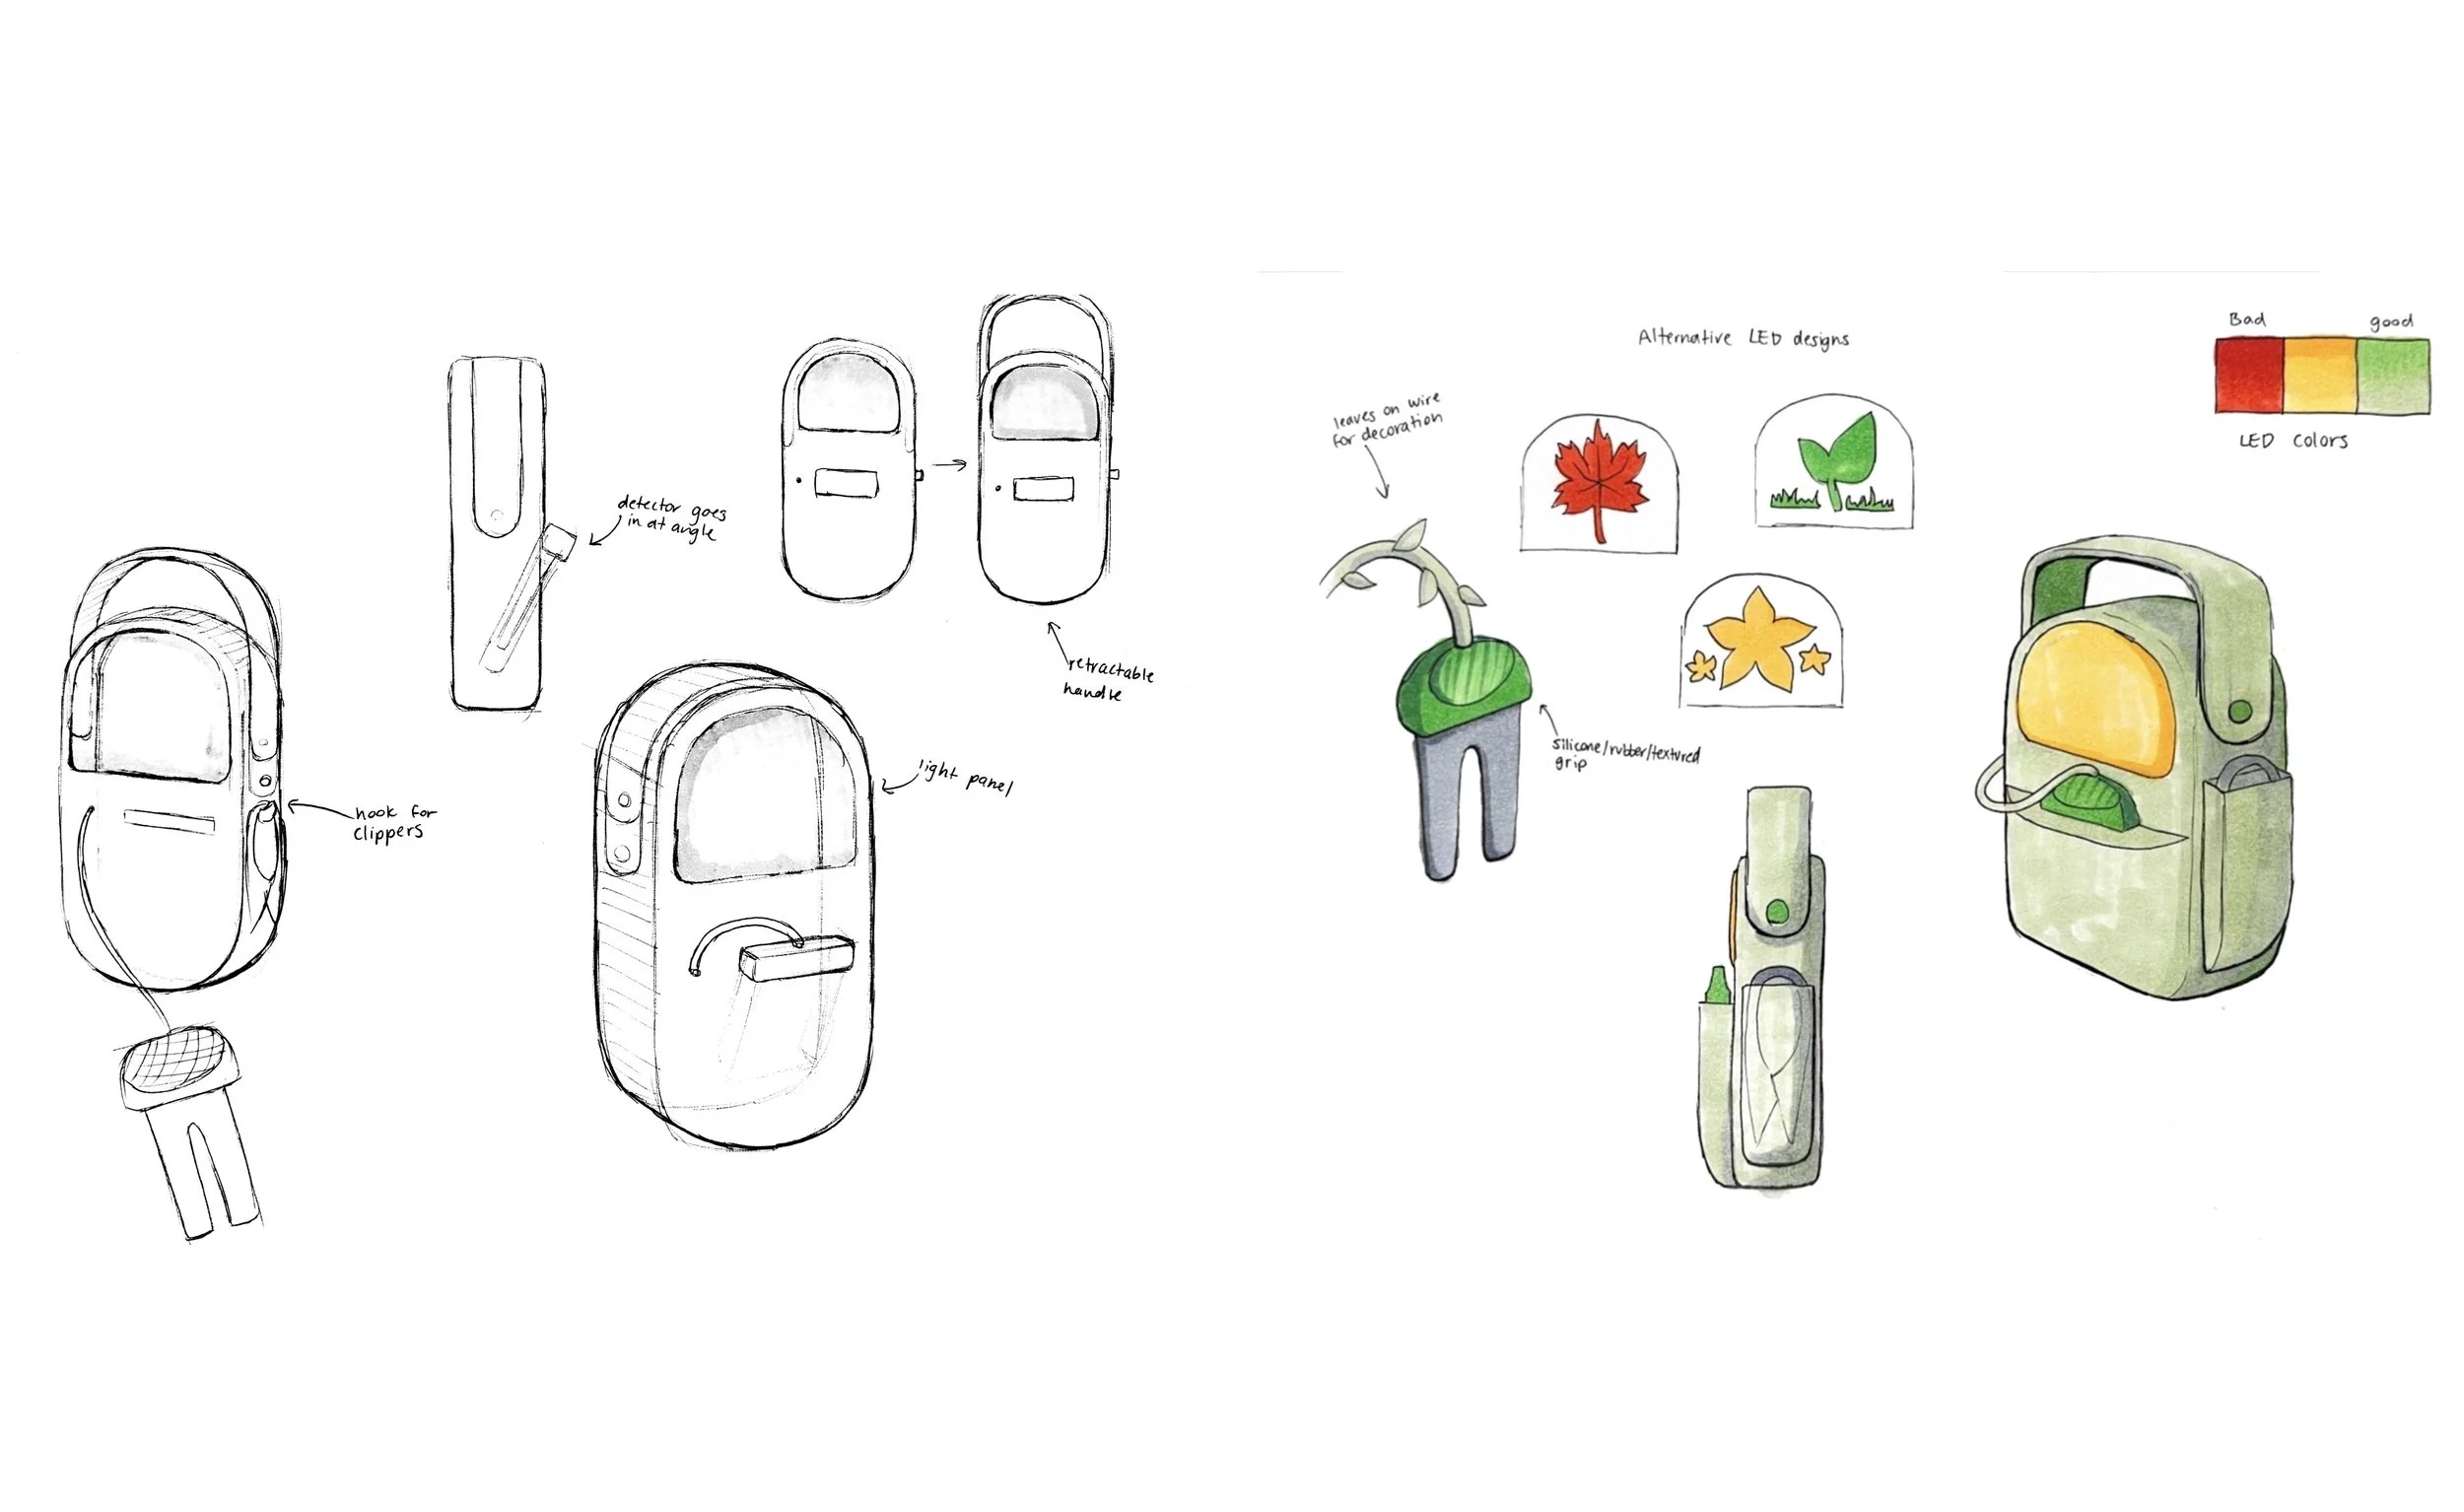
Refining the Design
After the Initial sketches, I refined my concepts, focusing on a few different iterations. Some concepts focused on visuals and aesthetics while others focused on functional practicality. The final design focused more on practicality than aesthetics, but it was still visually interesting and was something I could see myself using.
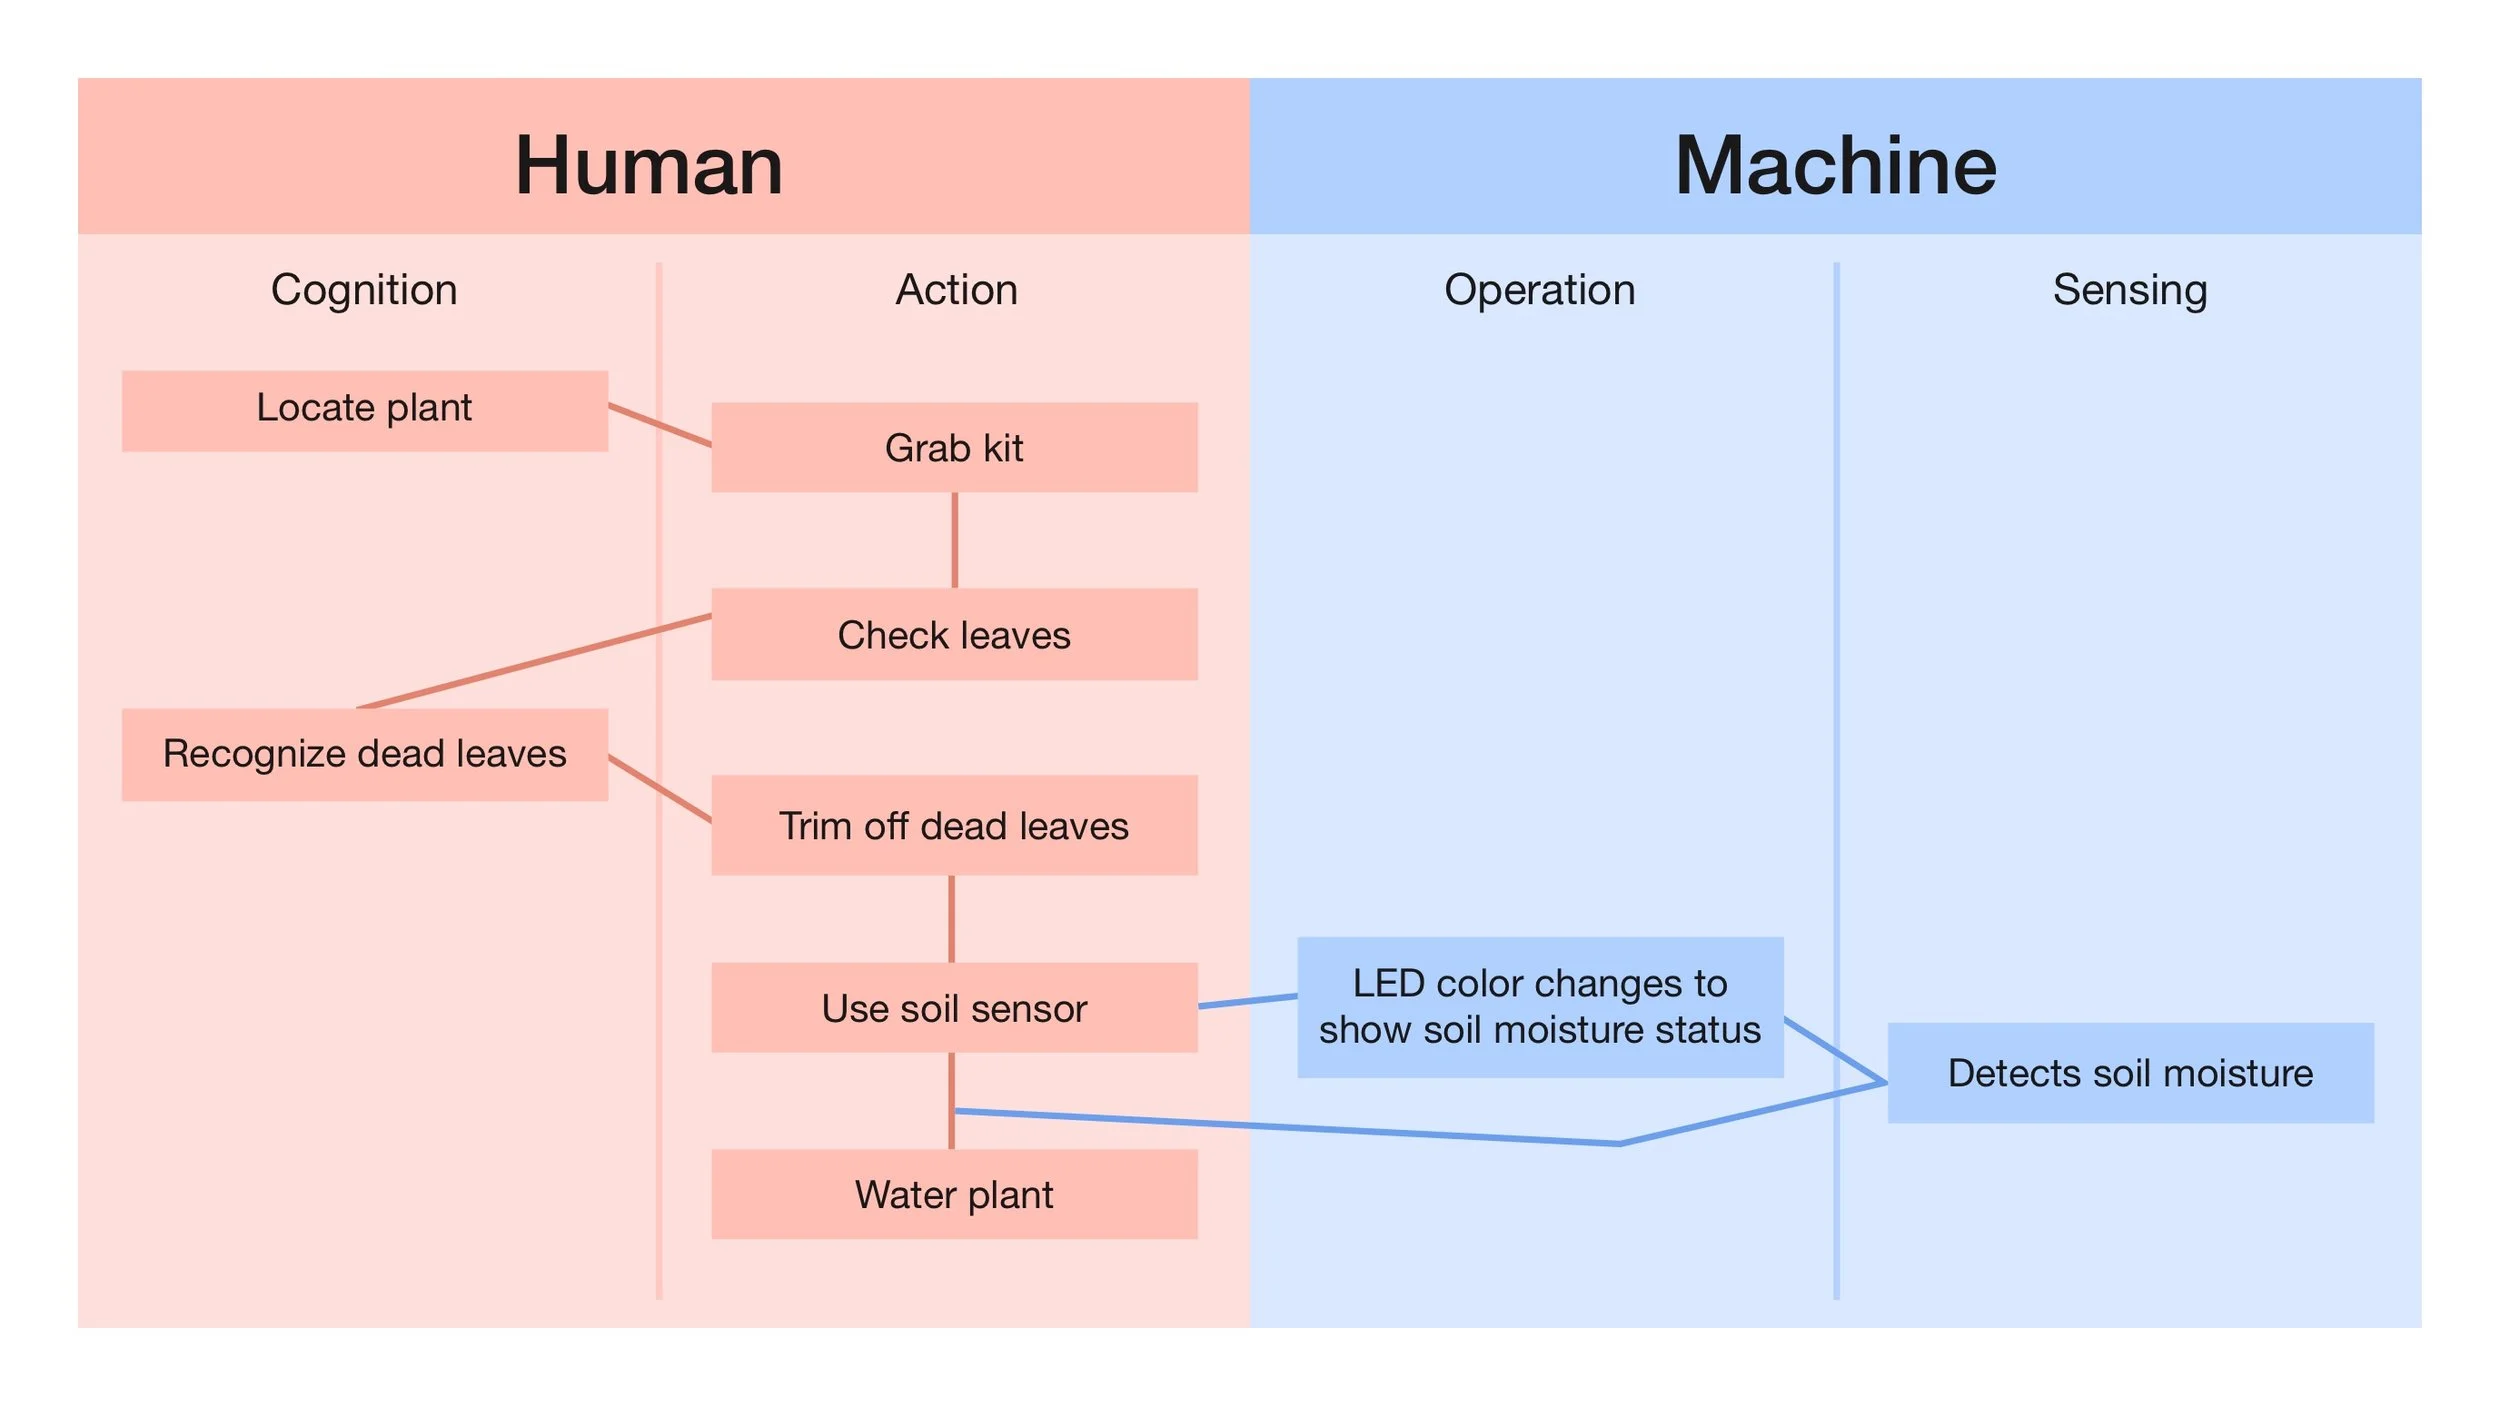
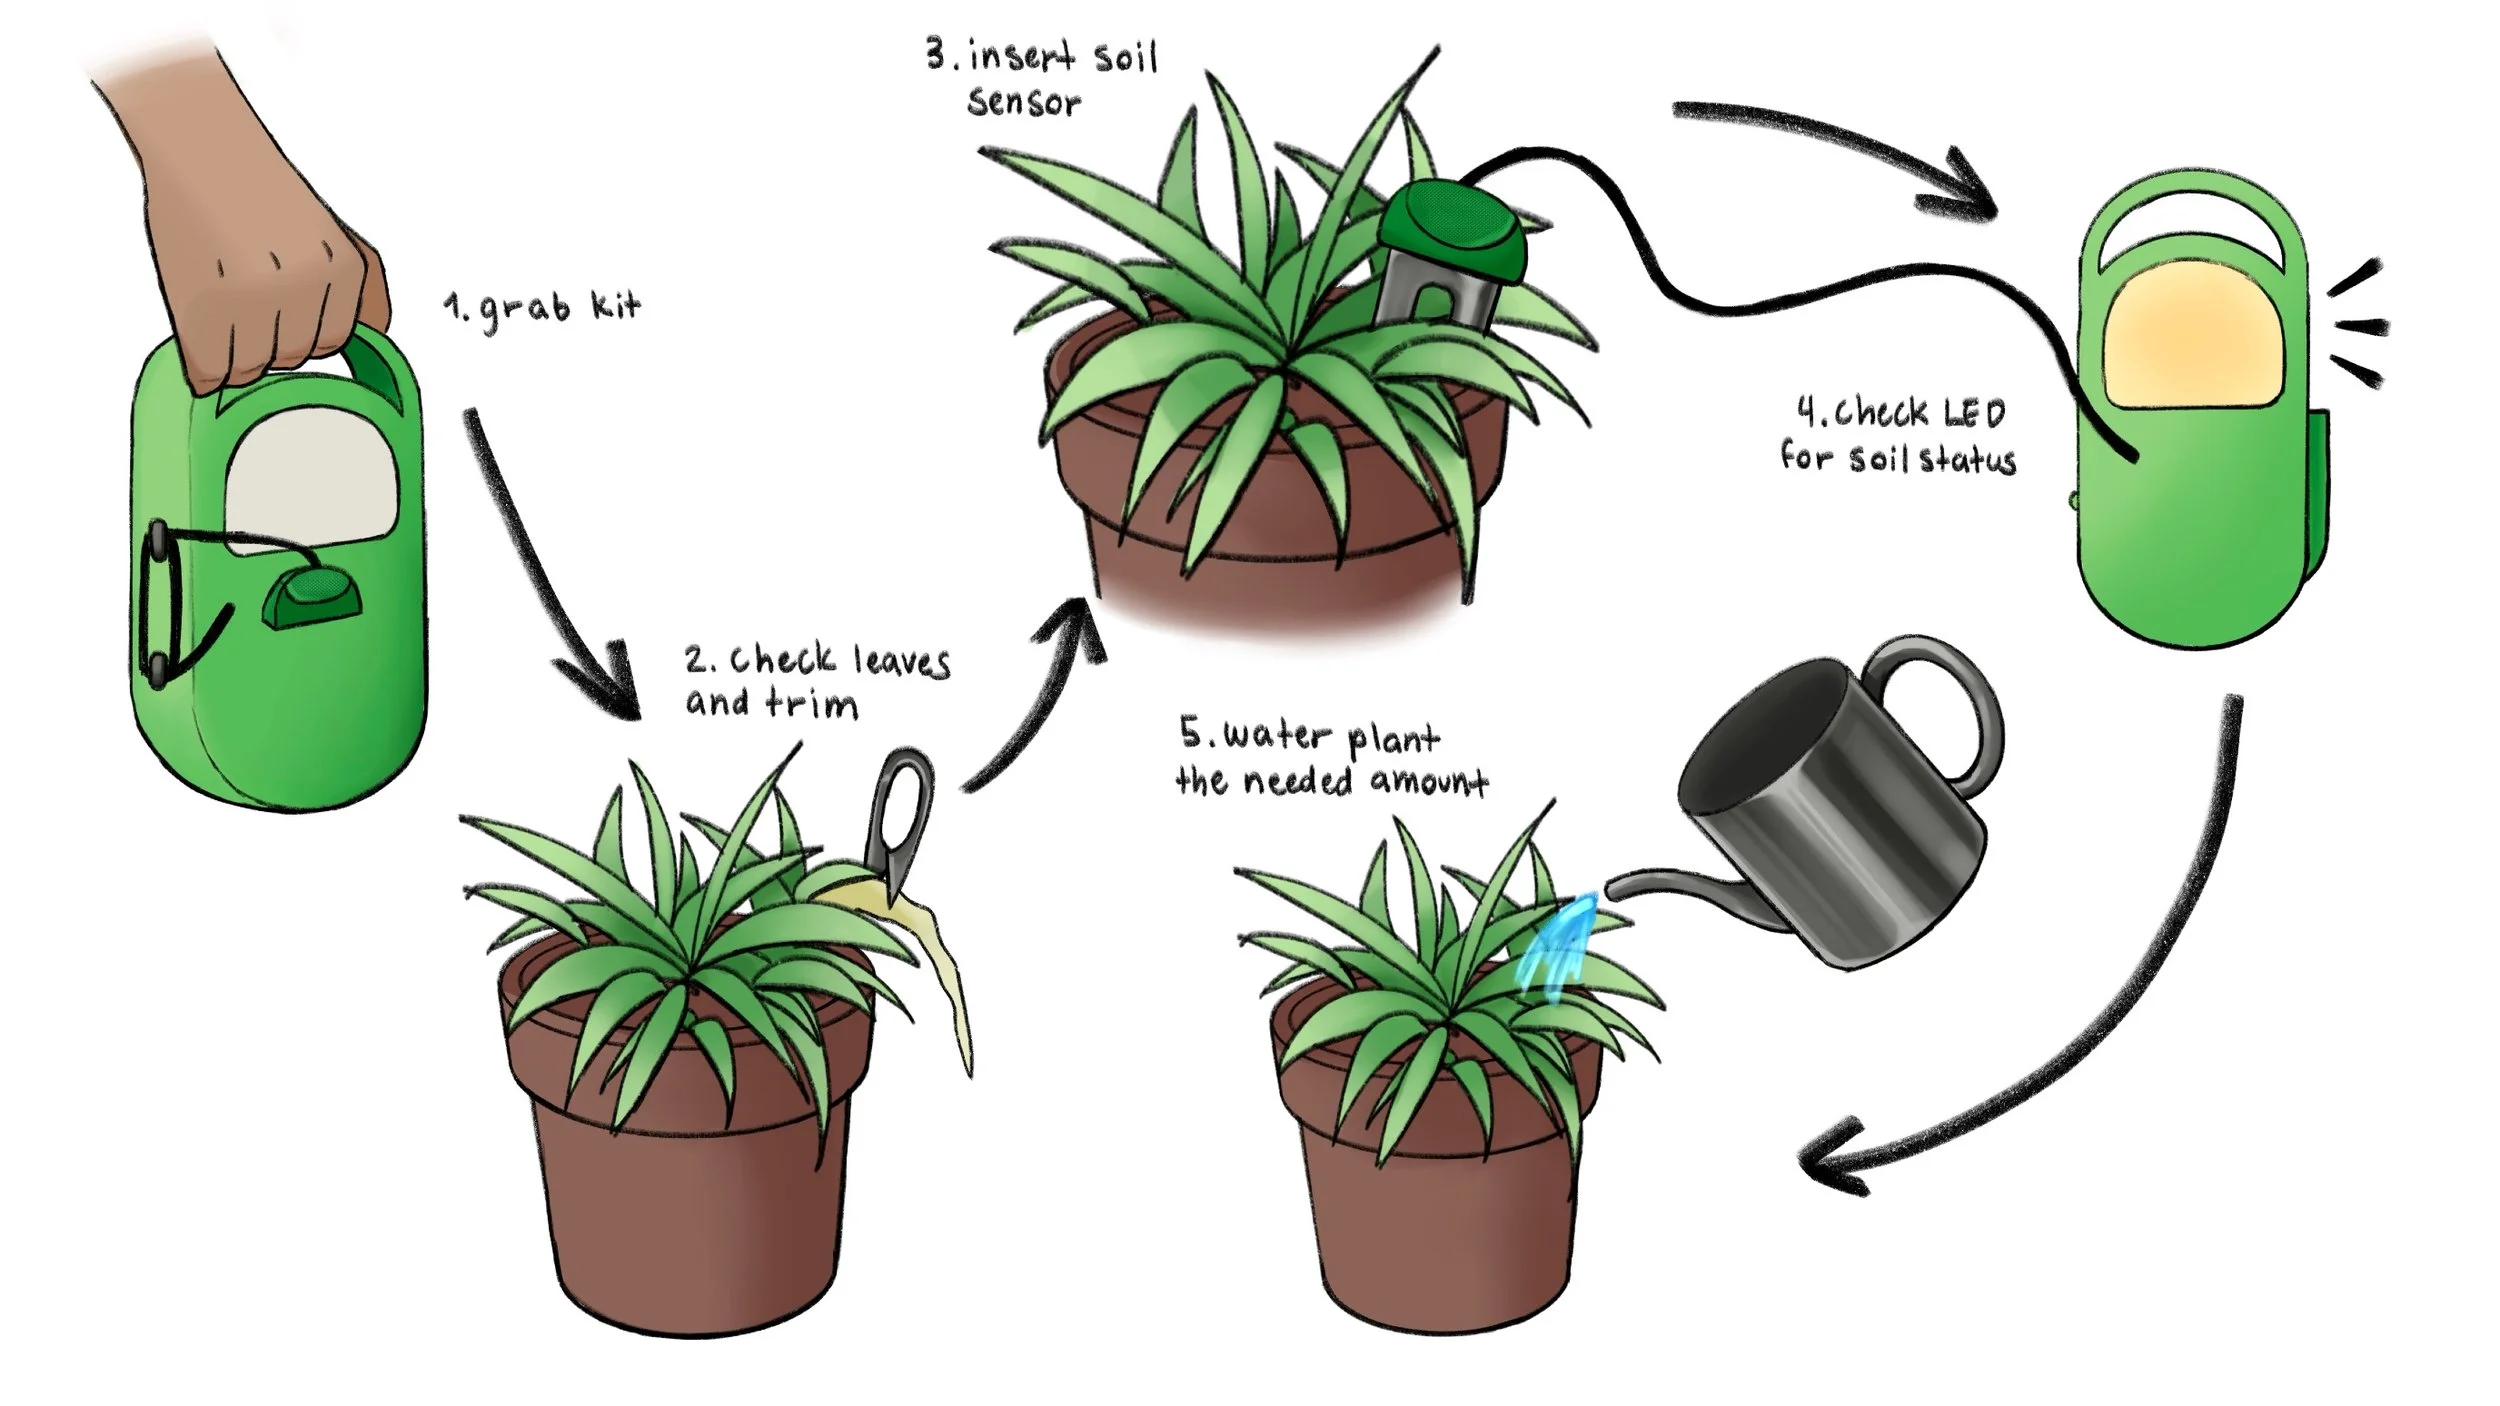
Flow Diagram and Storyboard
Once the concept and initial design had been chosen, I broke down the specific steps of how the product would be used. A step-by-step flow illustrated what the product and its user would do, and in what order. An accompanying storyboard provided a visual representation of the process of using the soil sensor.
First Prototype
For my first prototype, My main goal was to get an idea of the general scaling and functionality of the different parts of the model.
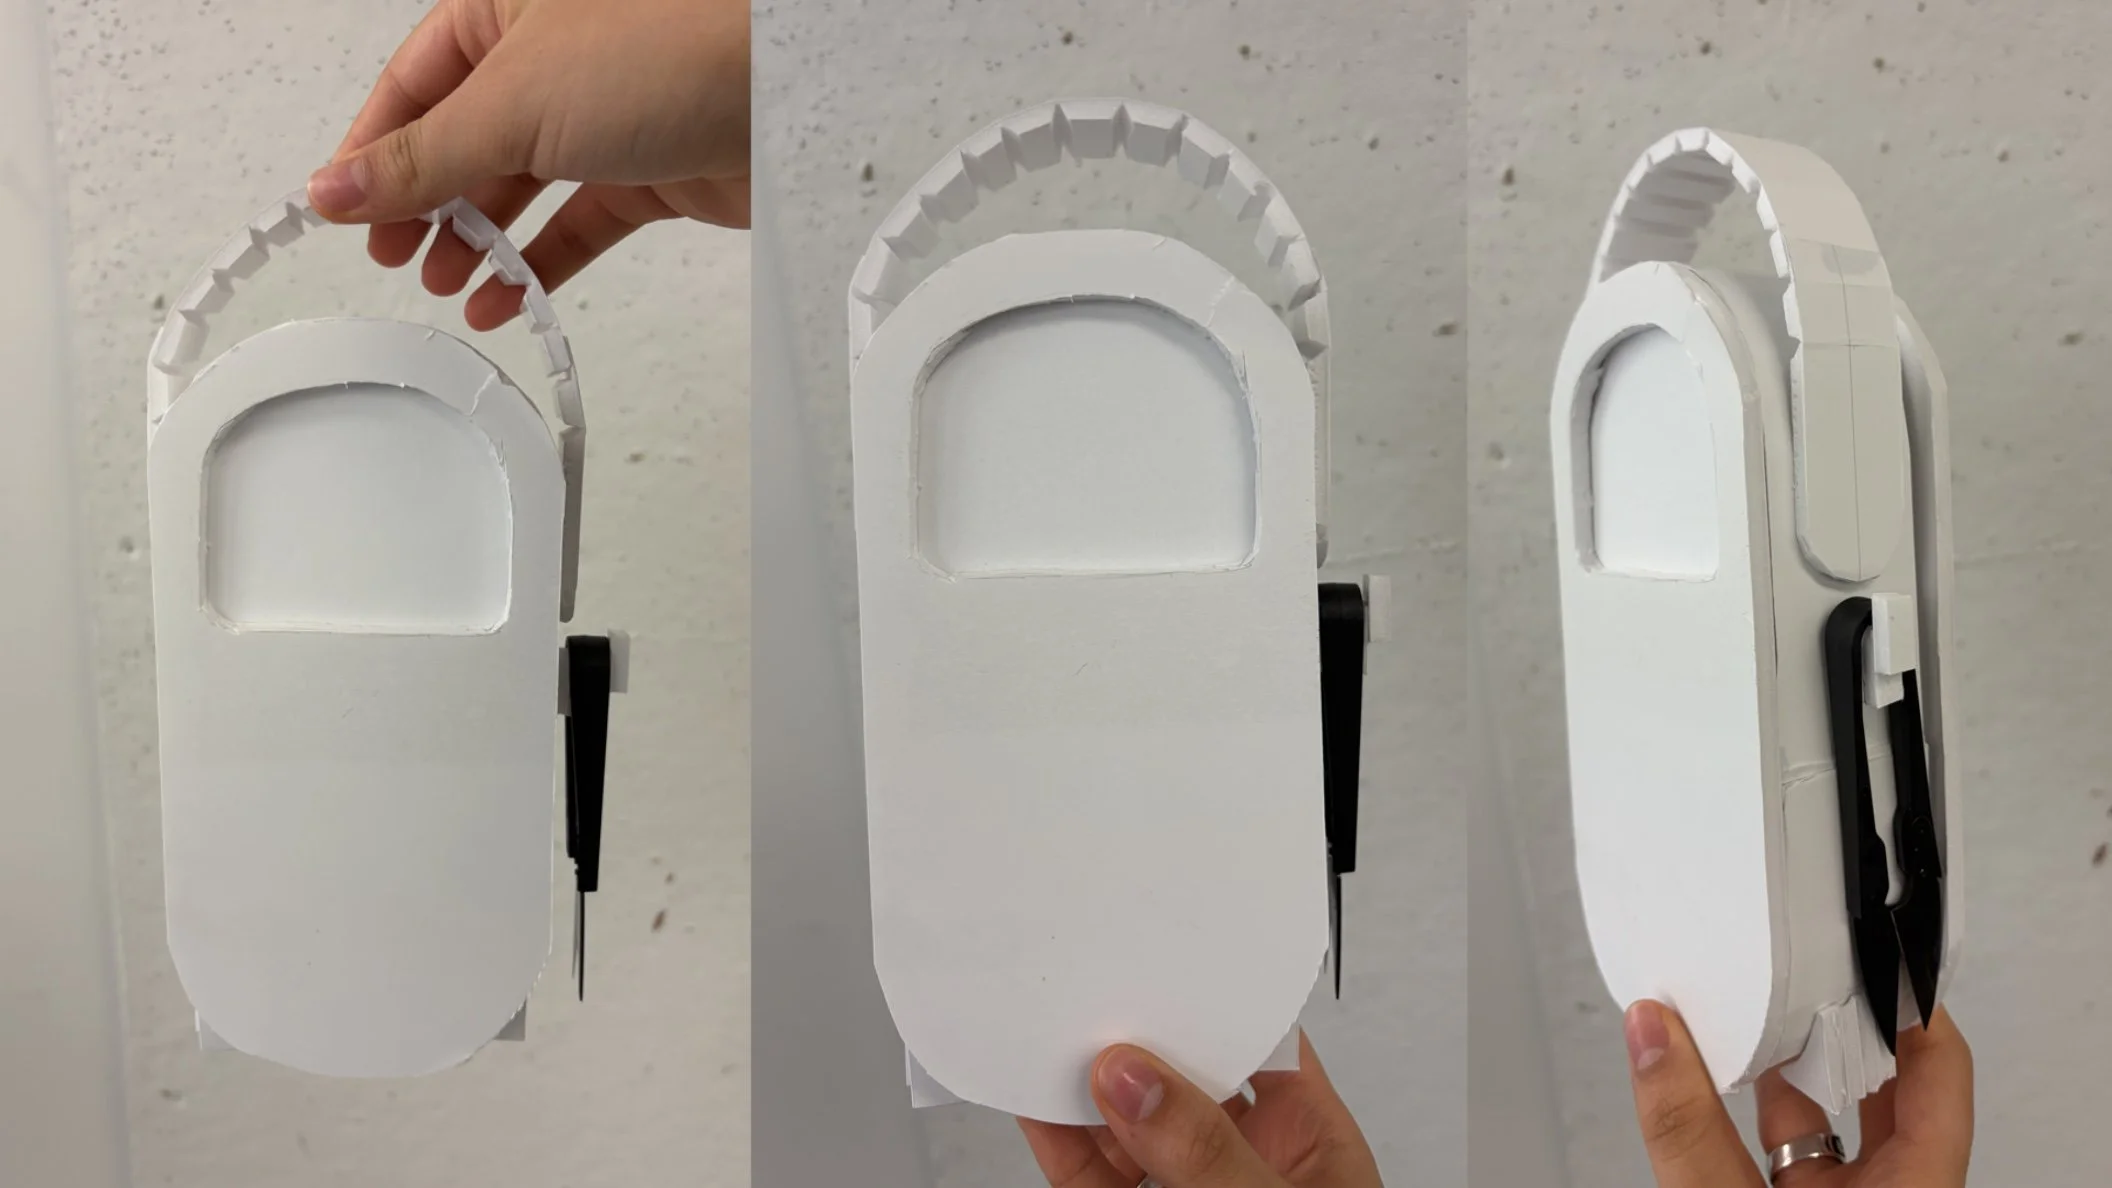
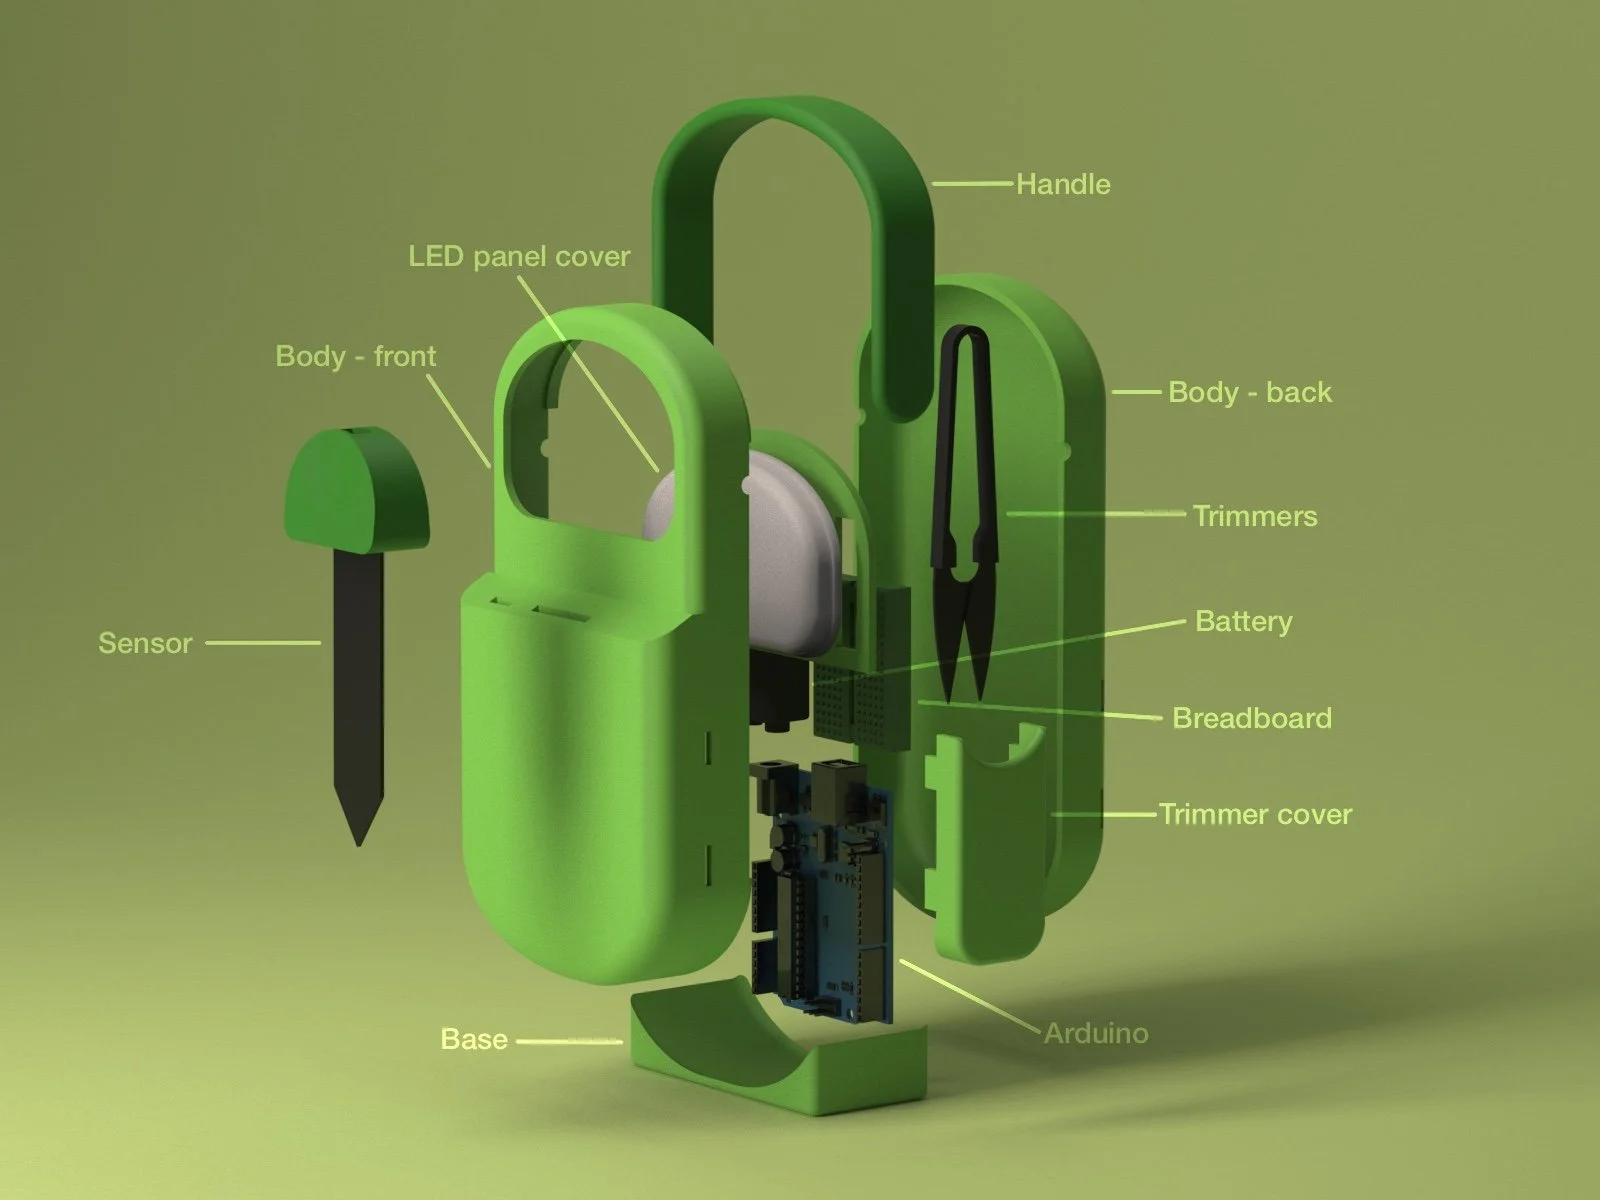
Modeling
The initial model was kept very simple and added to as test prints dictated modifications as those required for fitting. The Arduino board and breadboard were added to the model to make sure the product scaled appropriately. Joinery was executed with snapping parts, though some glue was required for the final prototype.
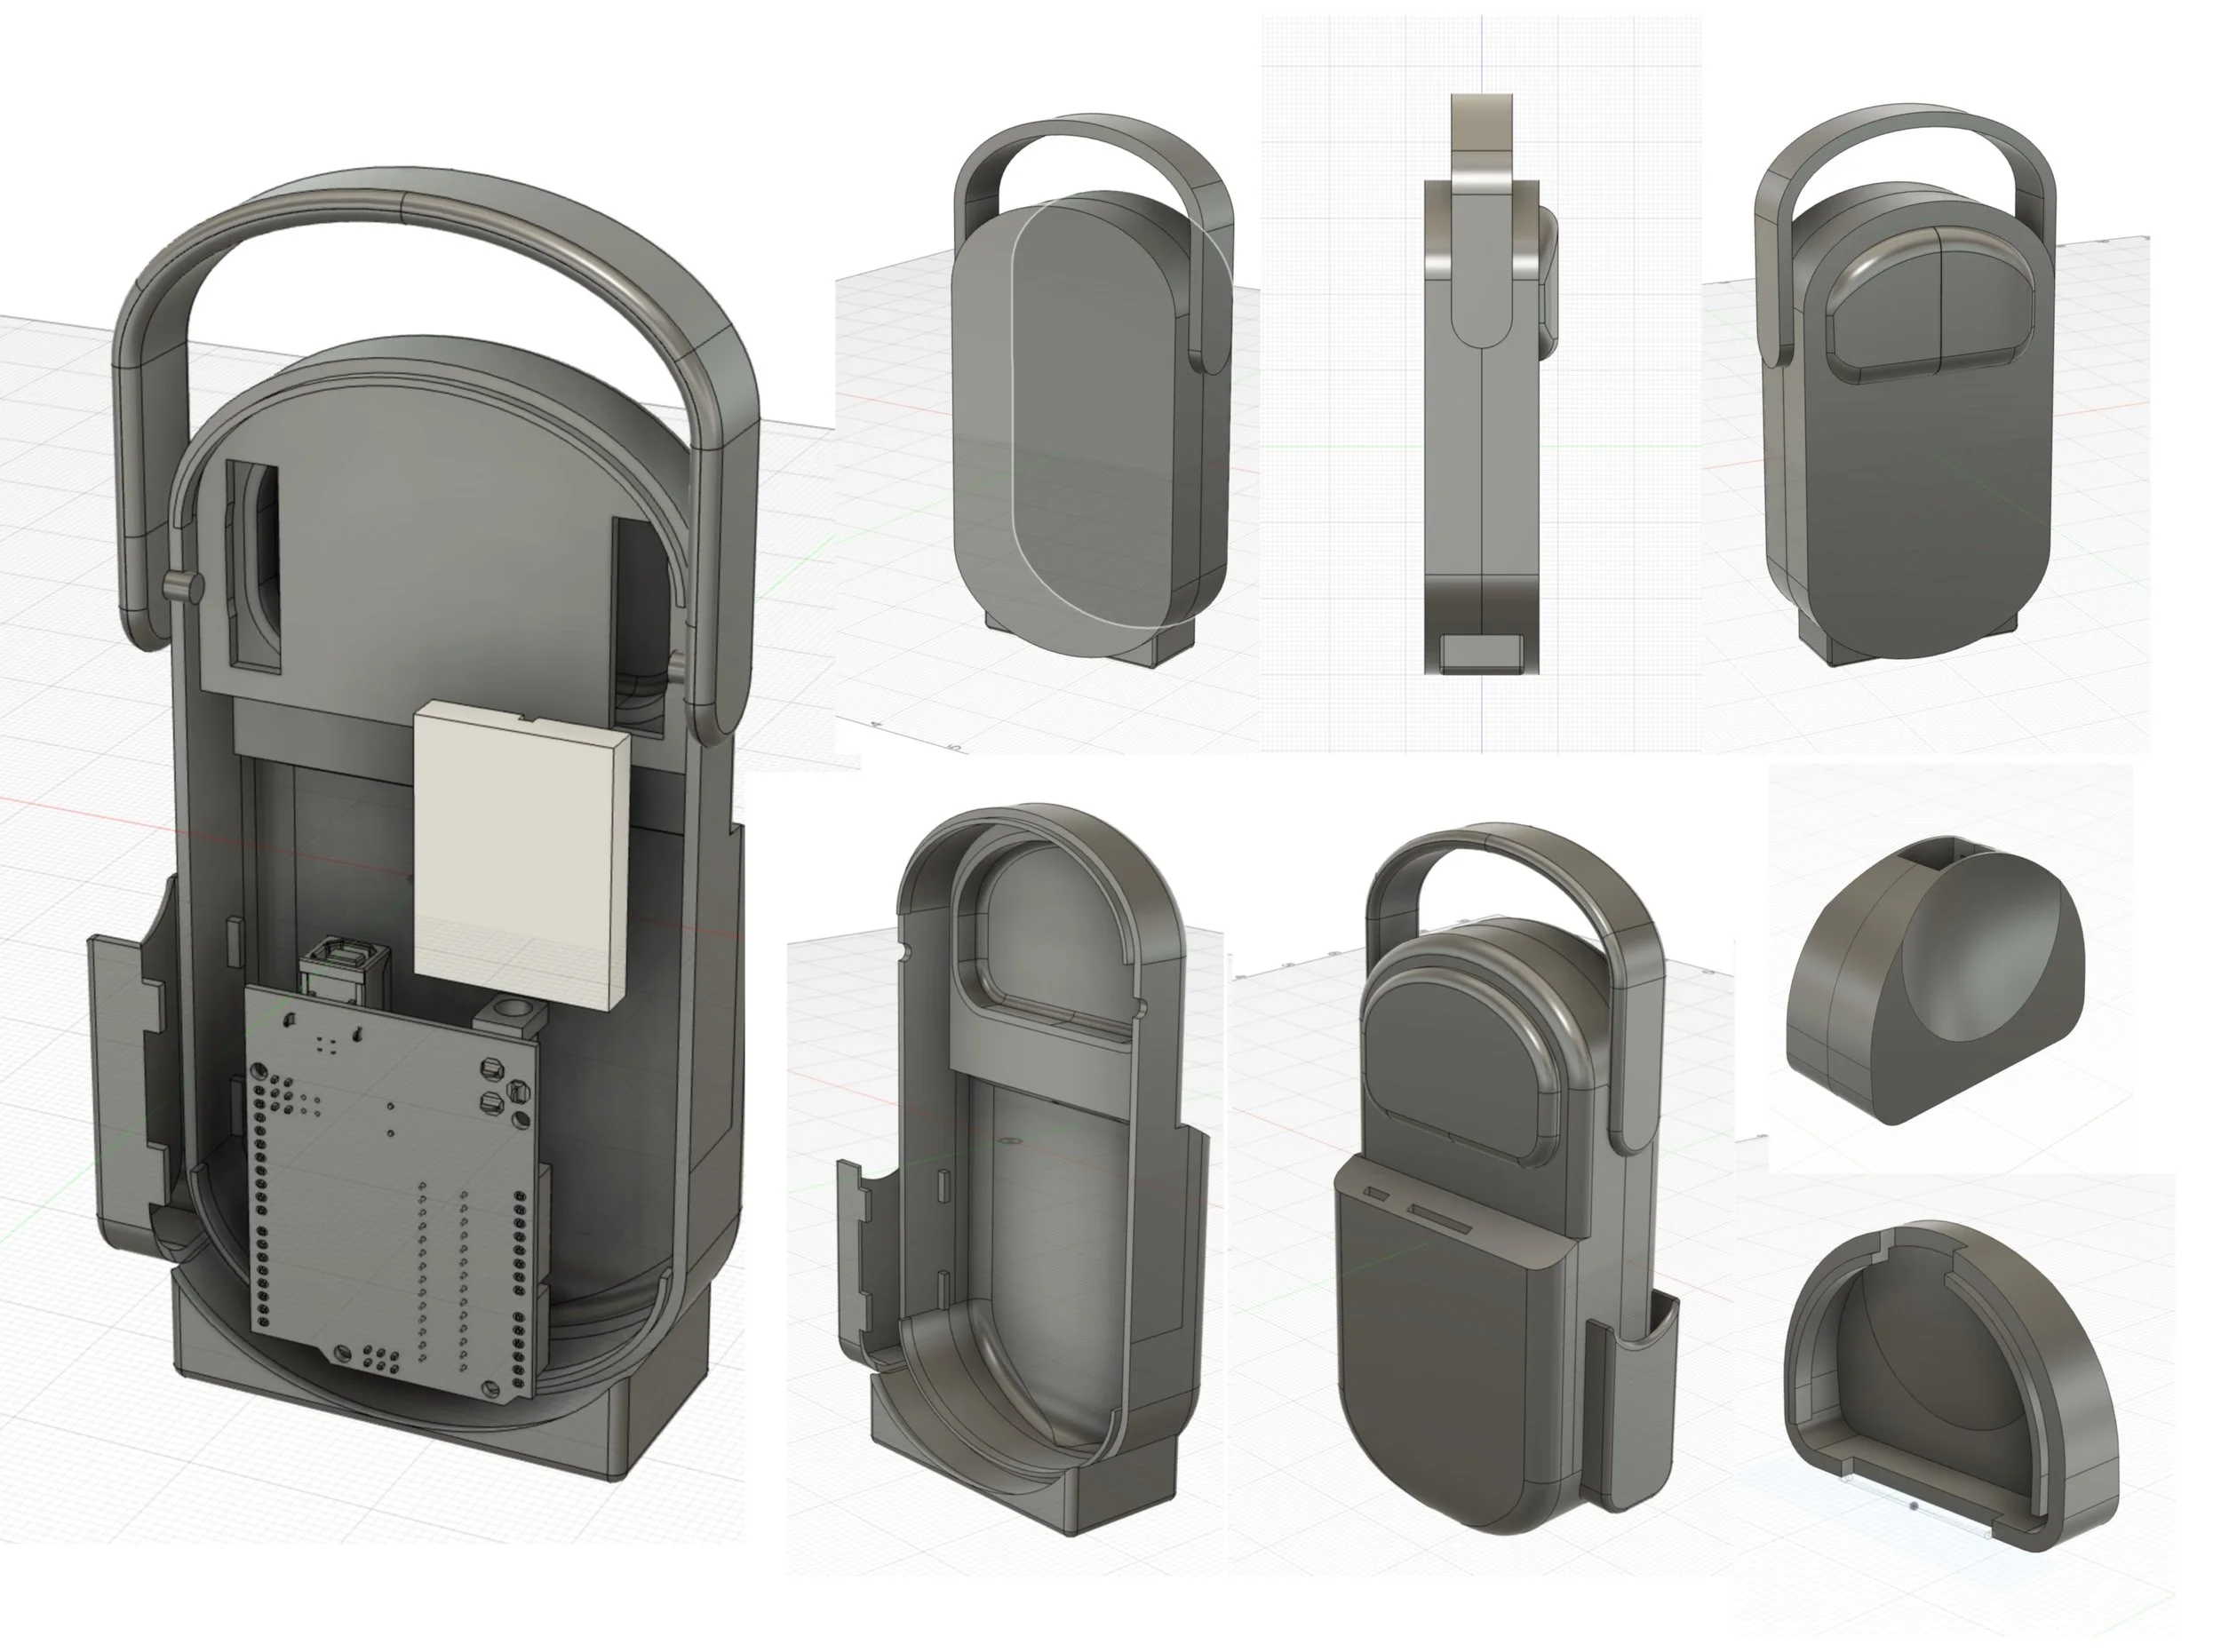
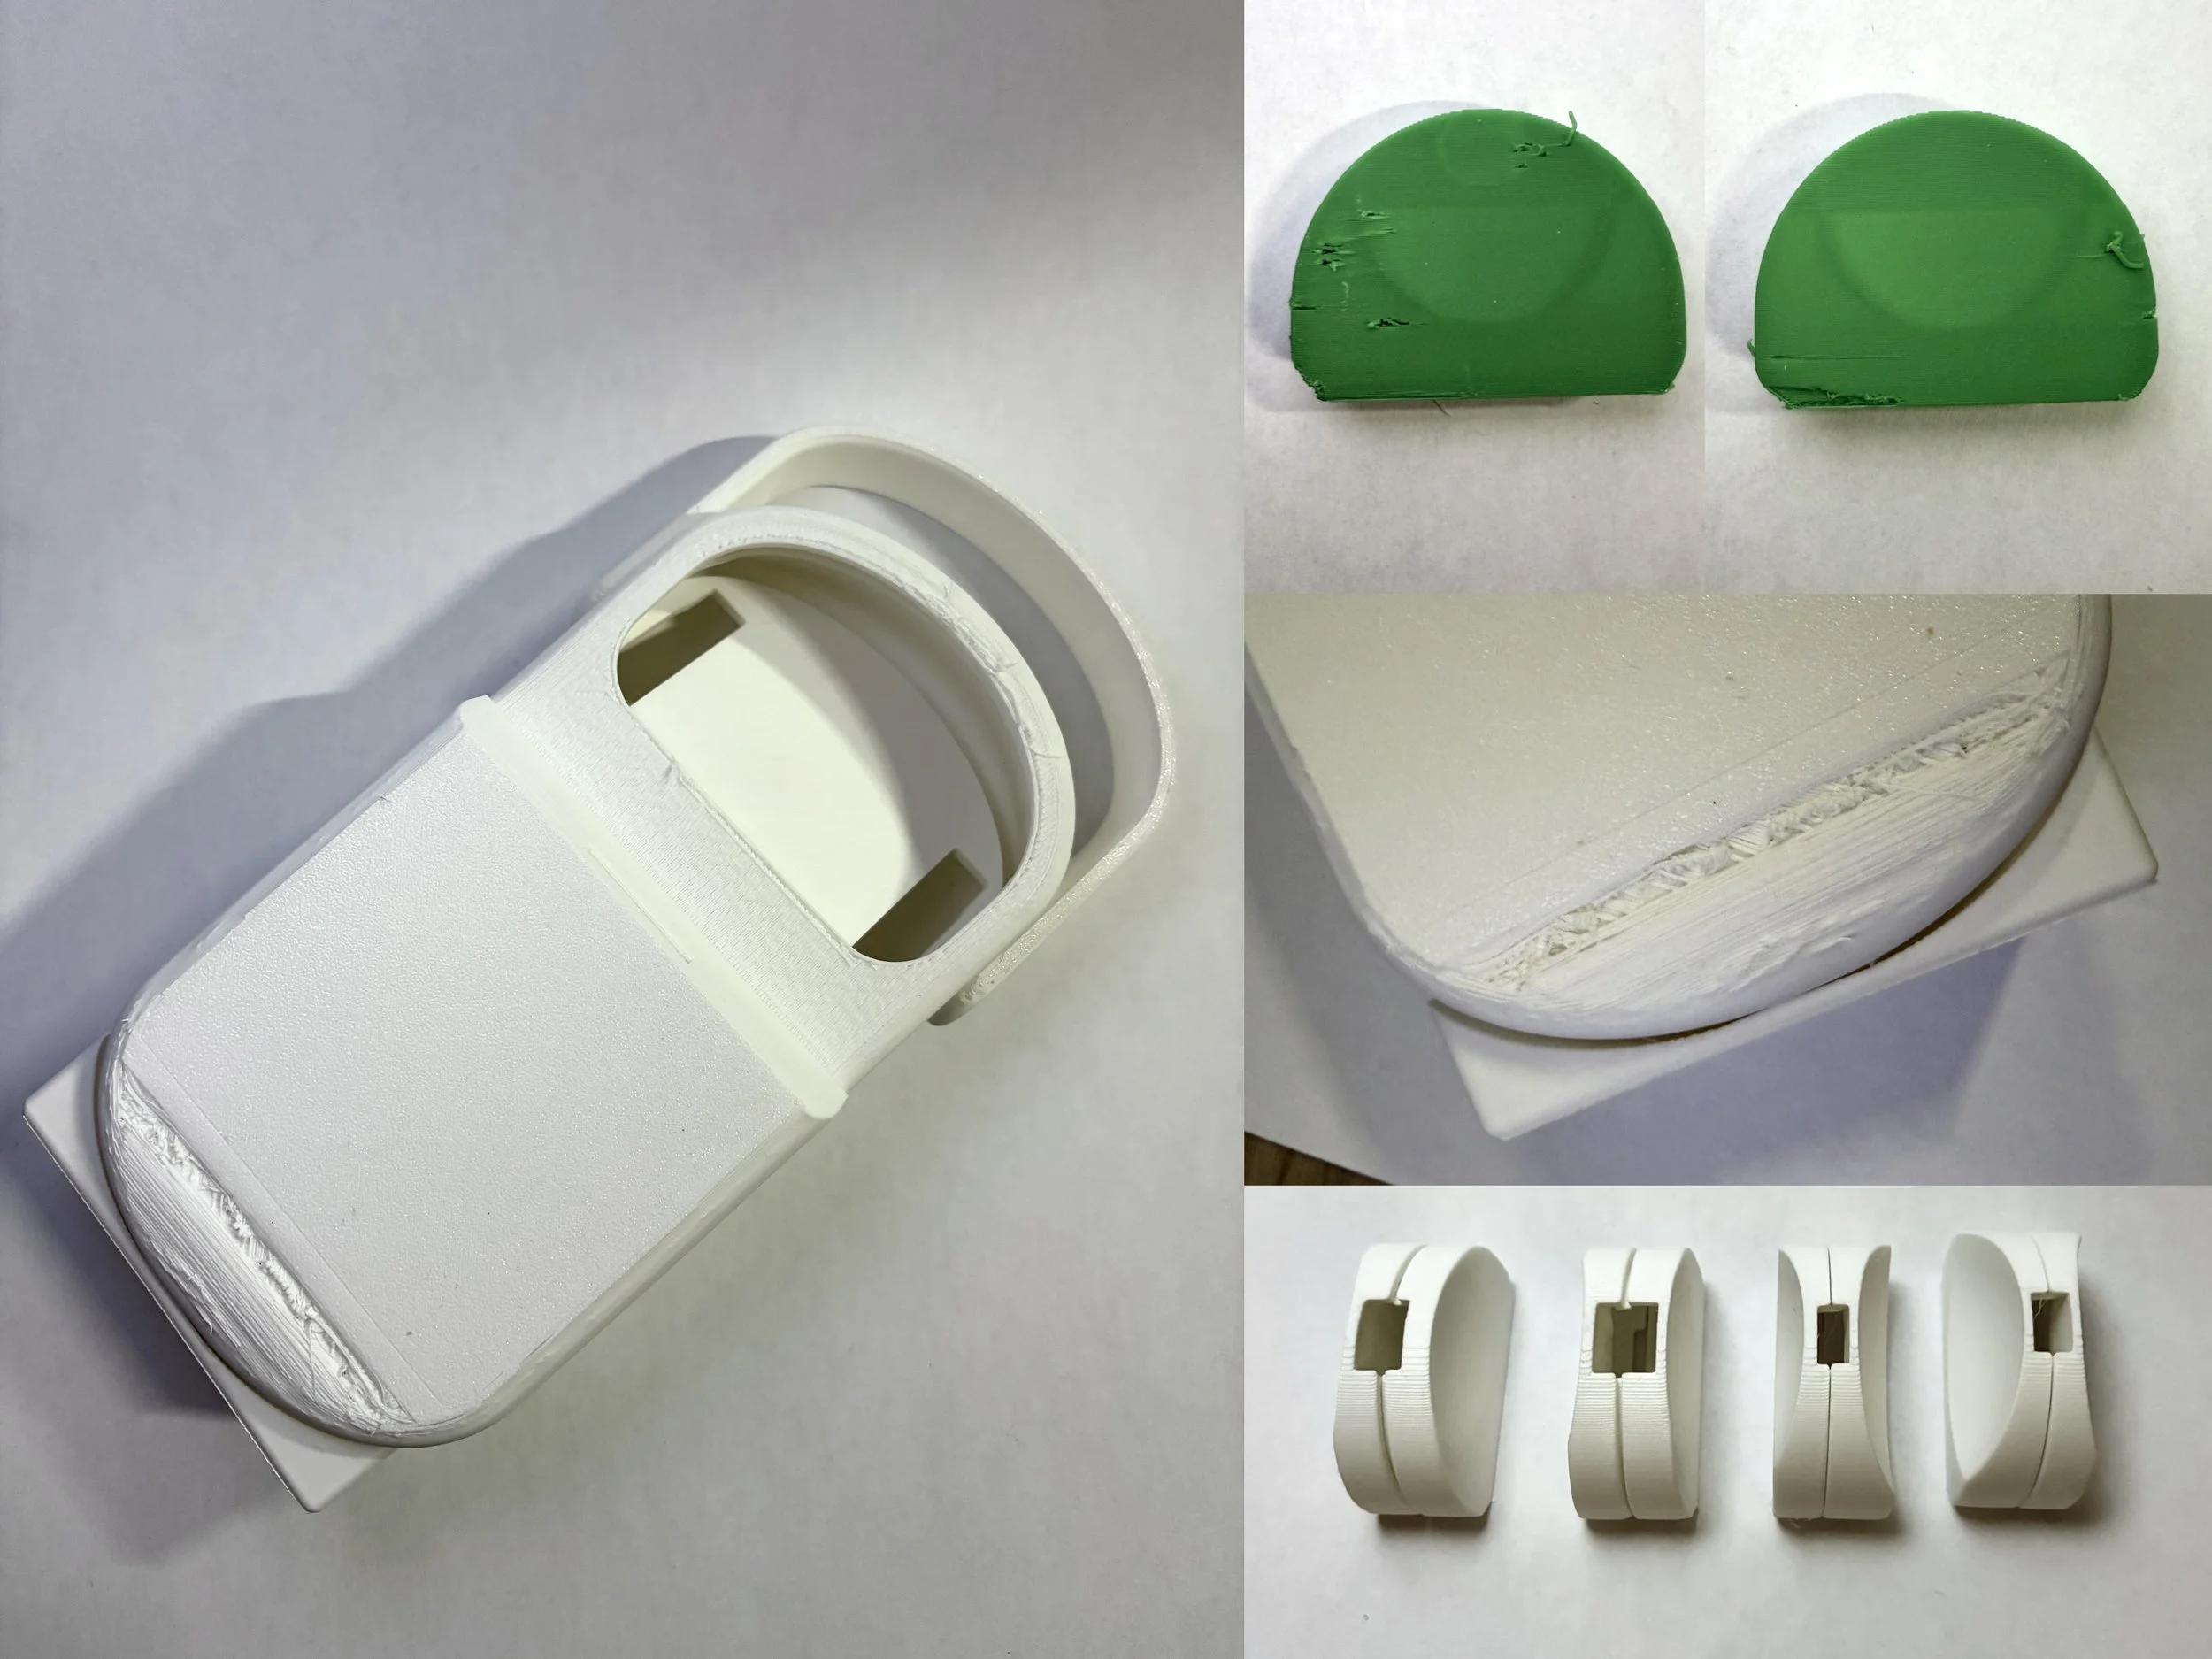
Test Prints
As mentioned before, I had to do quite a few test prints, specifically for the soil sensor cover, as I had a hard time getting the sizing right in certain spots. Quite a few of my prints had issues with filament as well, so I also did more prints because I wanted the final prototype to look as smooth and clean as possible.
Coding
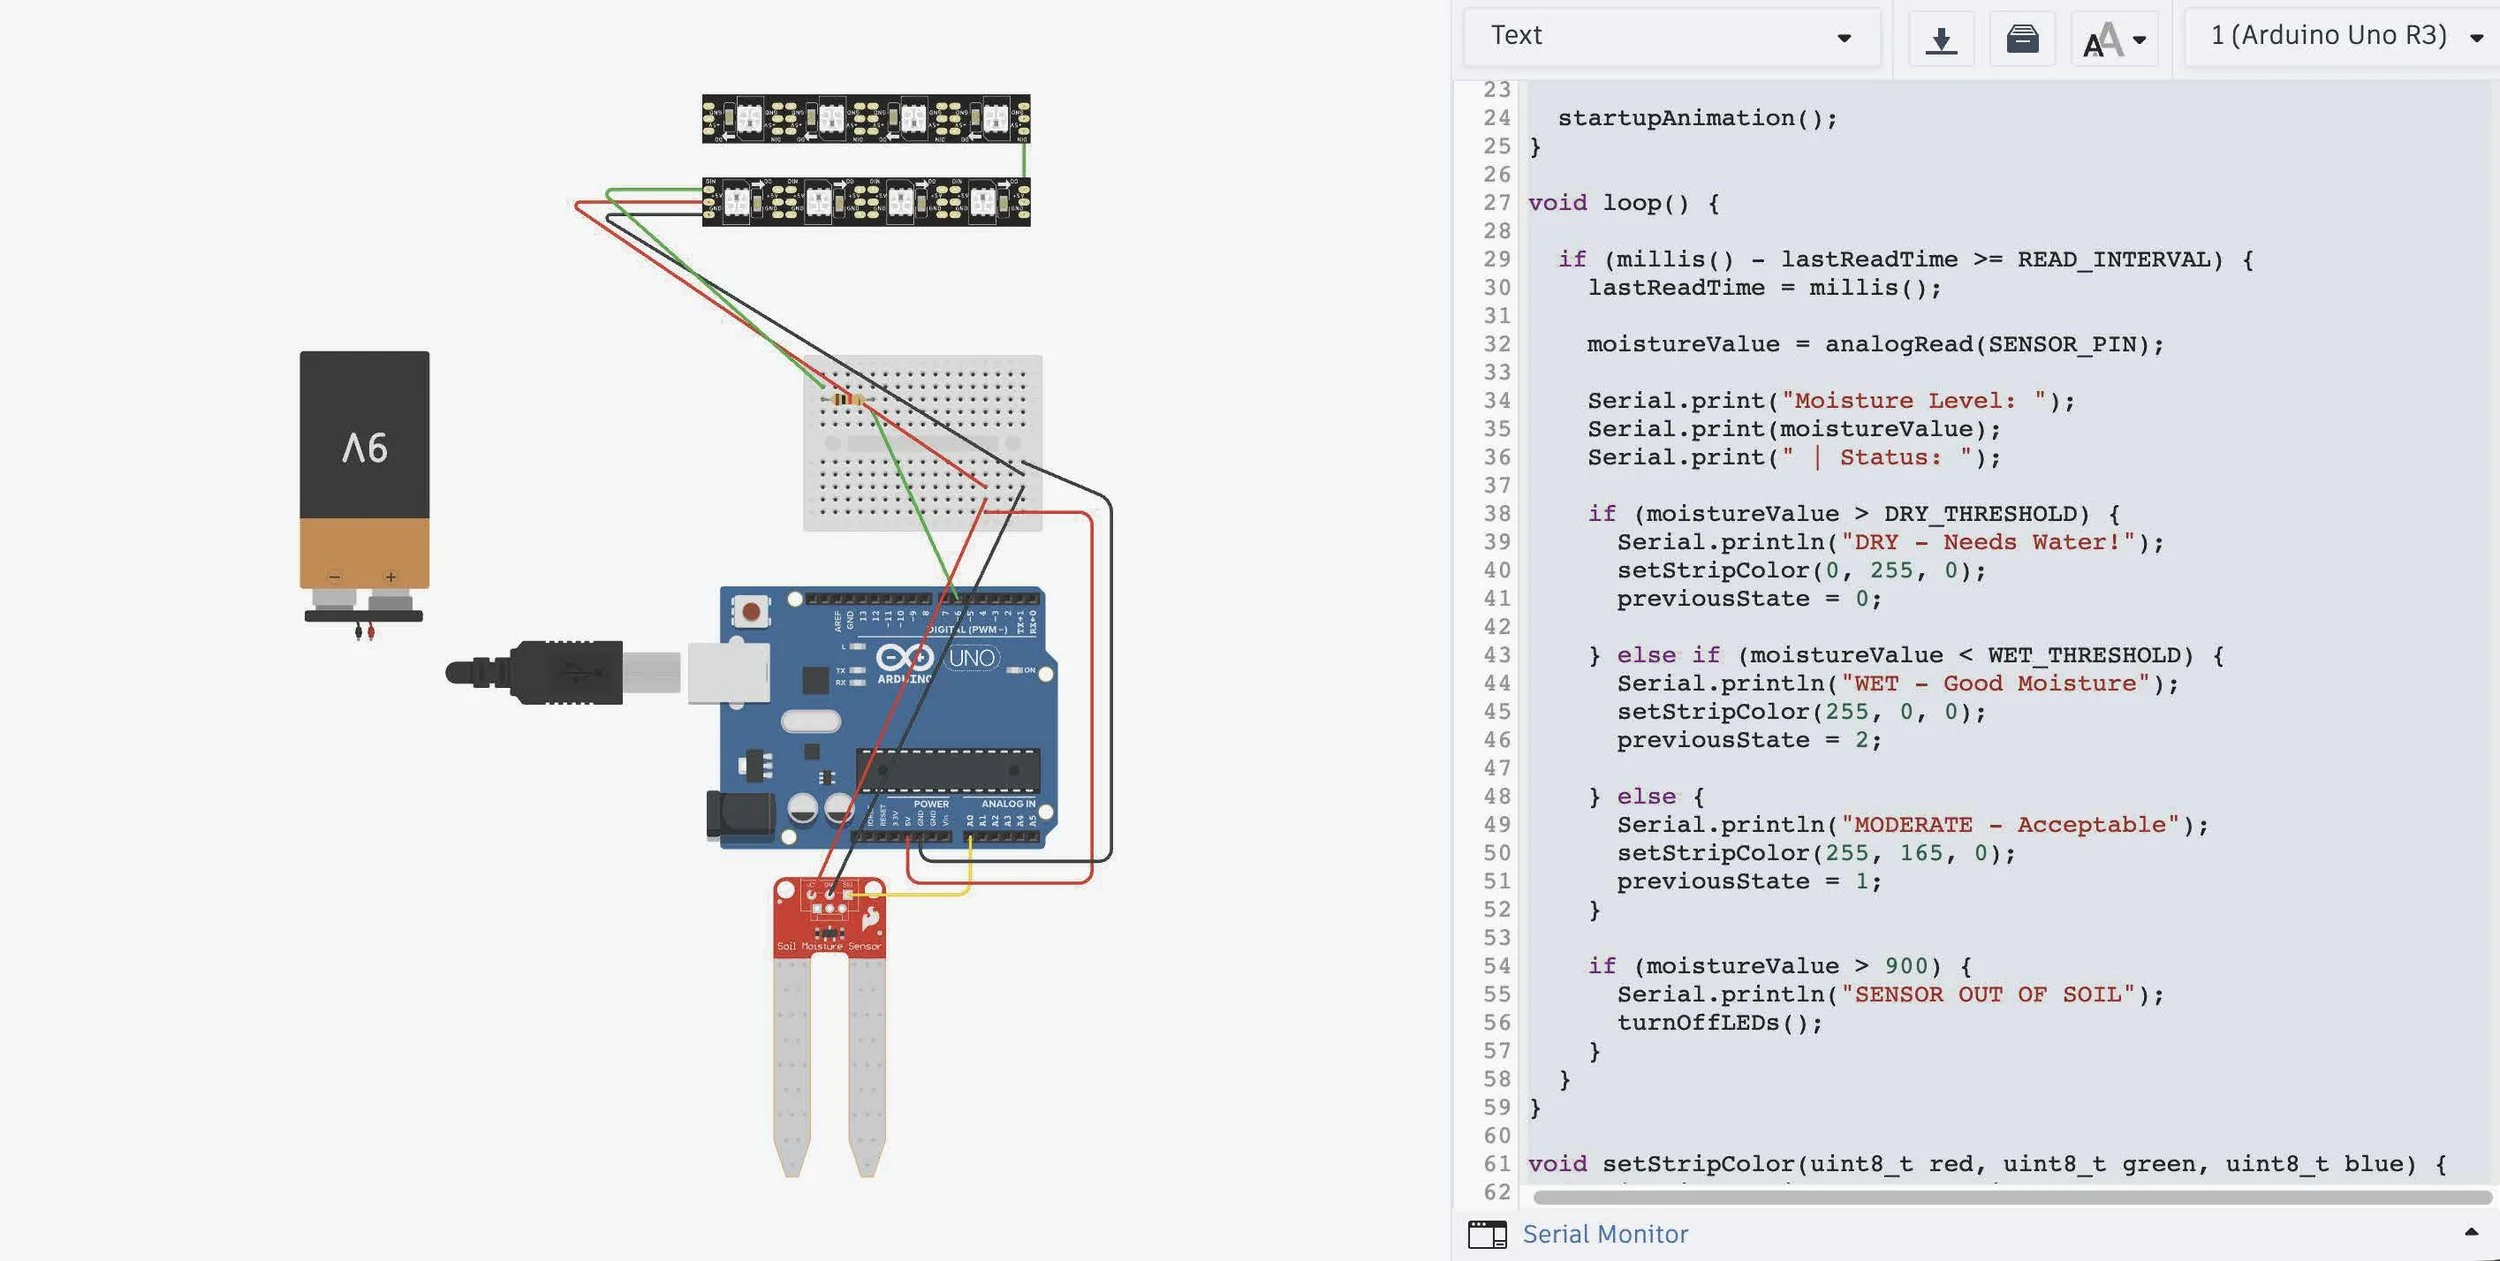
Before puting the code on the Arduino, I used TinkerCad to simulate the code with the soil sensor and other parts that I used. For the coding, I used Claude for the initial code but had a bit trouble understanding some of it so I used chat GPT as well to explain the code in more depth. My main problem was that I didn’t have the LED strip connected to the board correctly, but after I fixed that the code worked fine. I also decided to use a battery to power the Arduino.
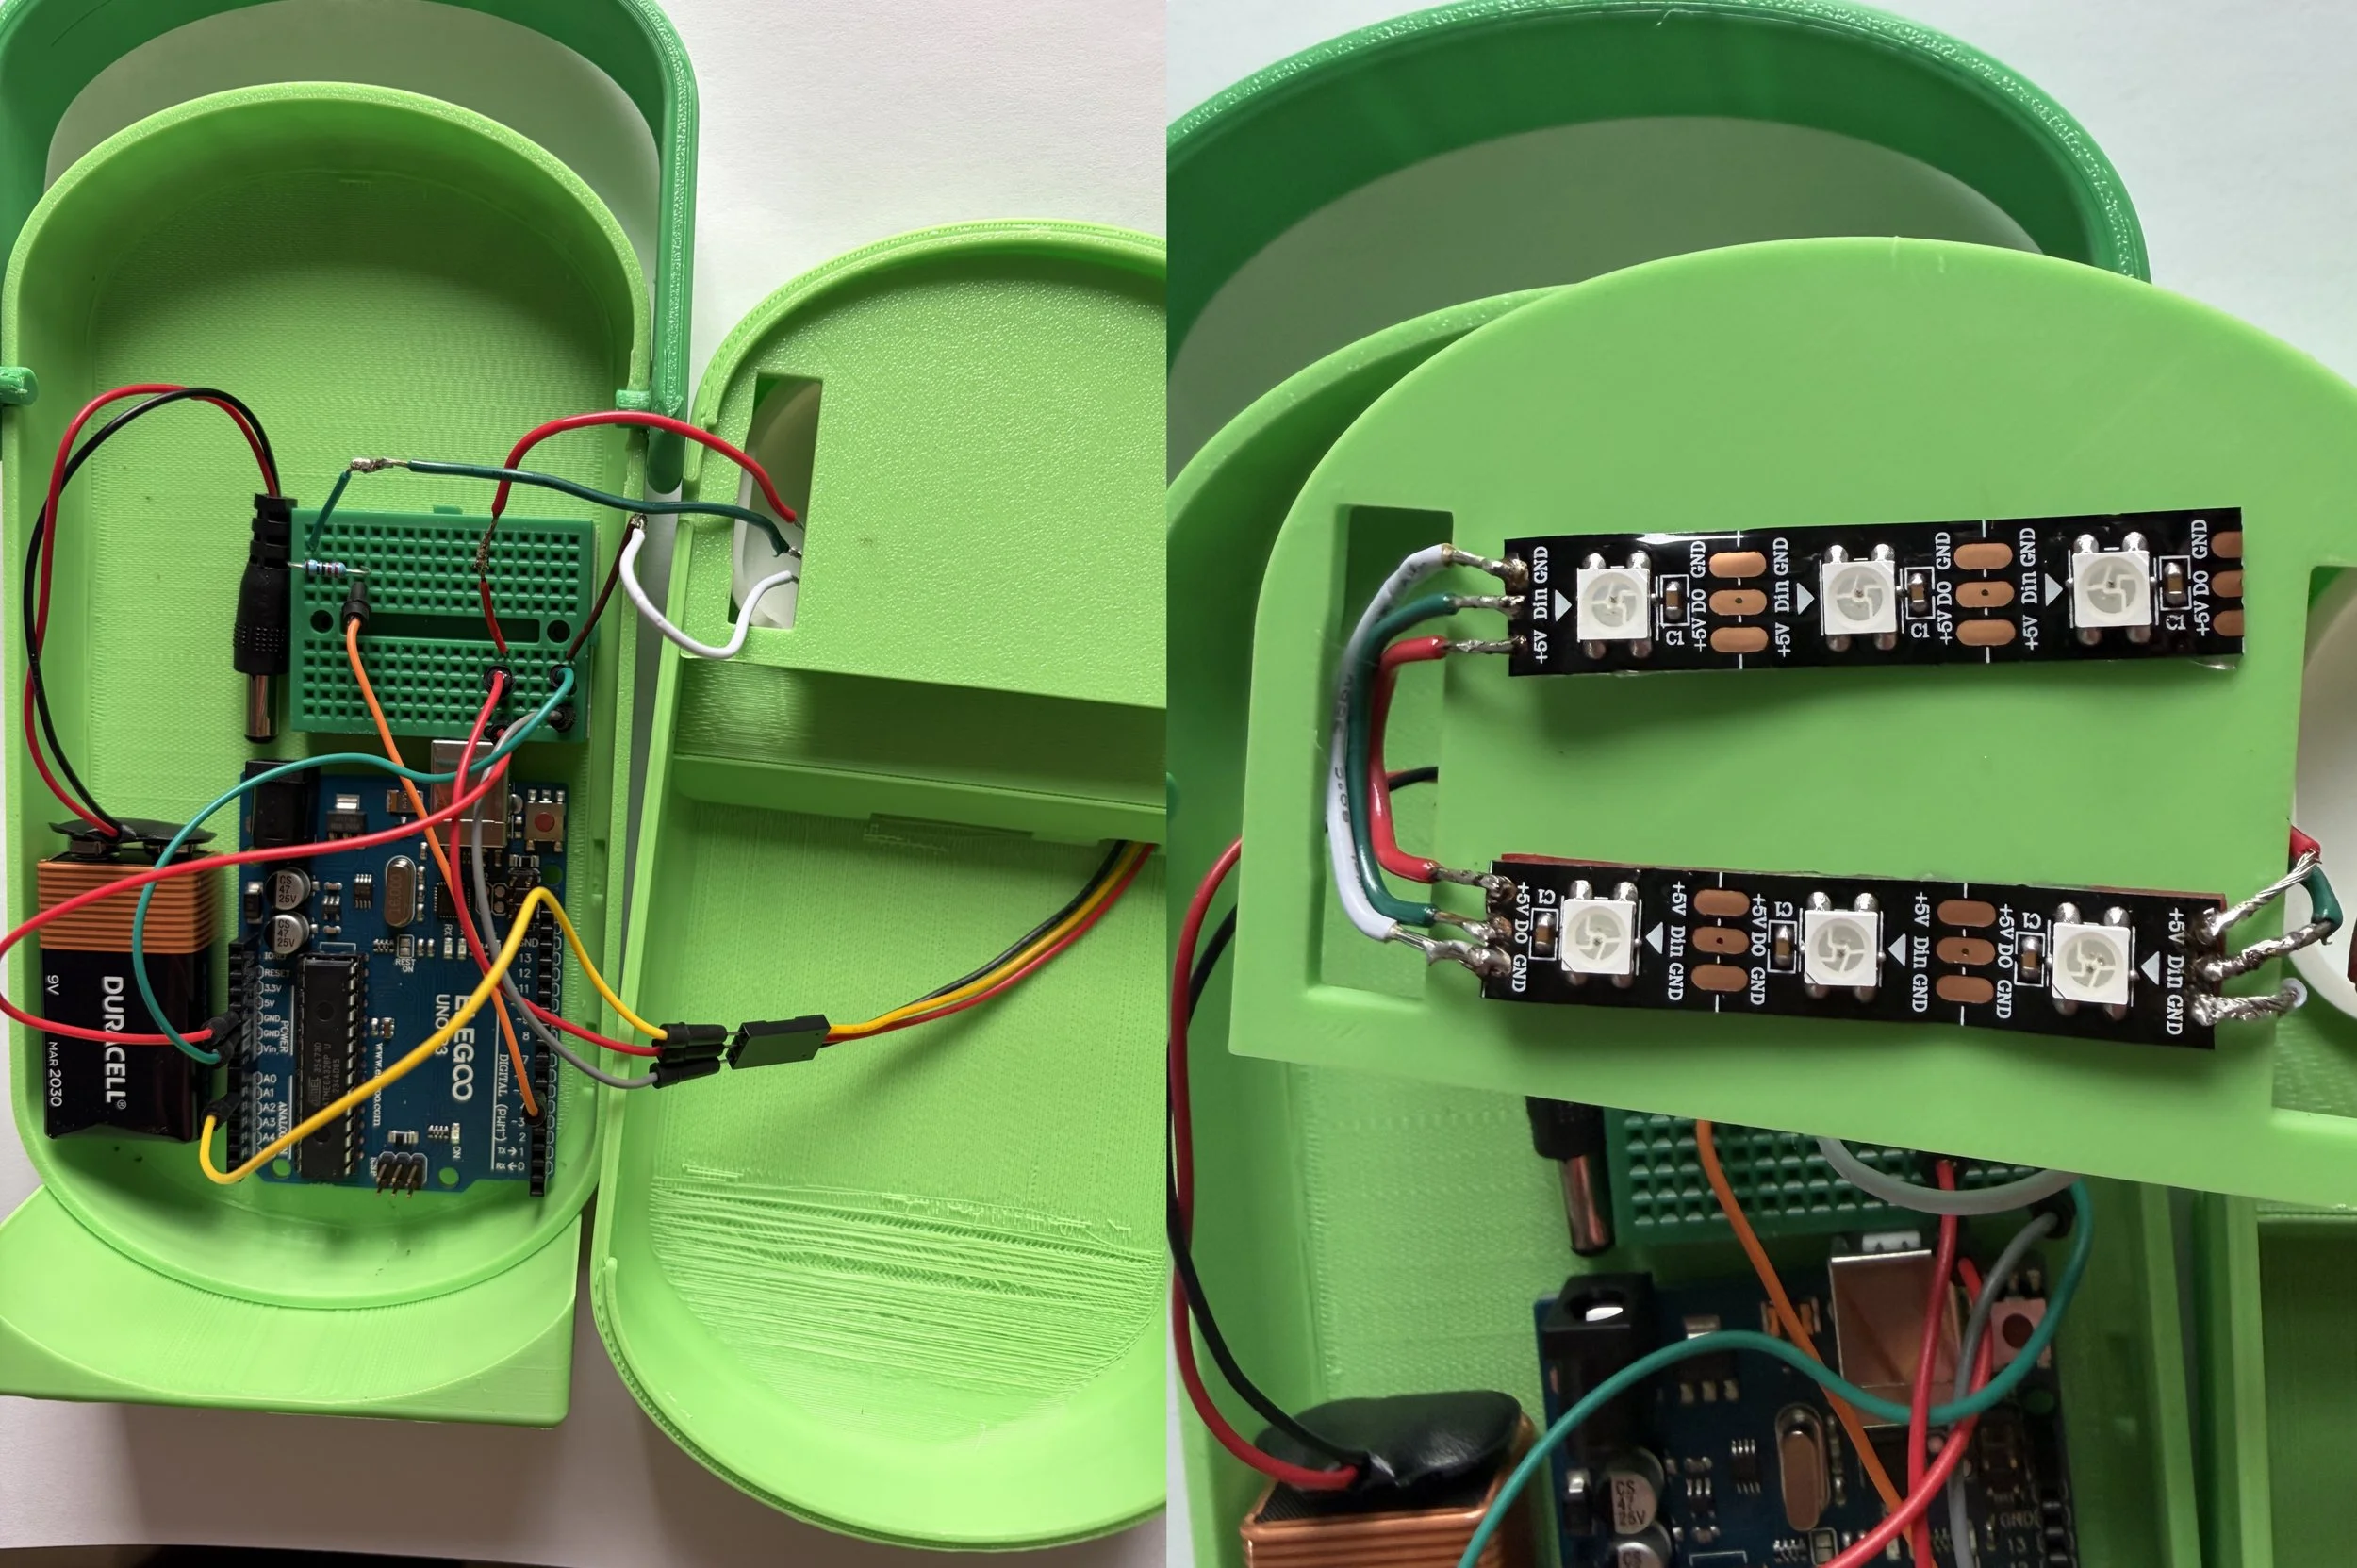
Assembly
The assembly of the model itself was quite simple, though I did struggle a bit with the soldering, specifically attaching the LED. New LED strips had to be purchased as my original ones didn’t work.
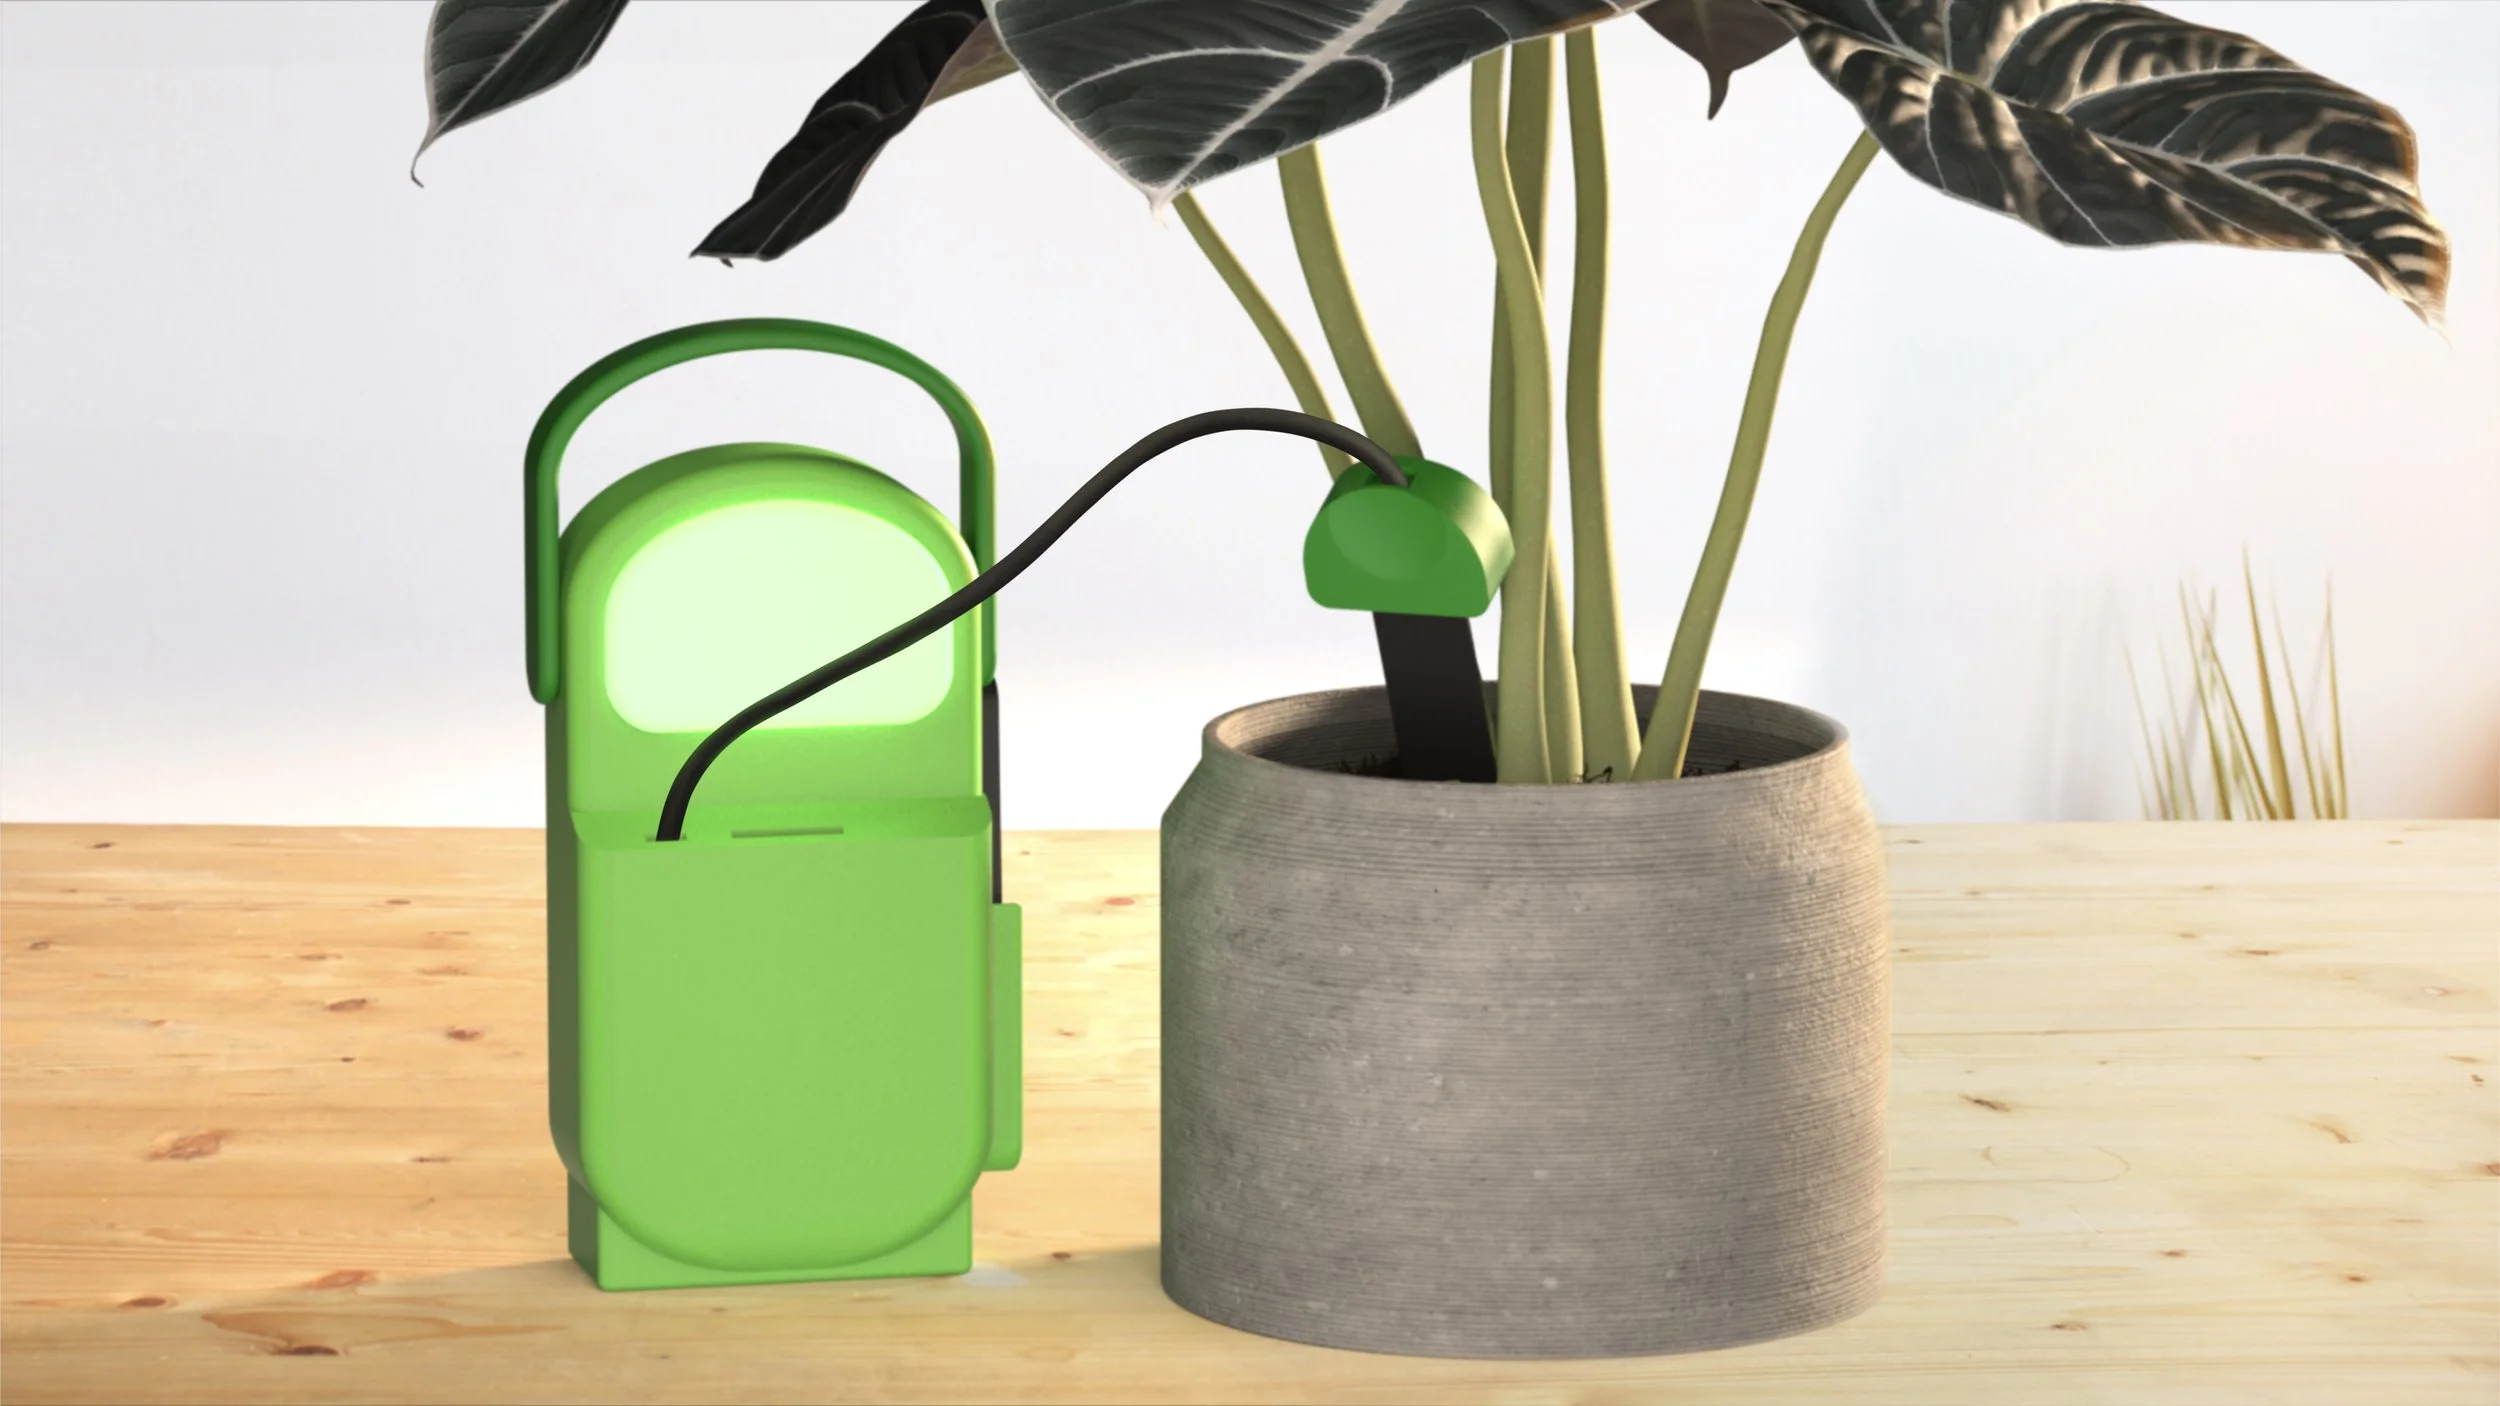
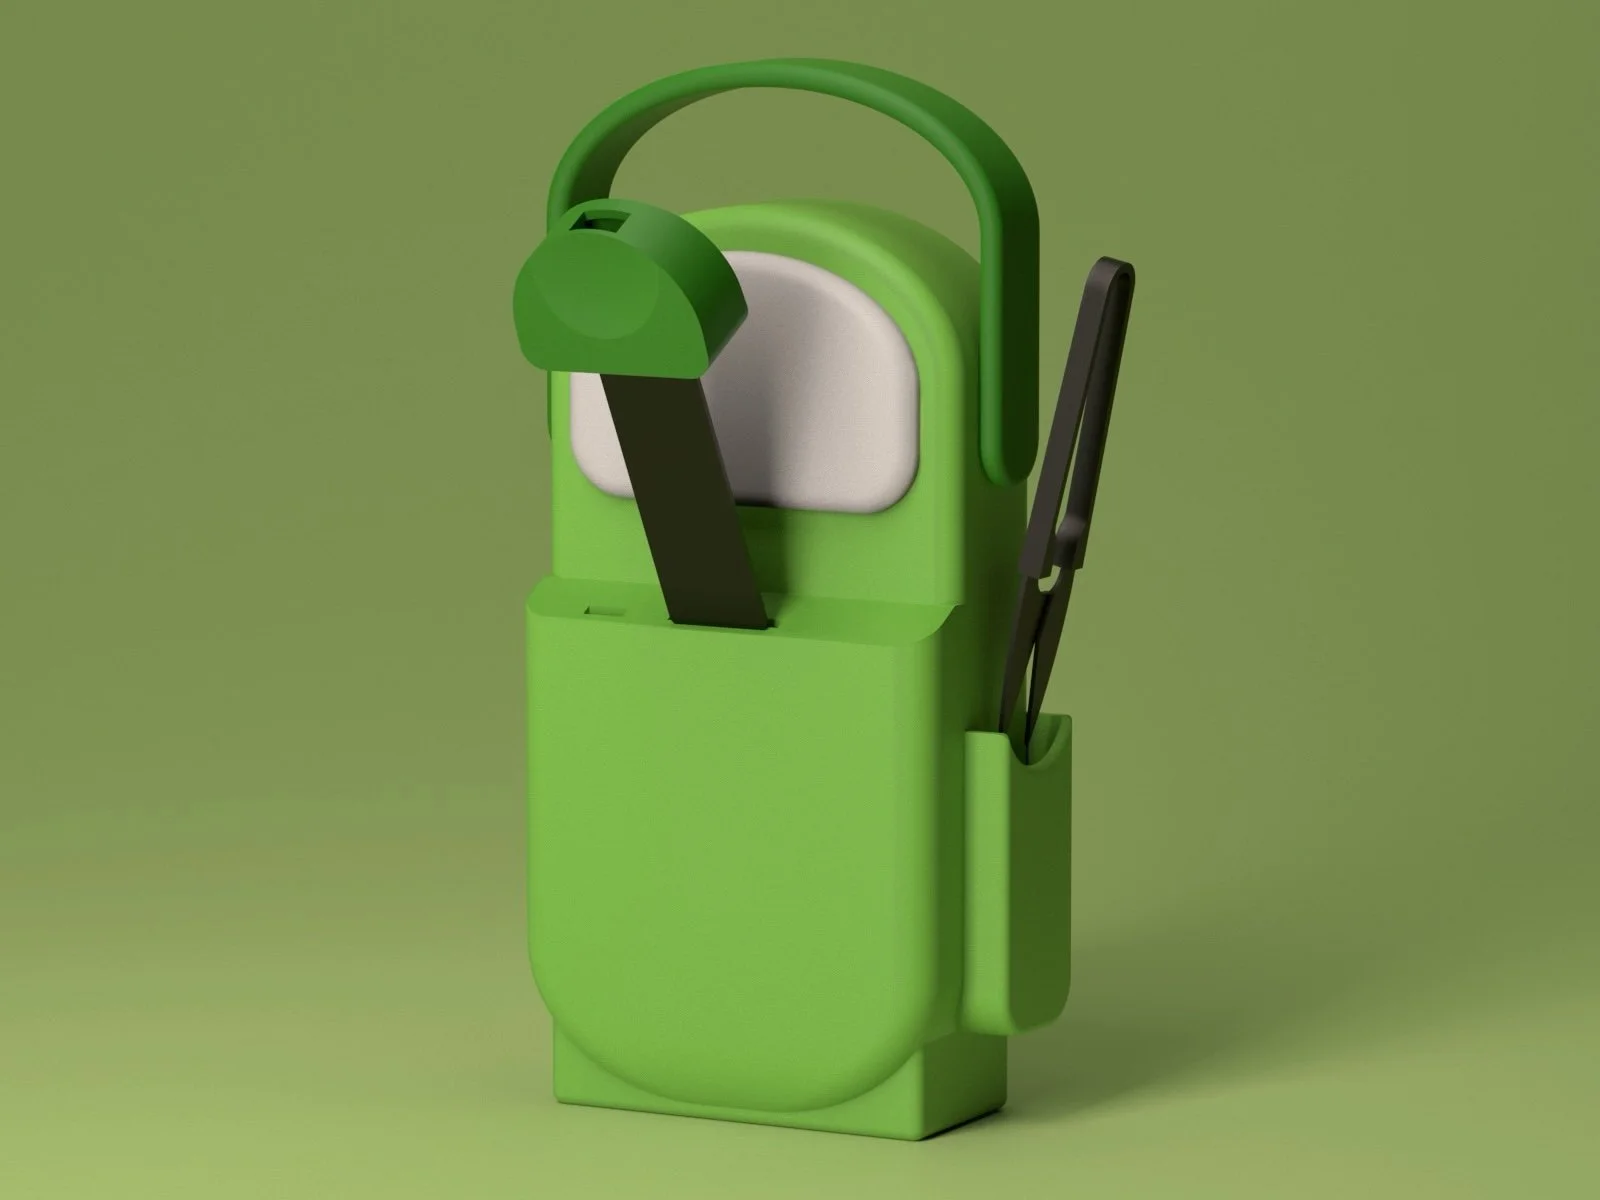
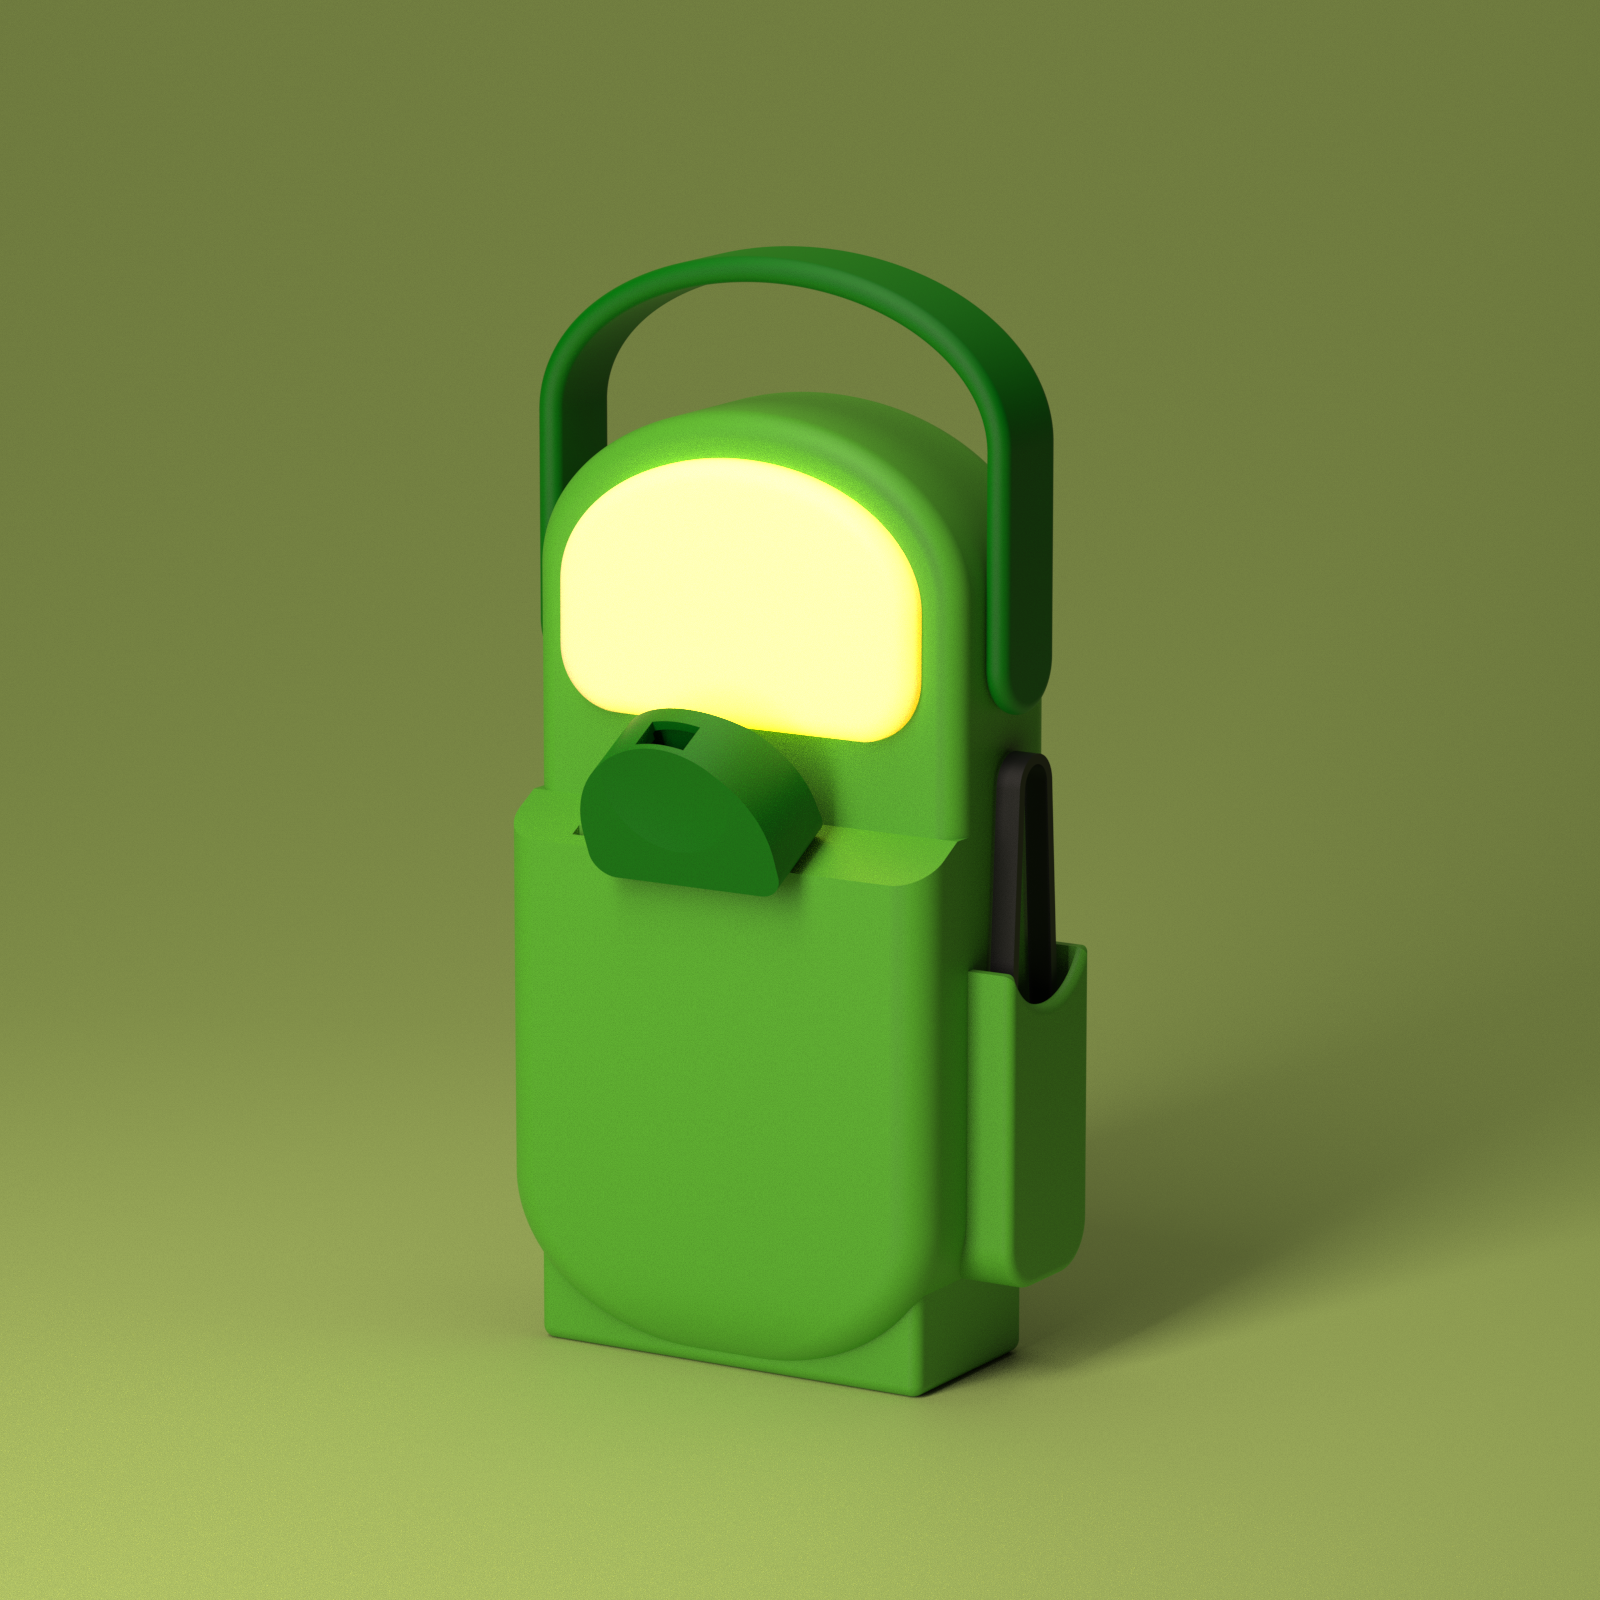
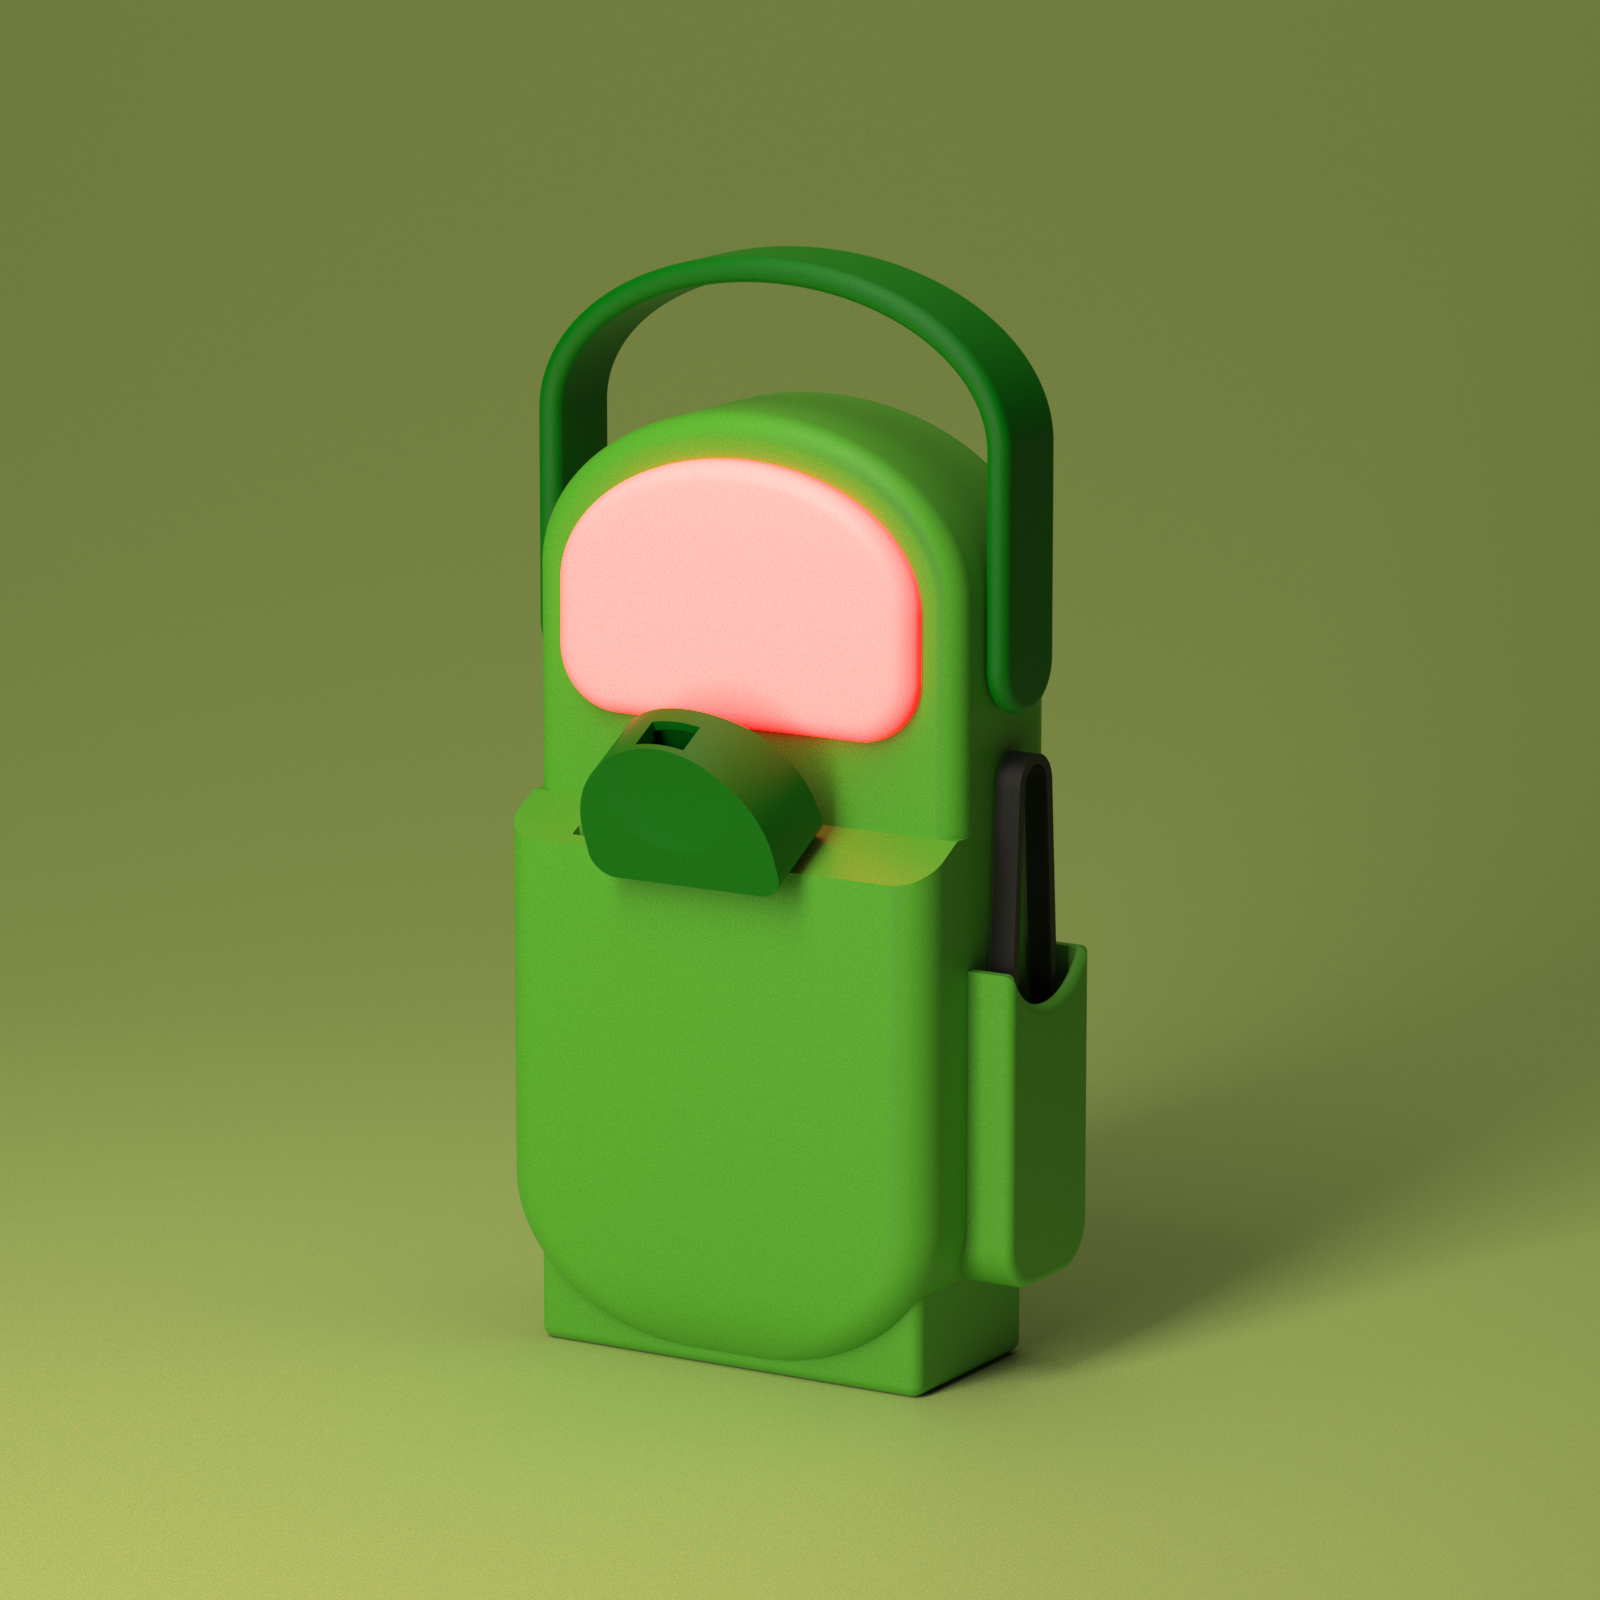
Final Model and Renders