Goals and Inspiration
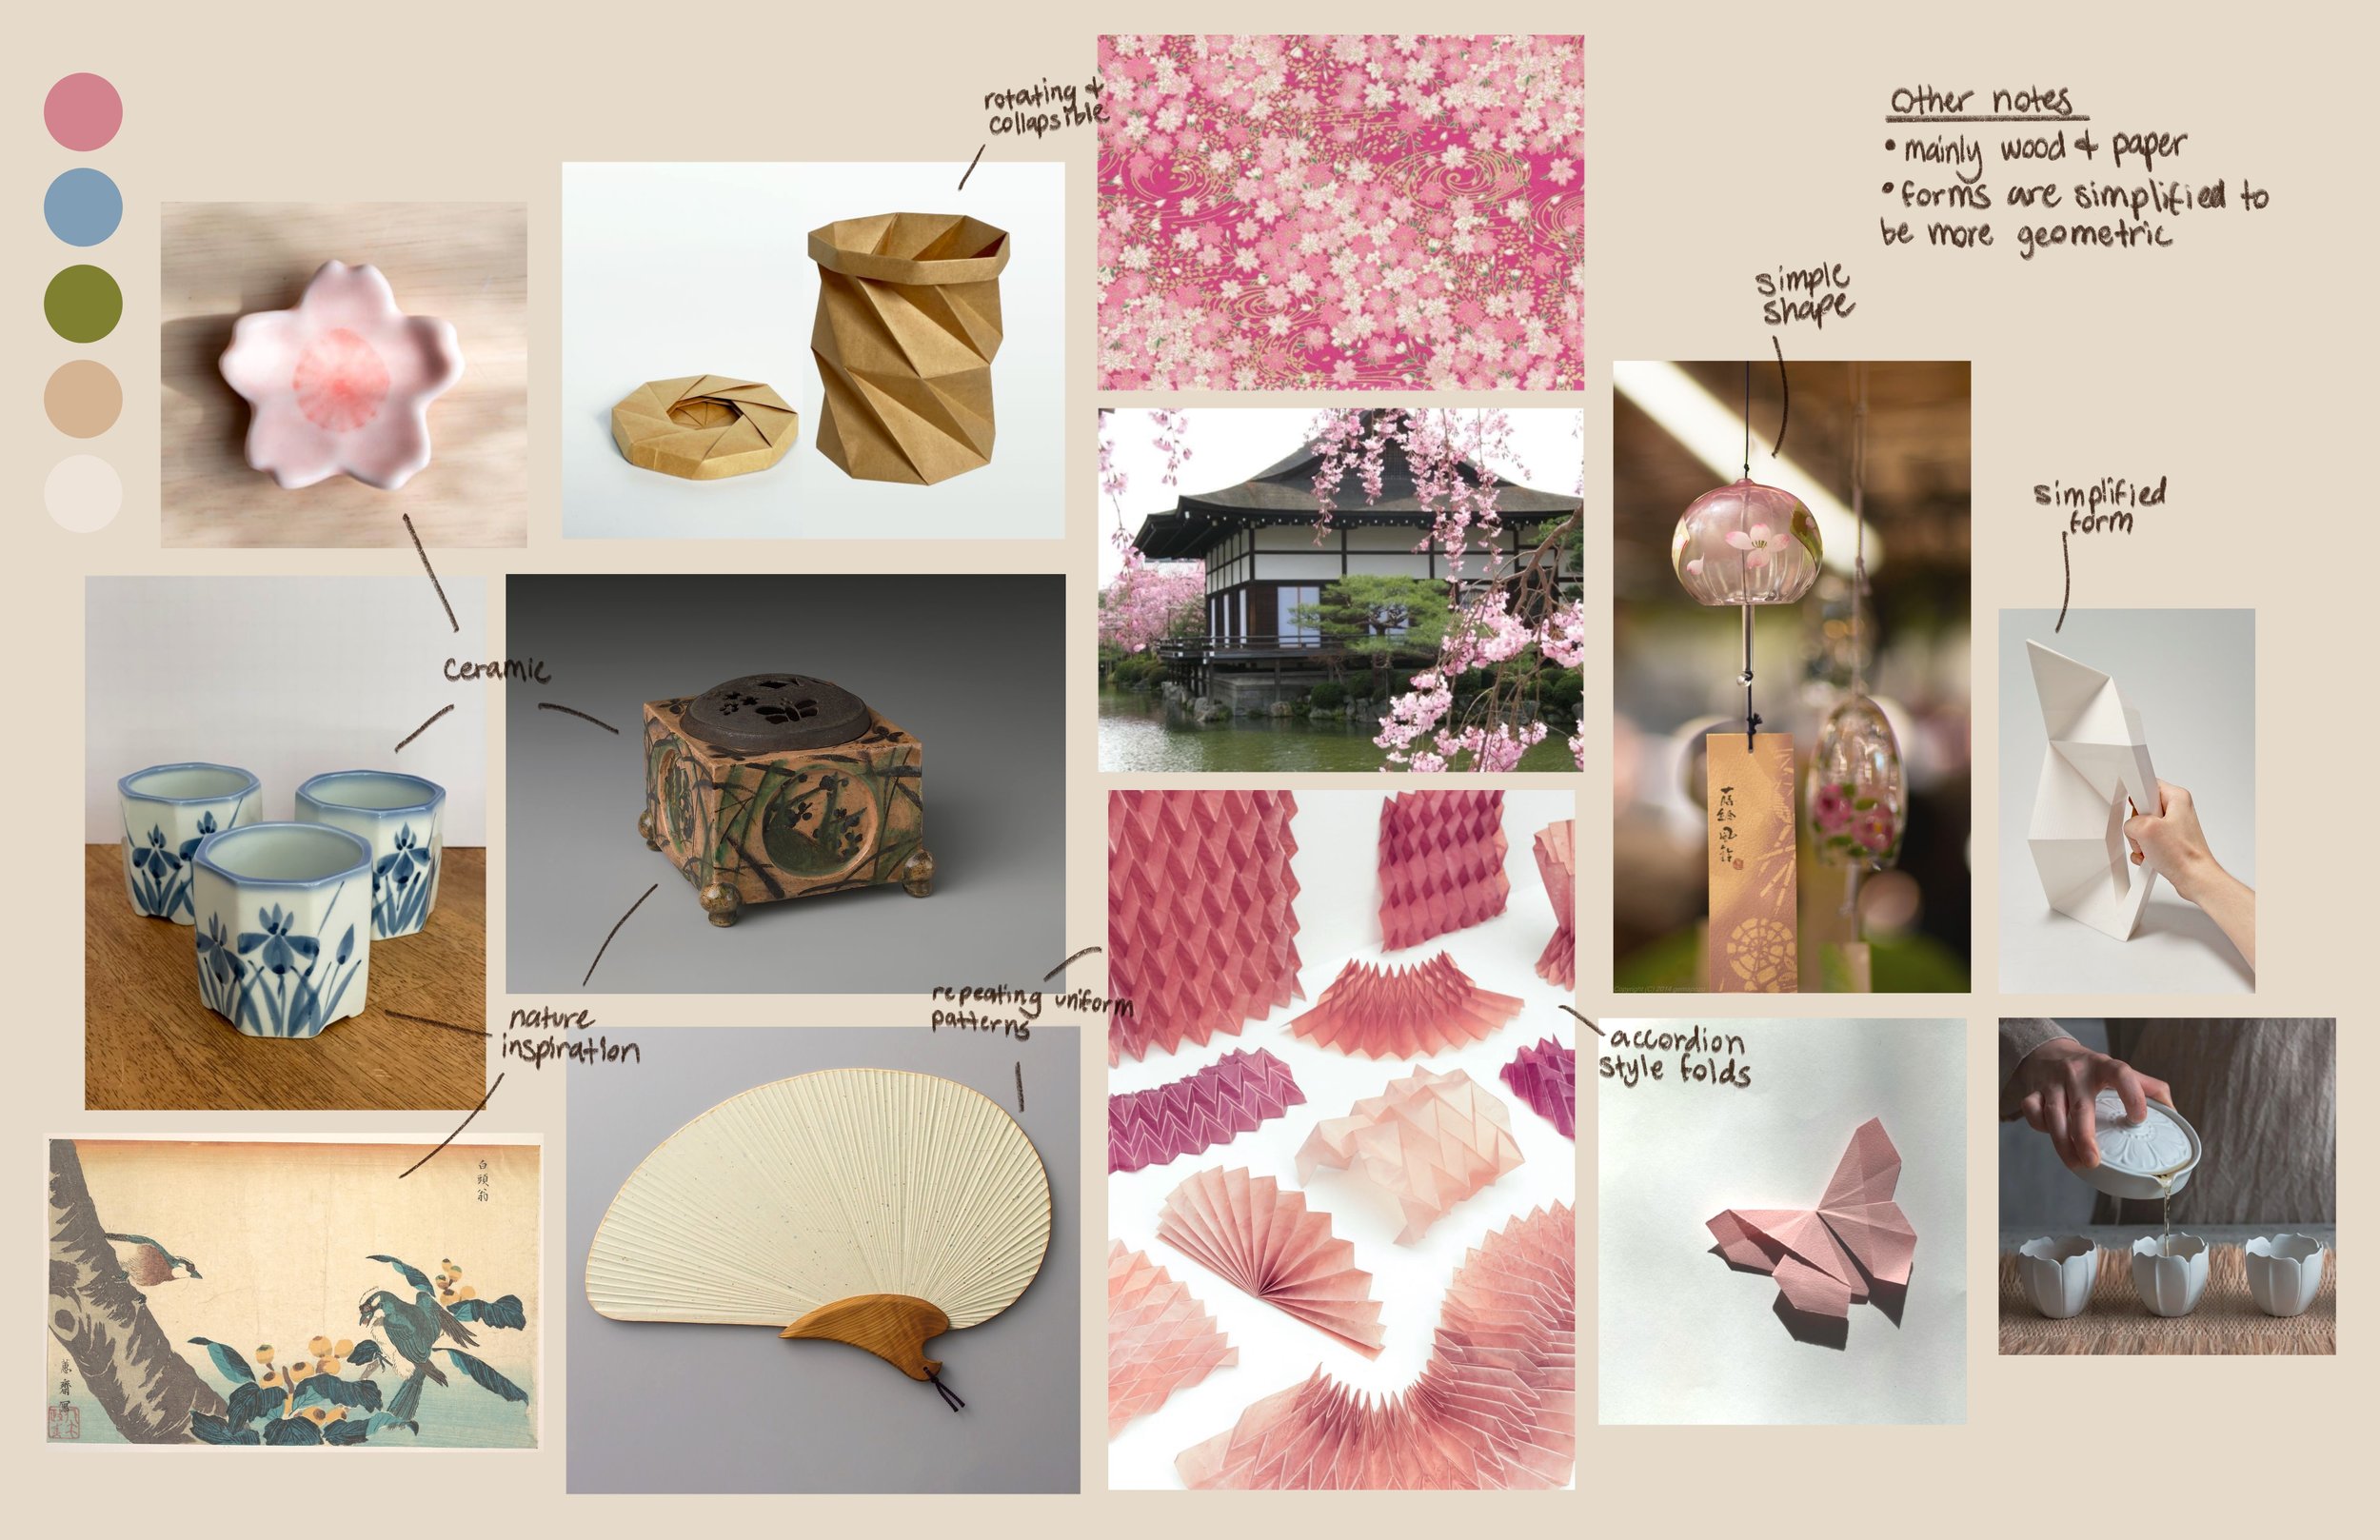
This project was a 5 week design project in school to design a battery powered lamp. My main goal with this project was to create something that I myself would use, and I knew I wanted to make a lamp that was more ambient and aesthetic focused rather than for a specific use. The first step in the process was coming up with some different inspiration boards. One of my ideas was to make something inspired by Japanese designs, and the other was inspired by mid century modern architecture and design.

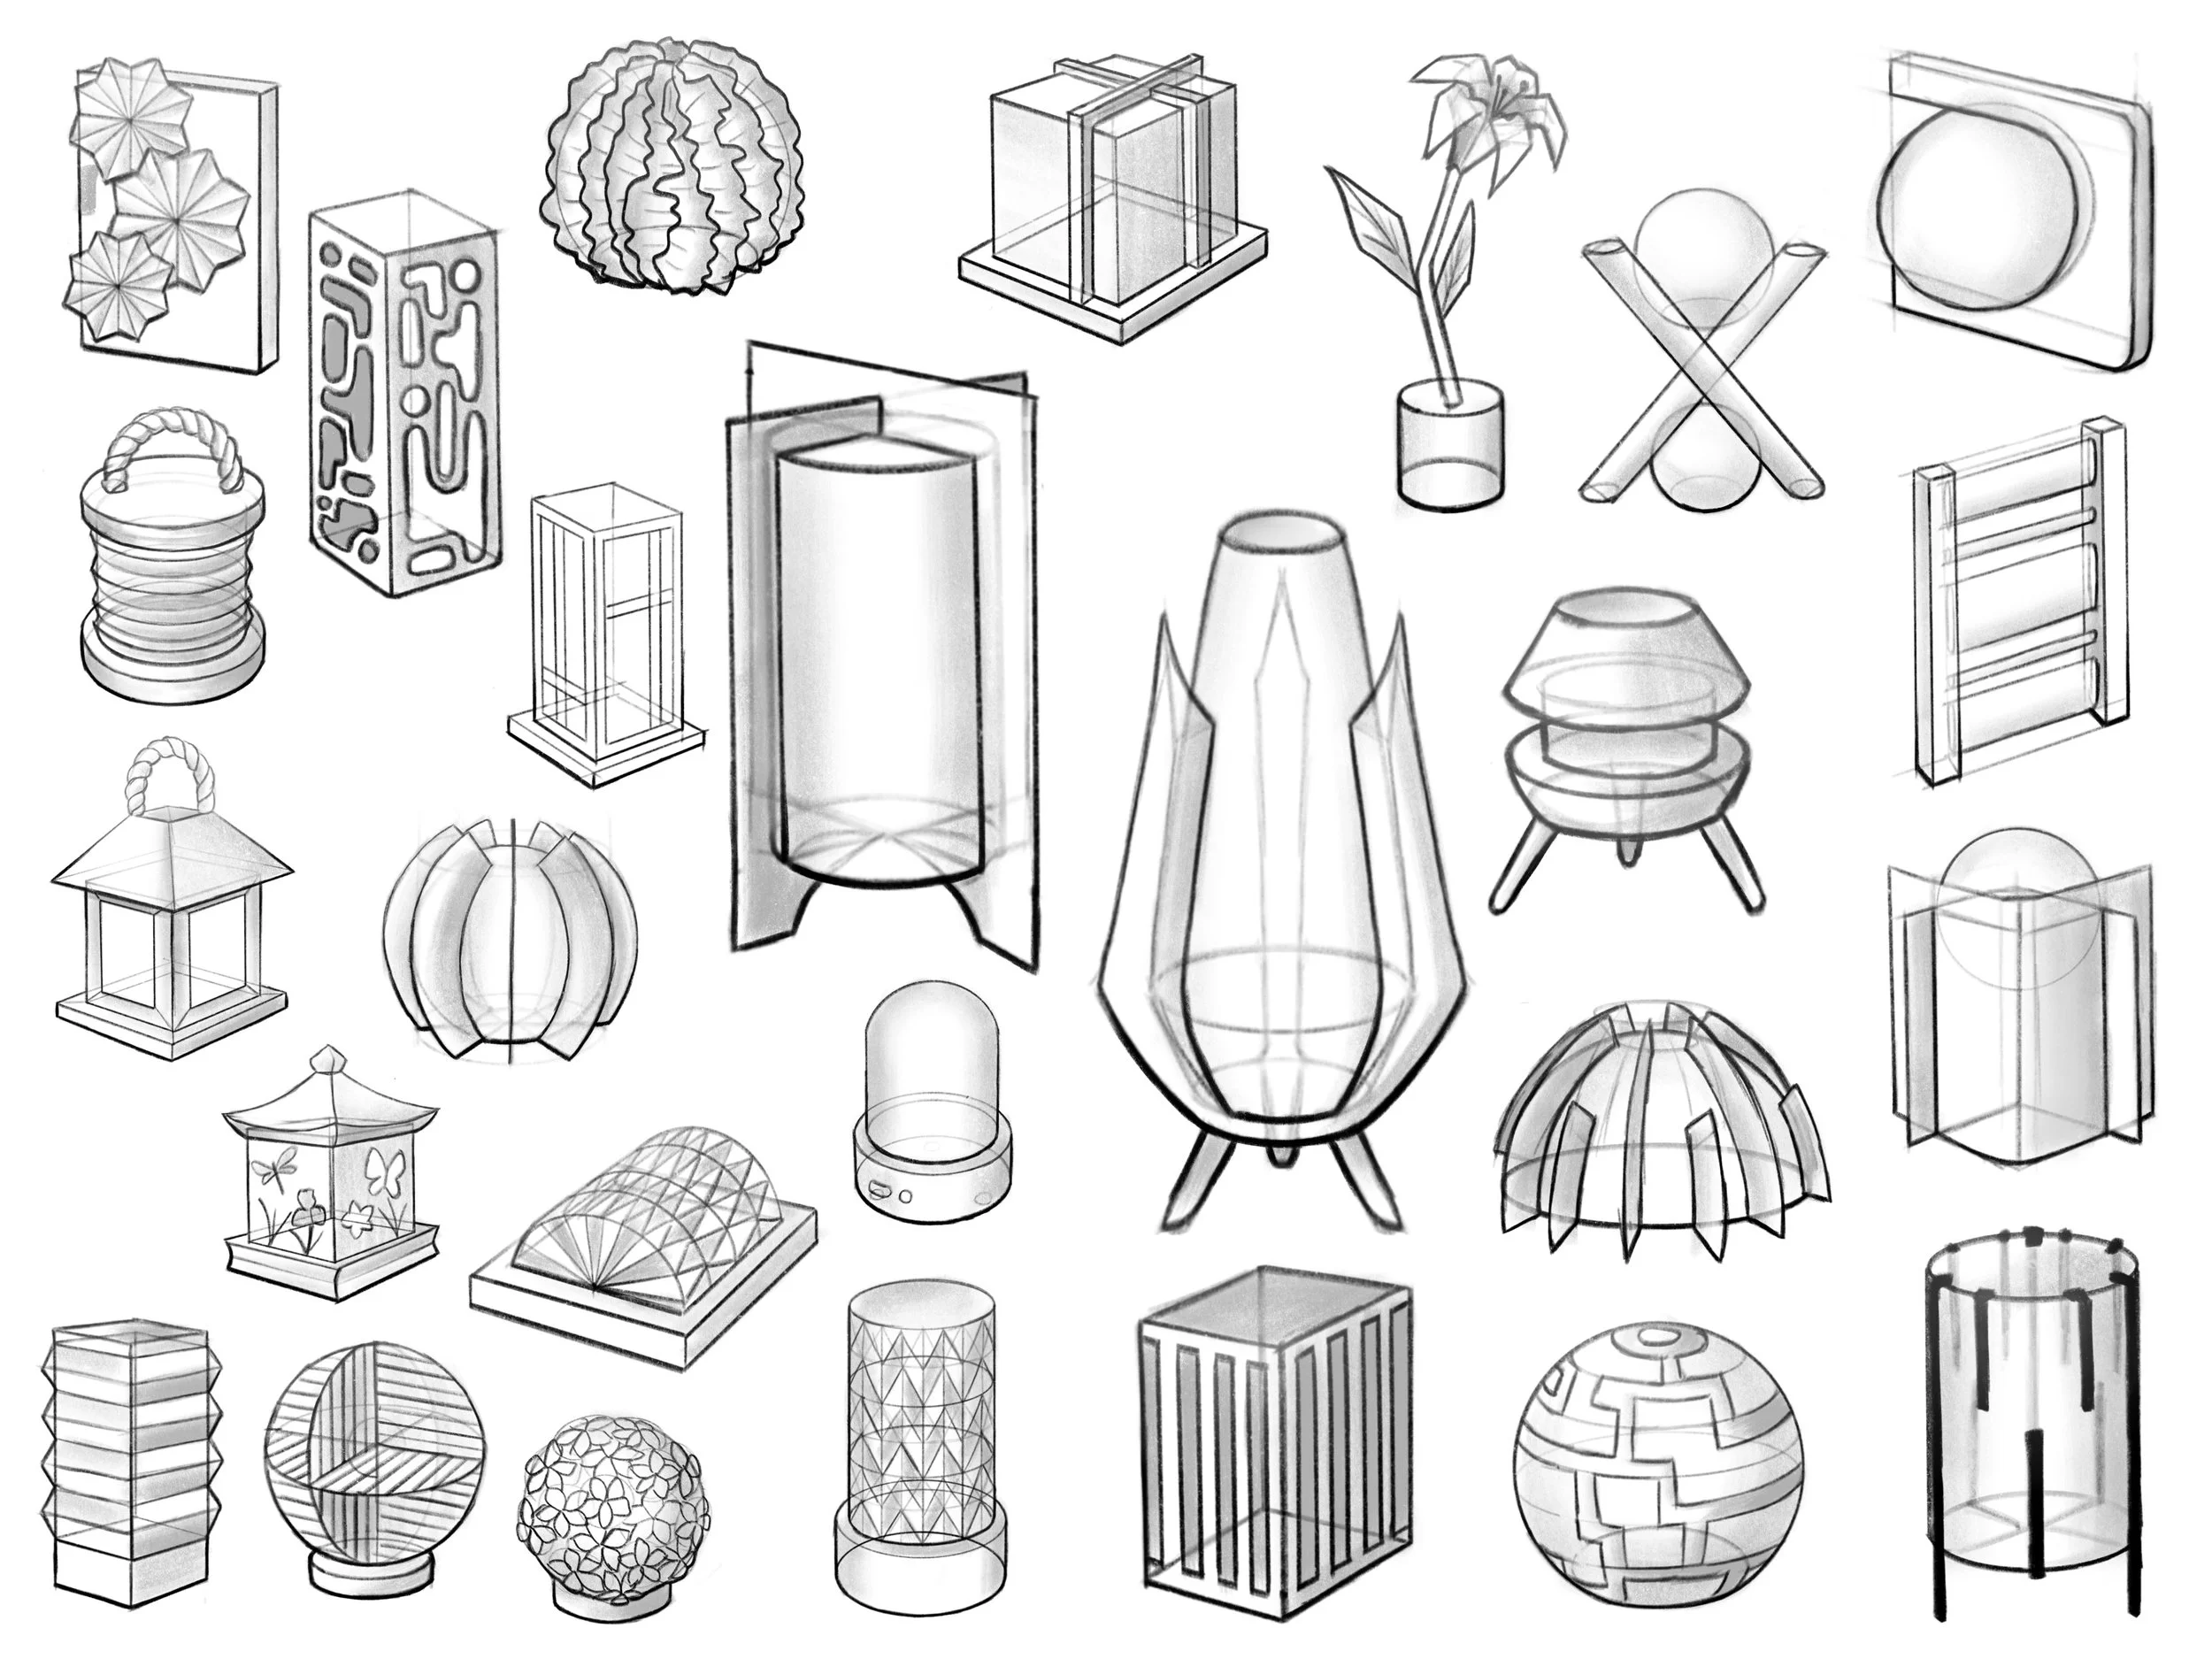
Exploratory Sketches
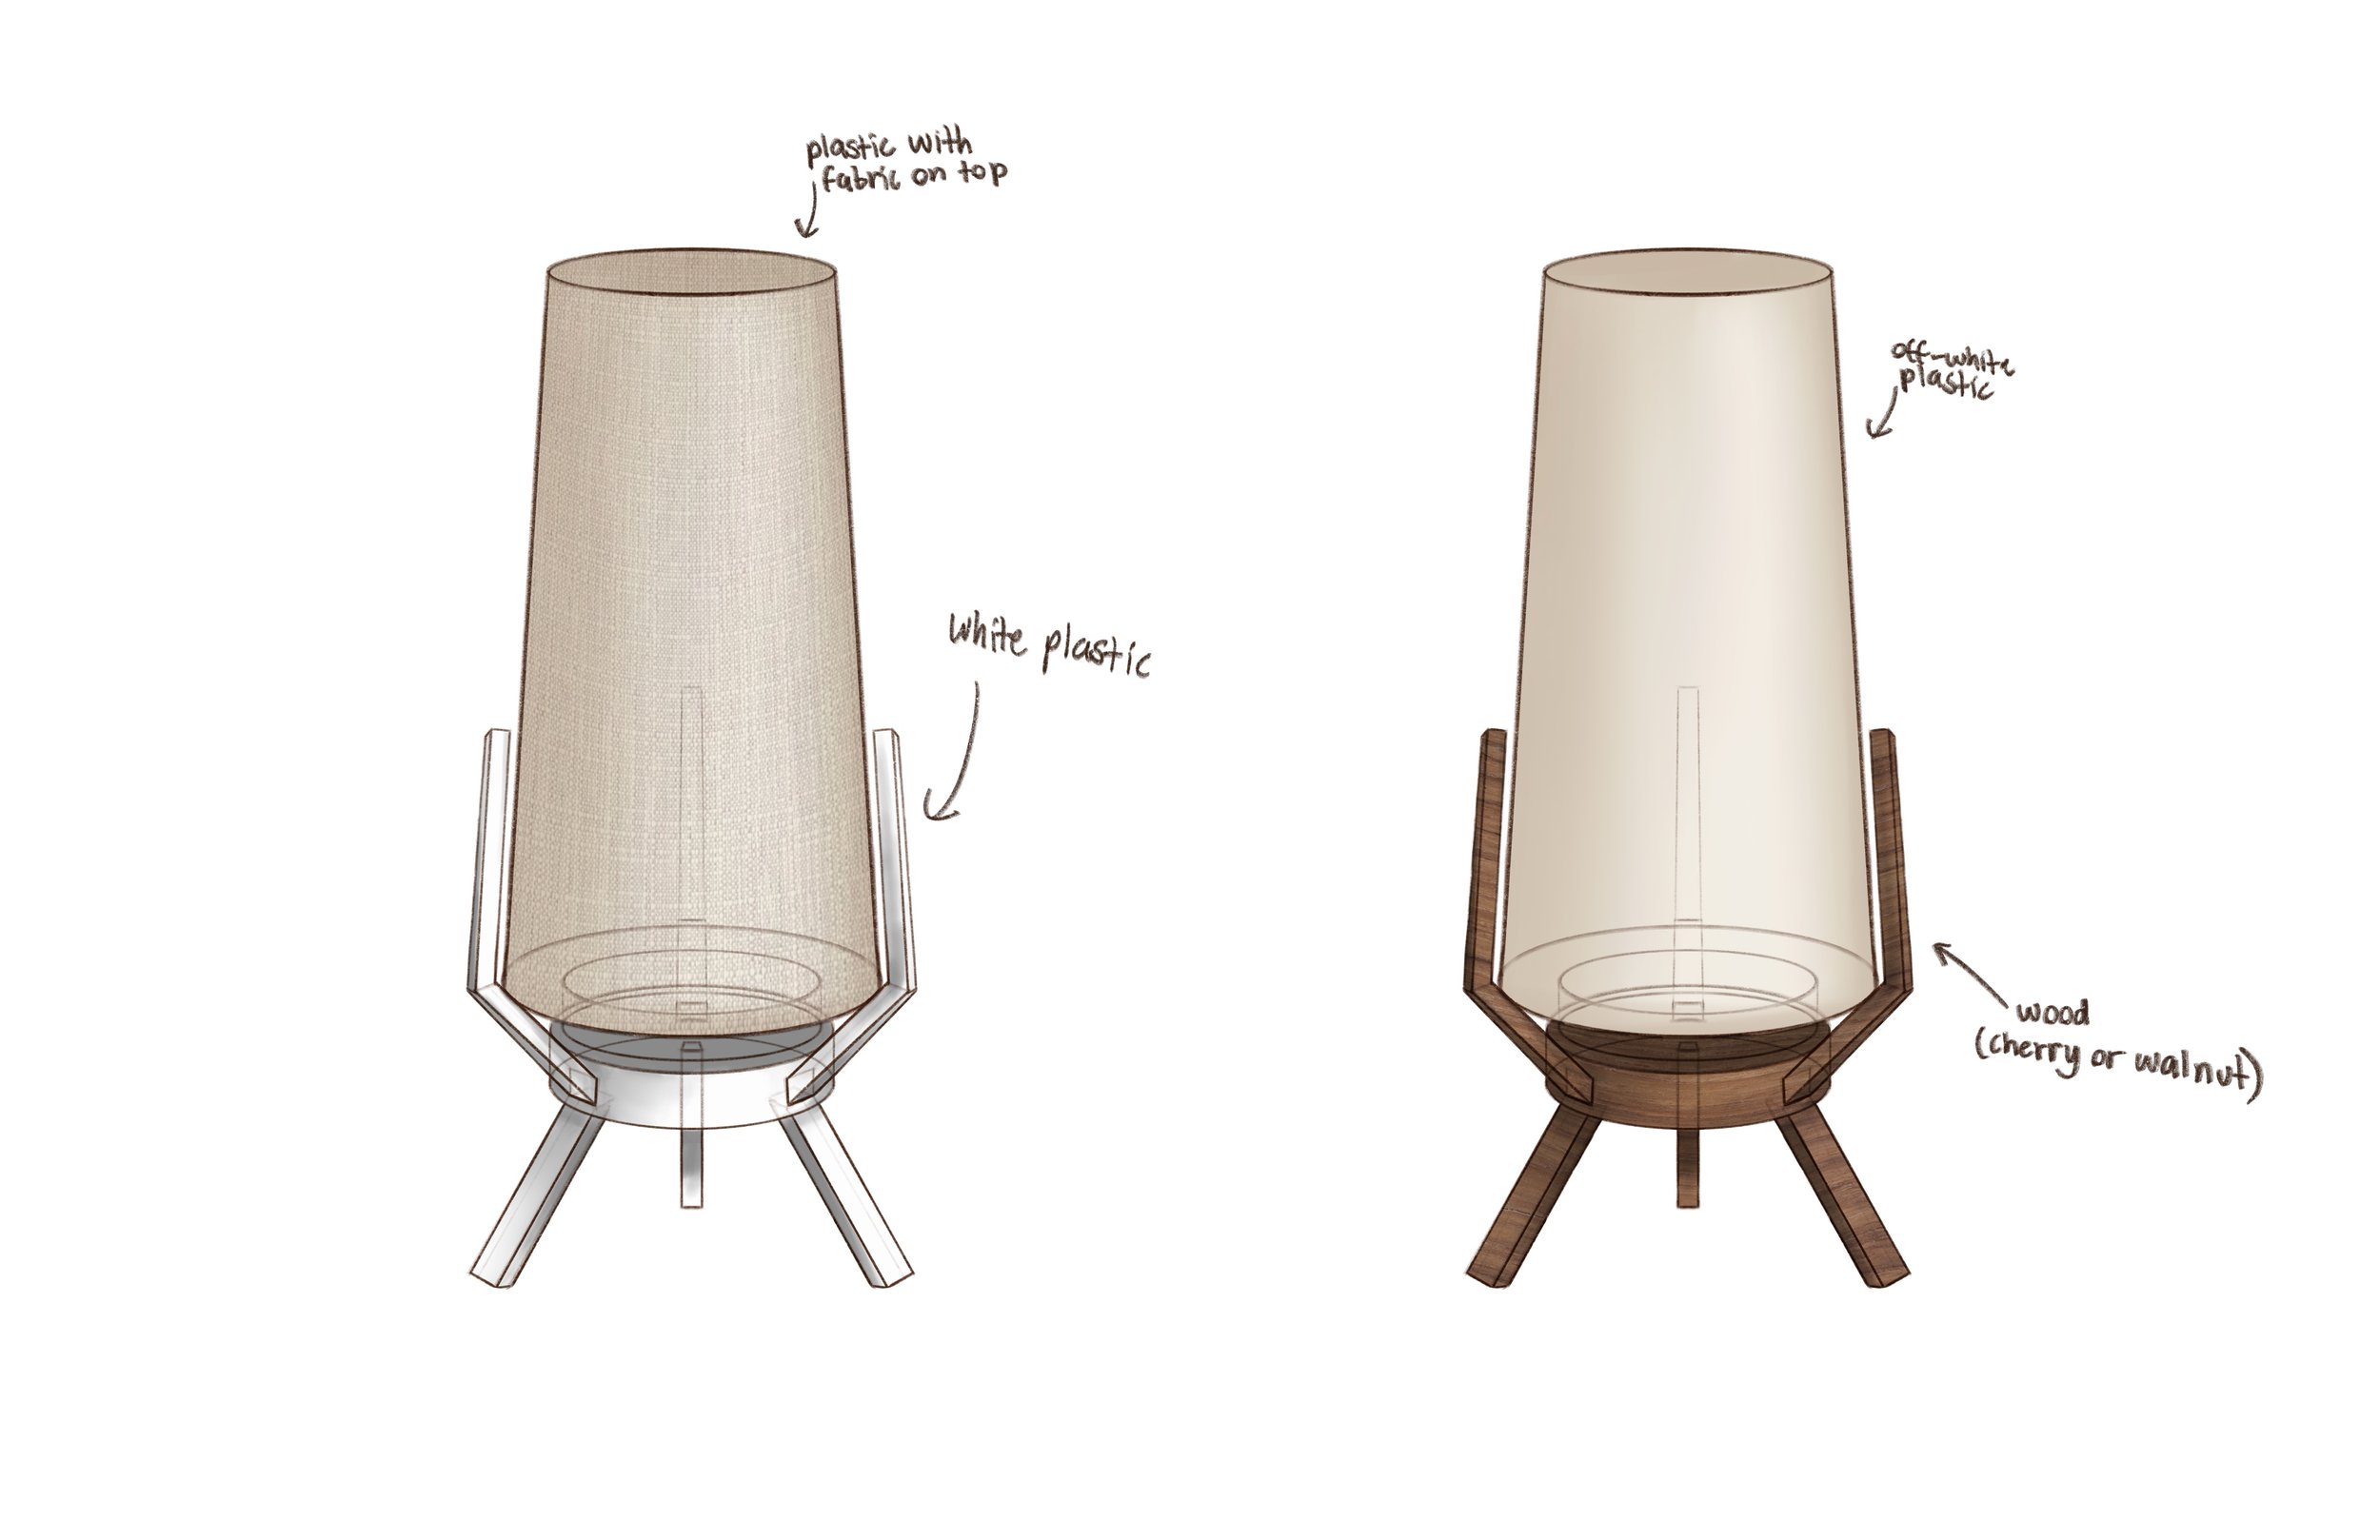
For my first sketches, I did some for both inspiration boards, keeping it broad, experimenting with the shape language, and thinking of different materials I could use. I eventually chose to go with the mid century modern inspiration and narrowed it down to one sketch, which I felt was simple but still fit with my theme. For the wood type, I was debating initially between cherry and walnut but eventually chose walnut.
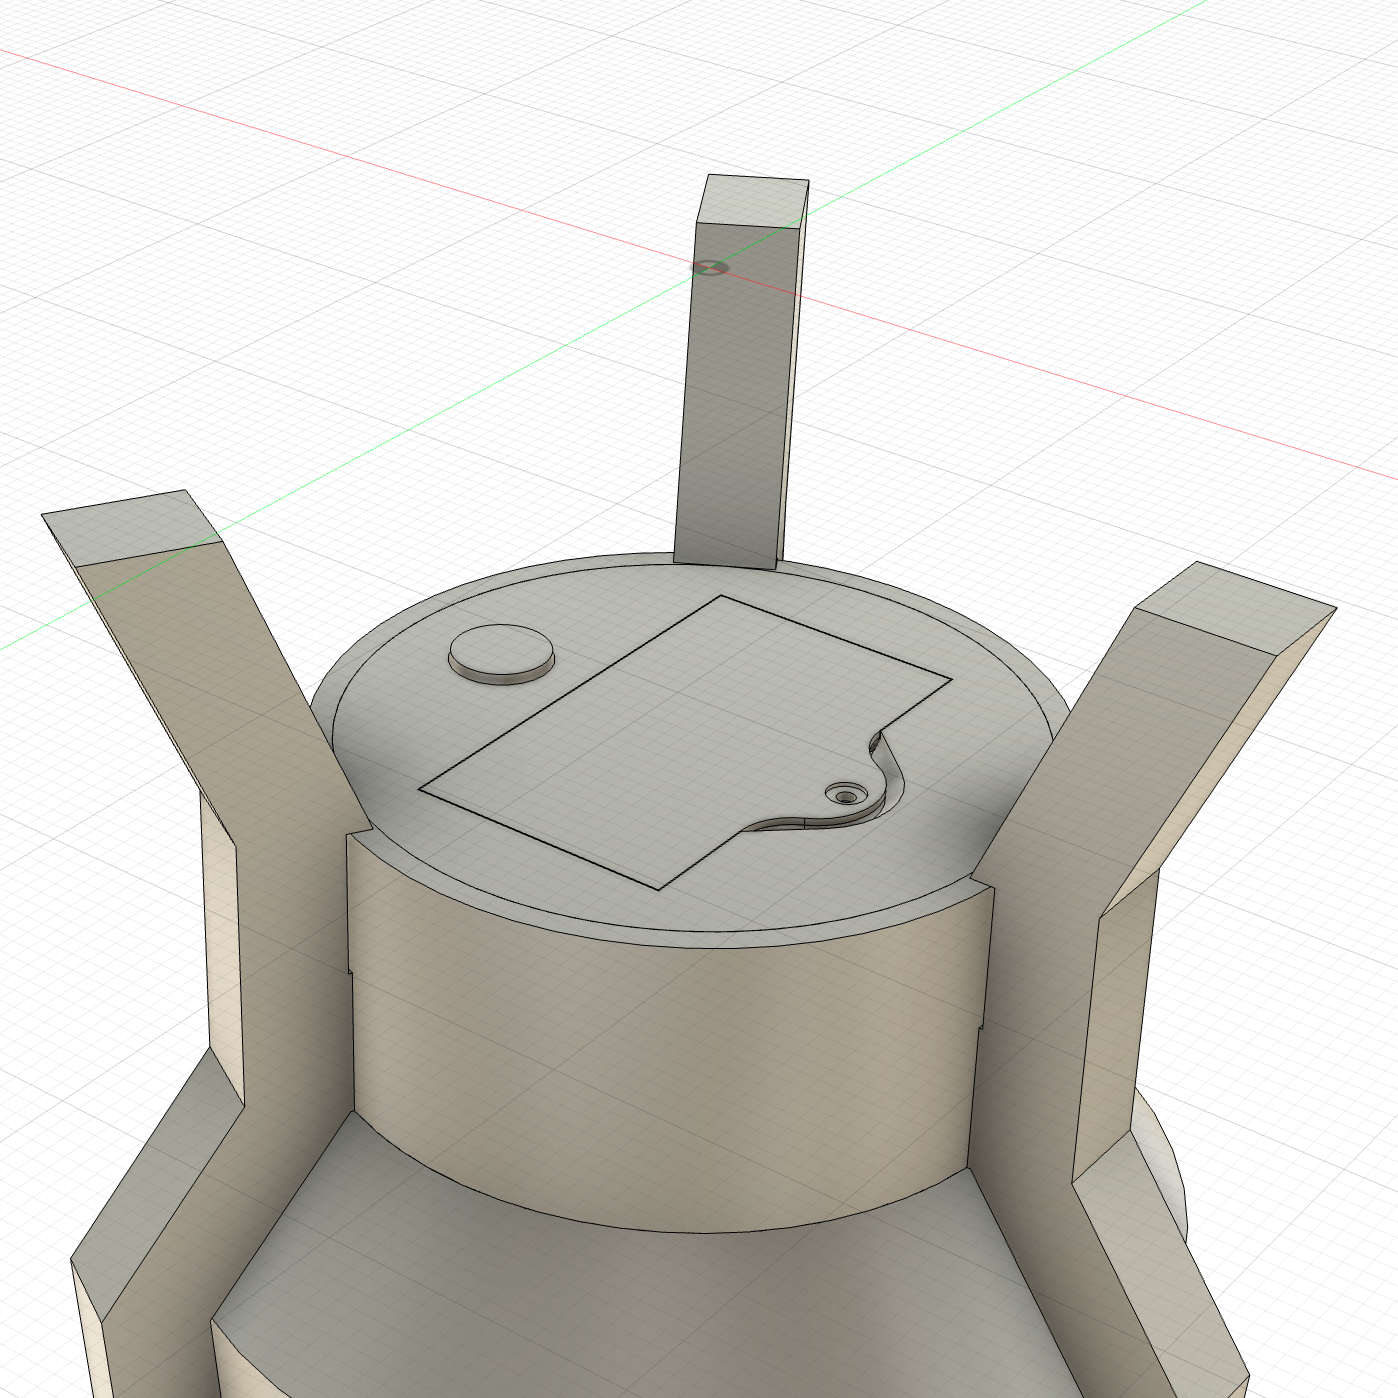
Initial CAD models
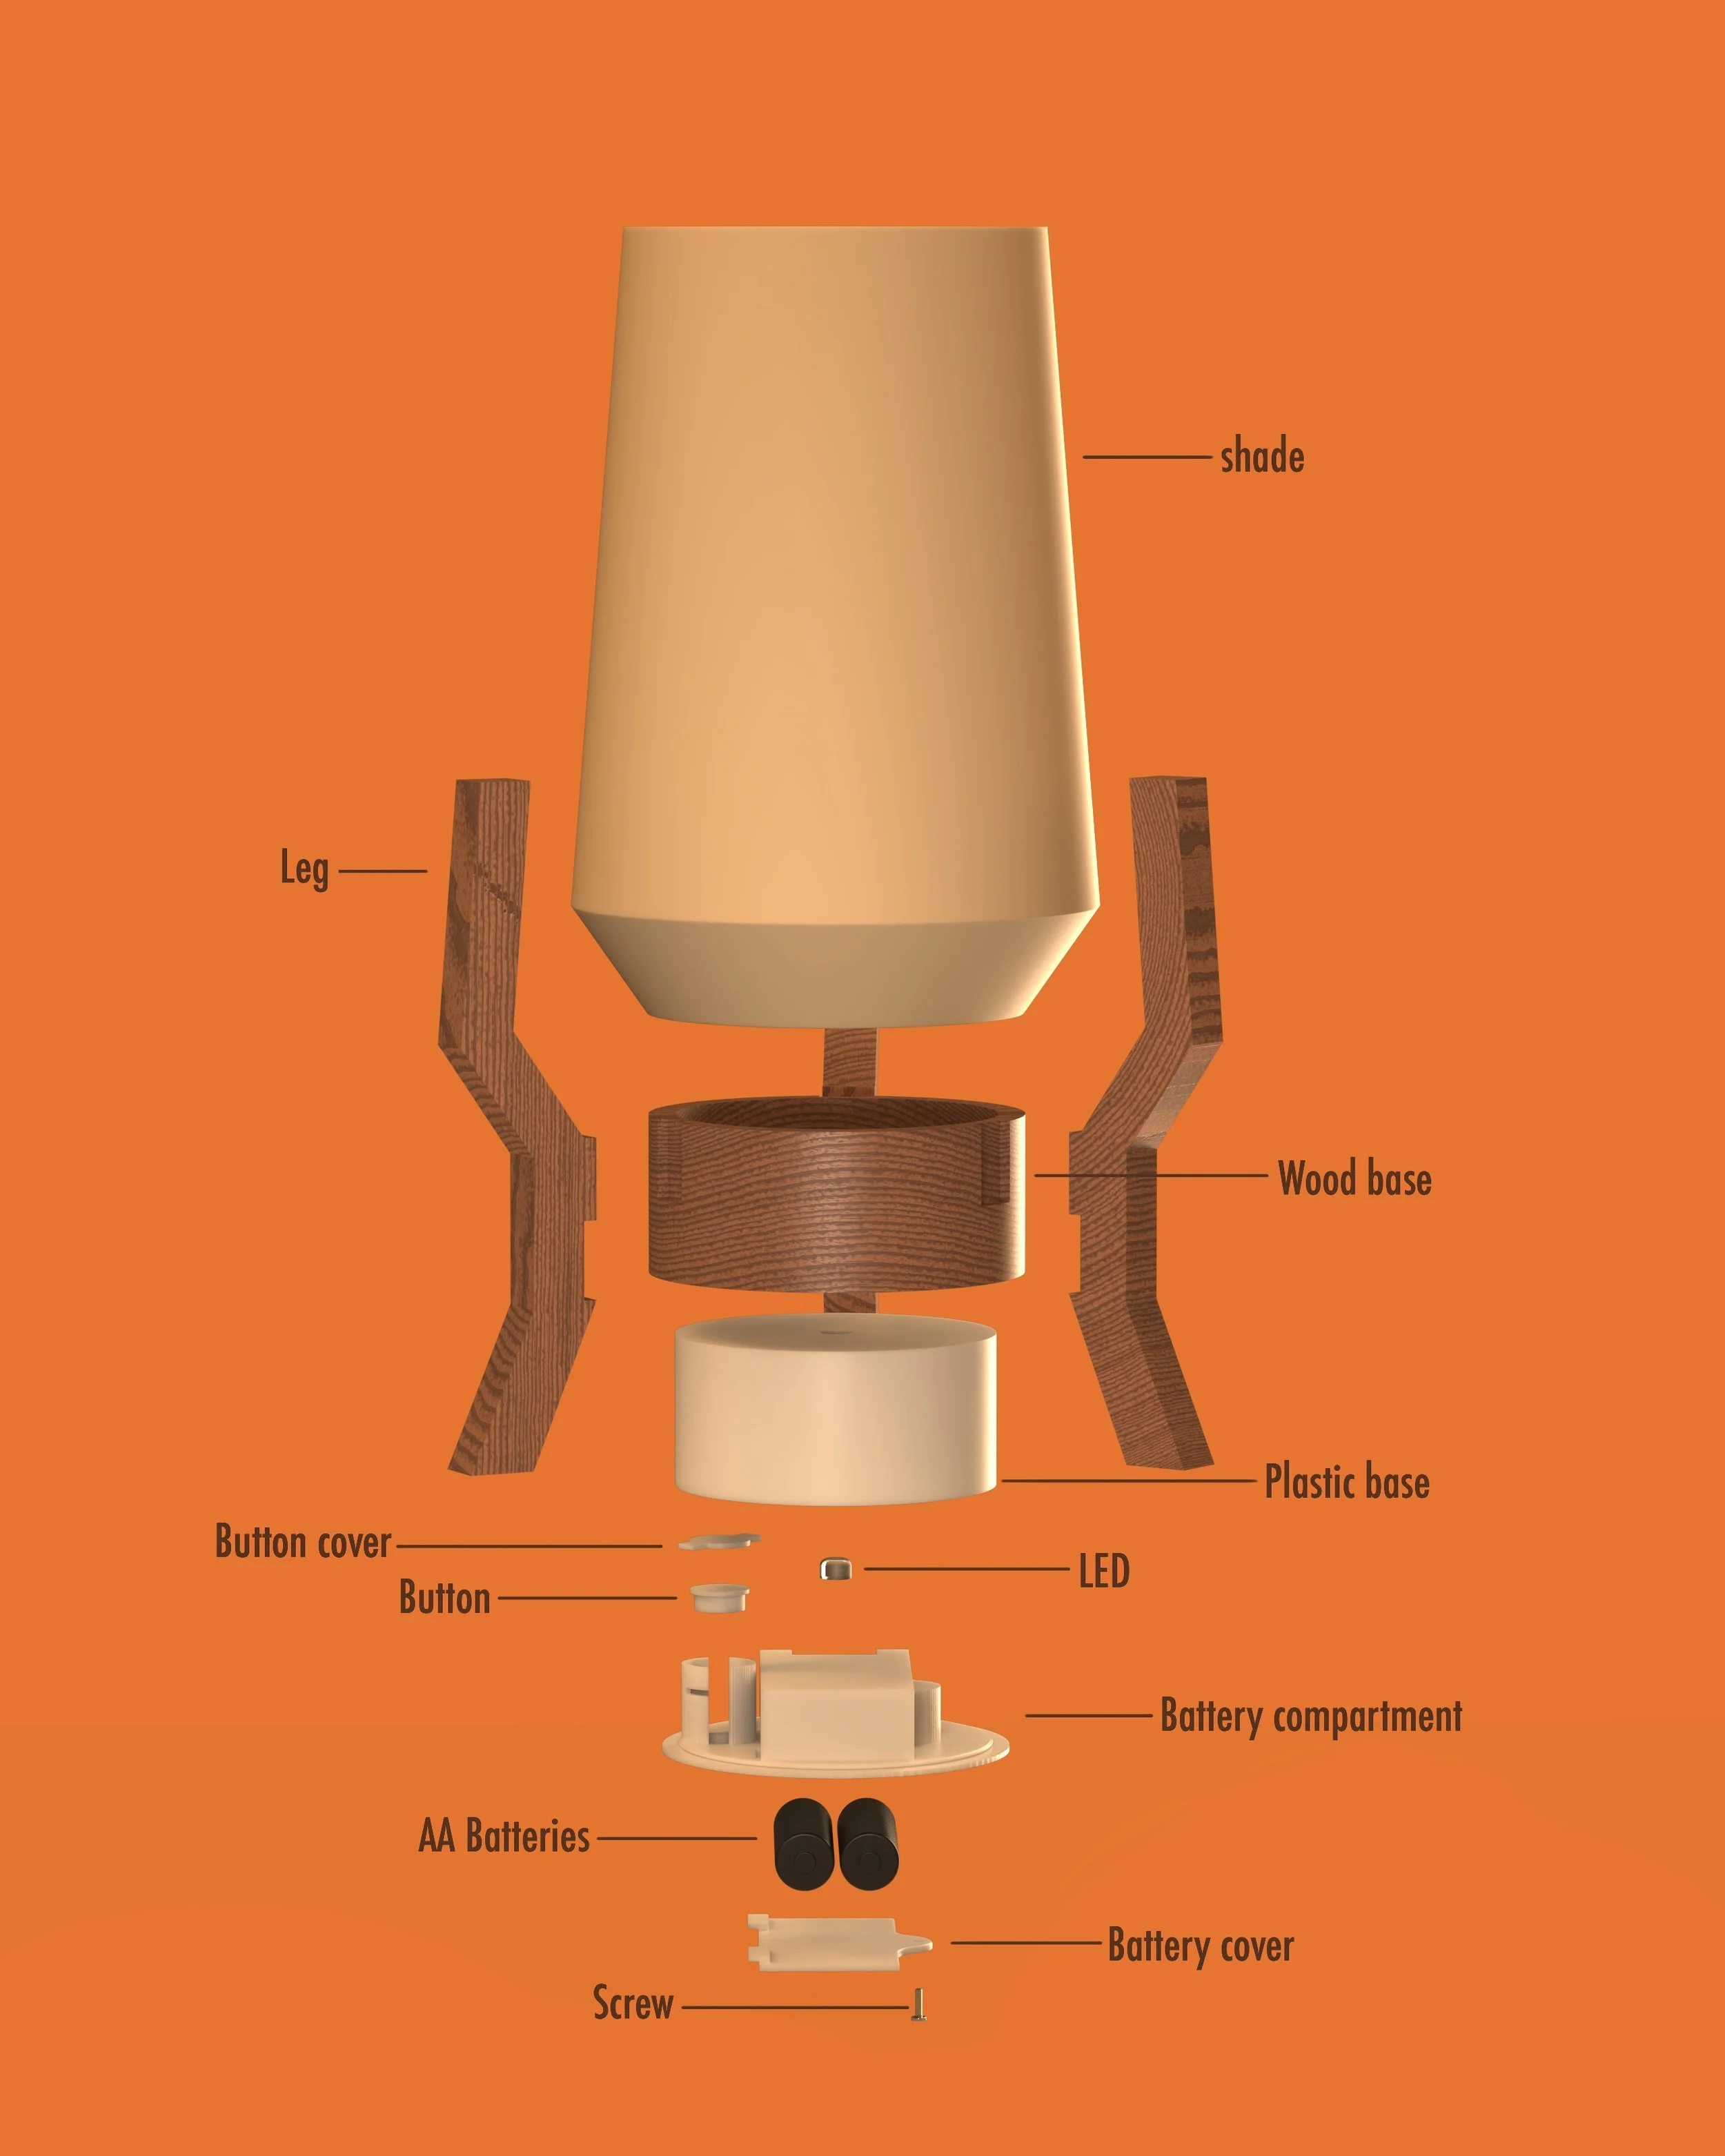
For my initial CAD model, I focused on the main pieces (the legs, base, and shade) and how I would attach them. I knew at this point I was going to use wood for the legs and base so I had to start to think of how I would cut and attach the pieces, but before adding more details I did a test print.

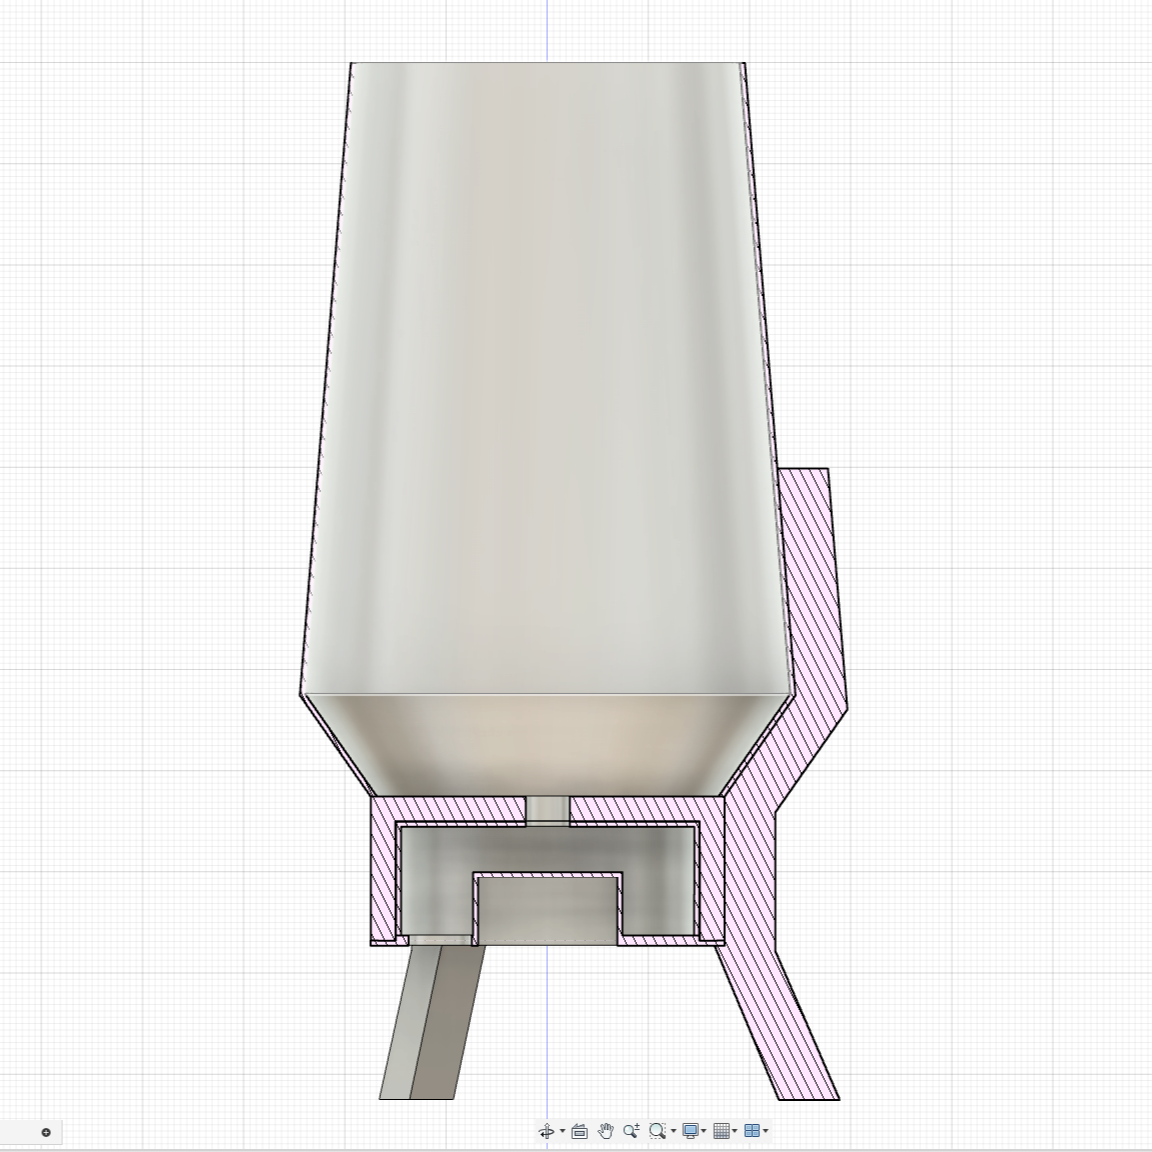

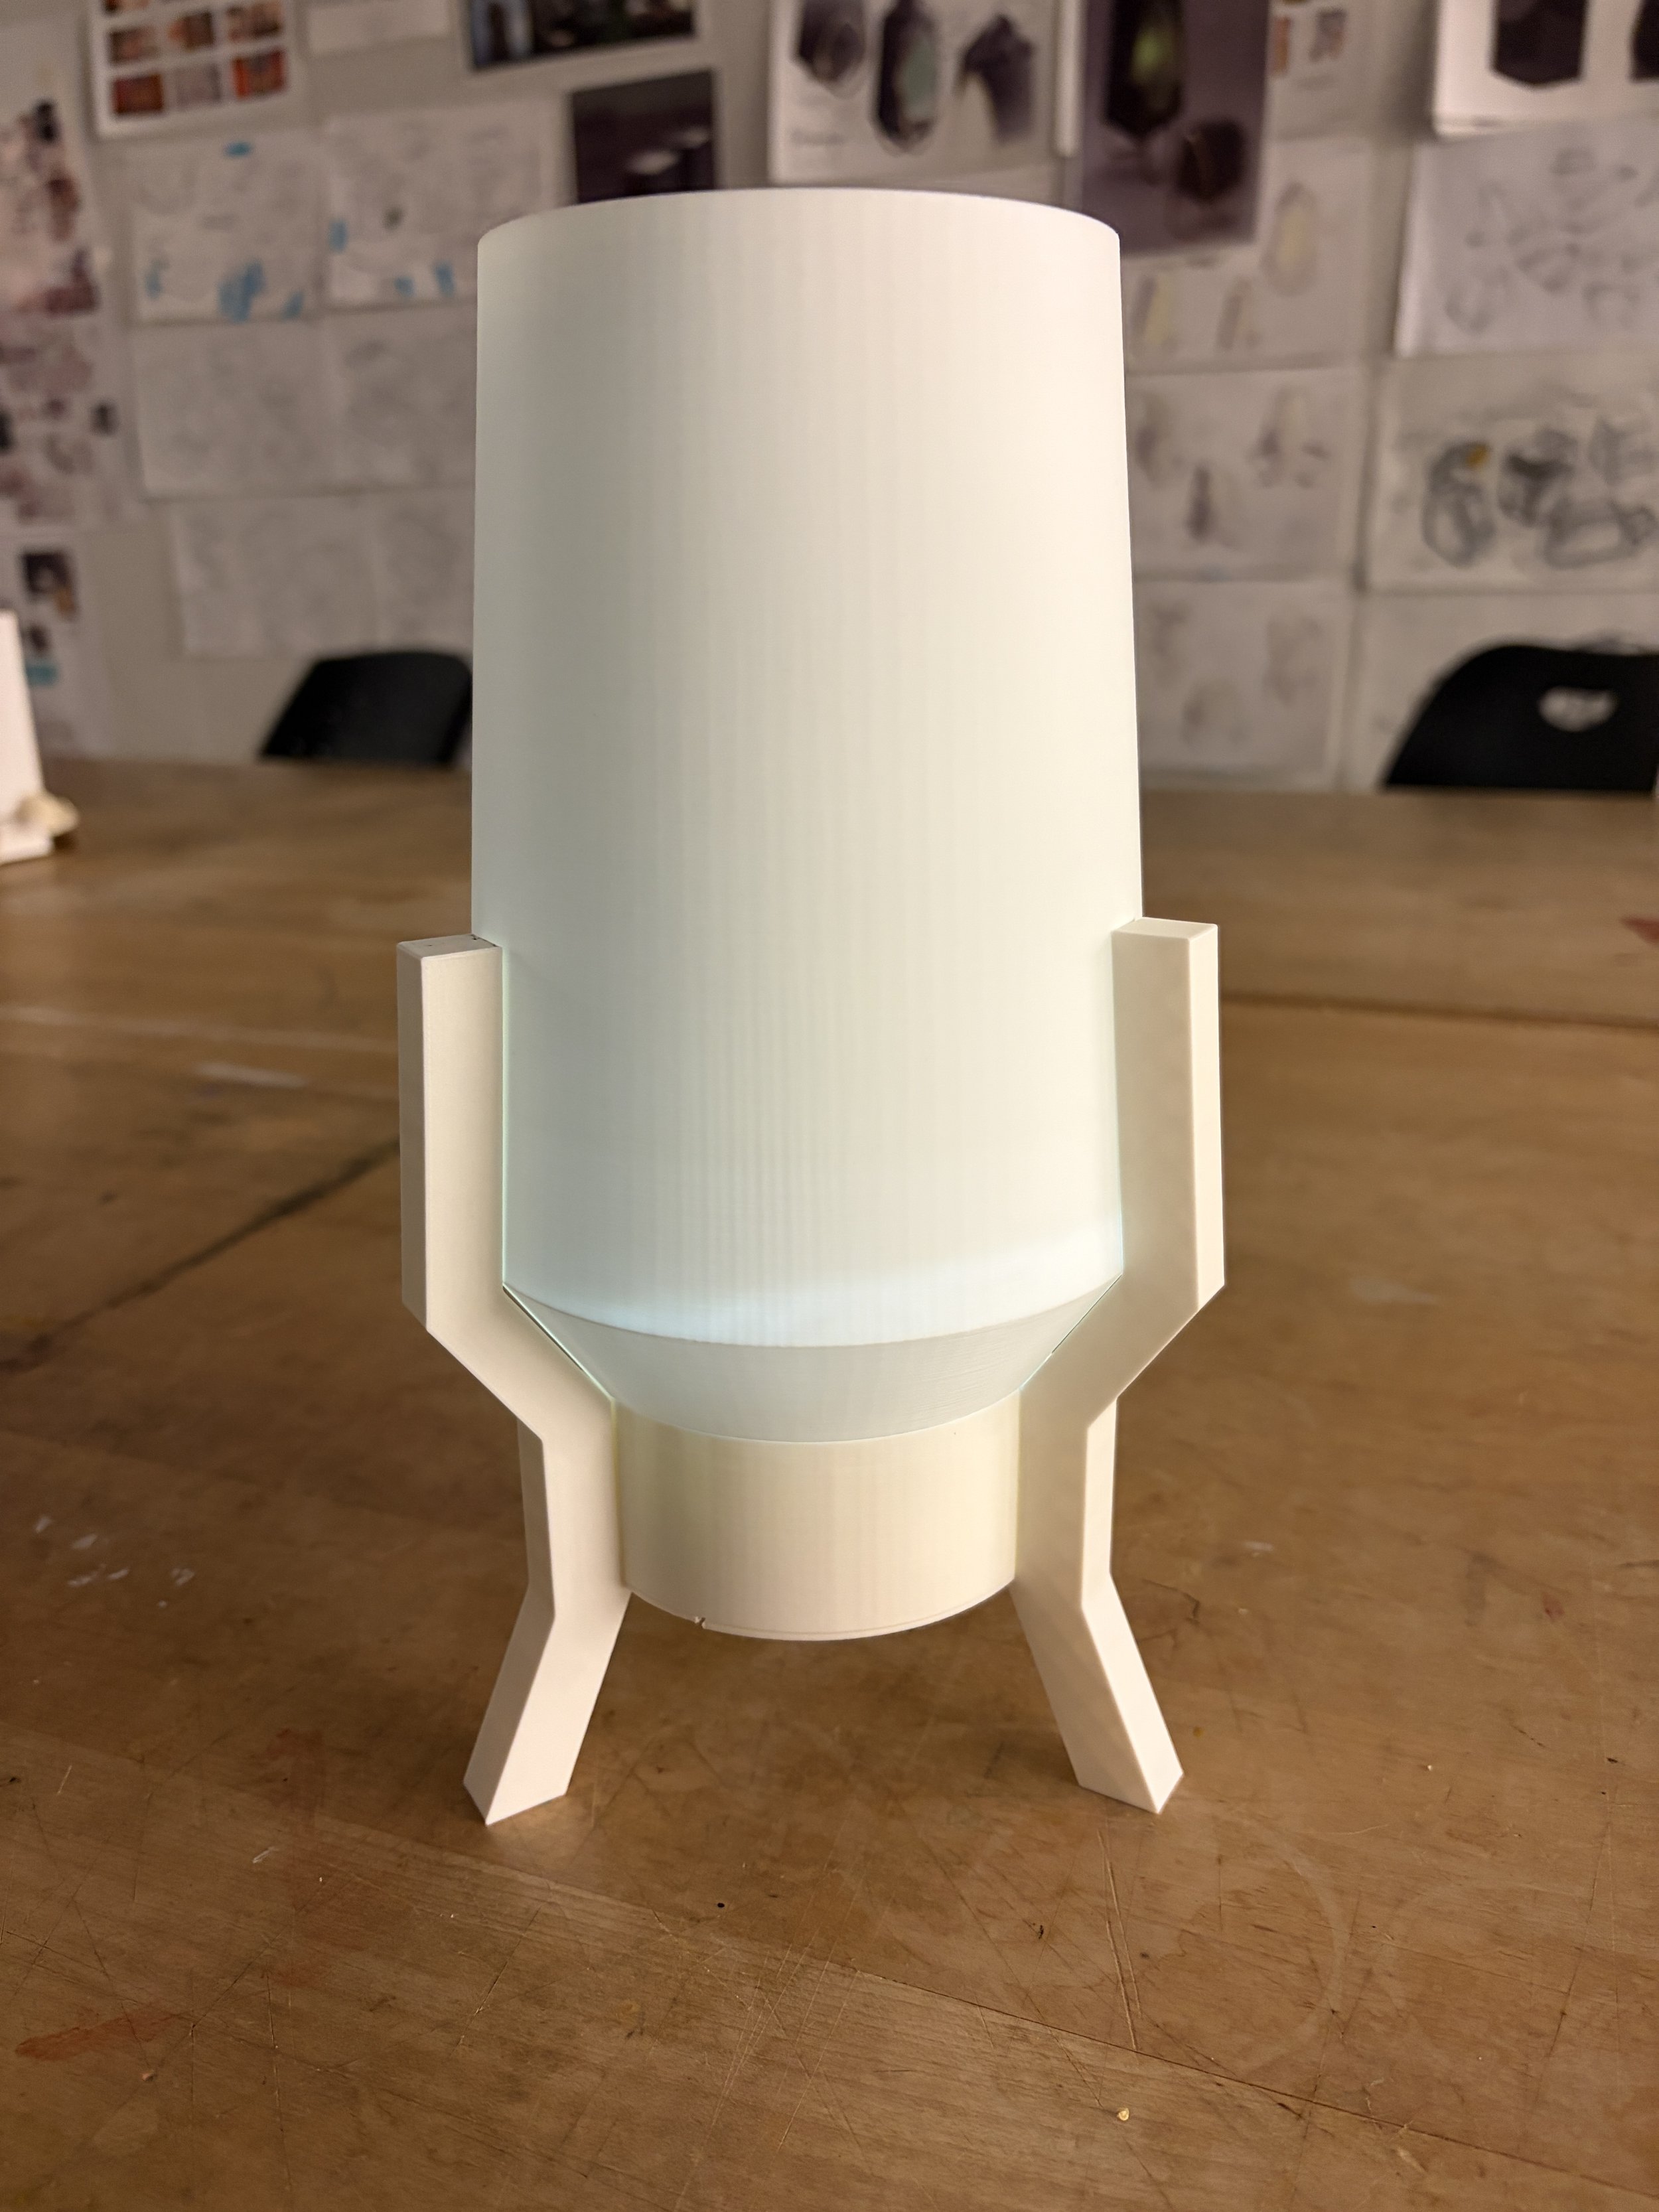
First Print
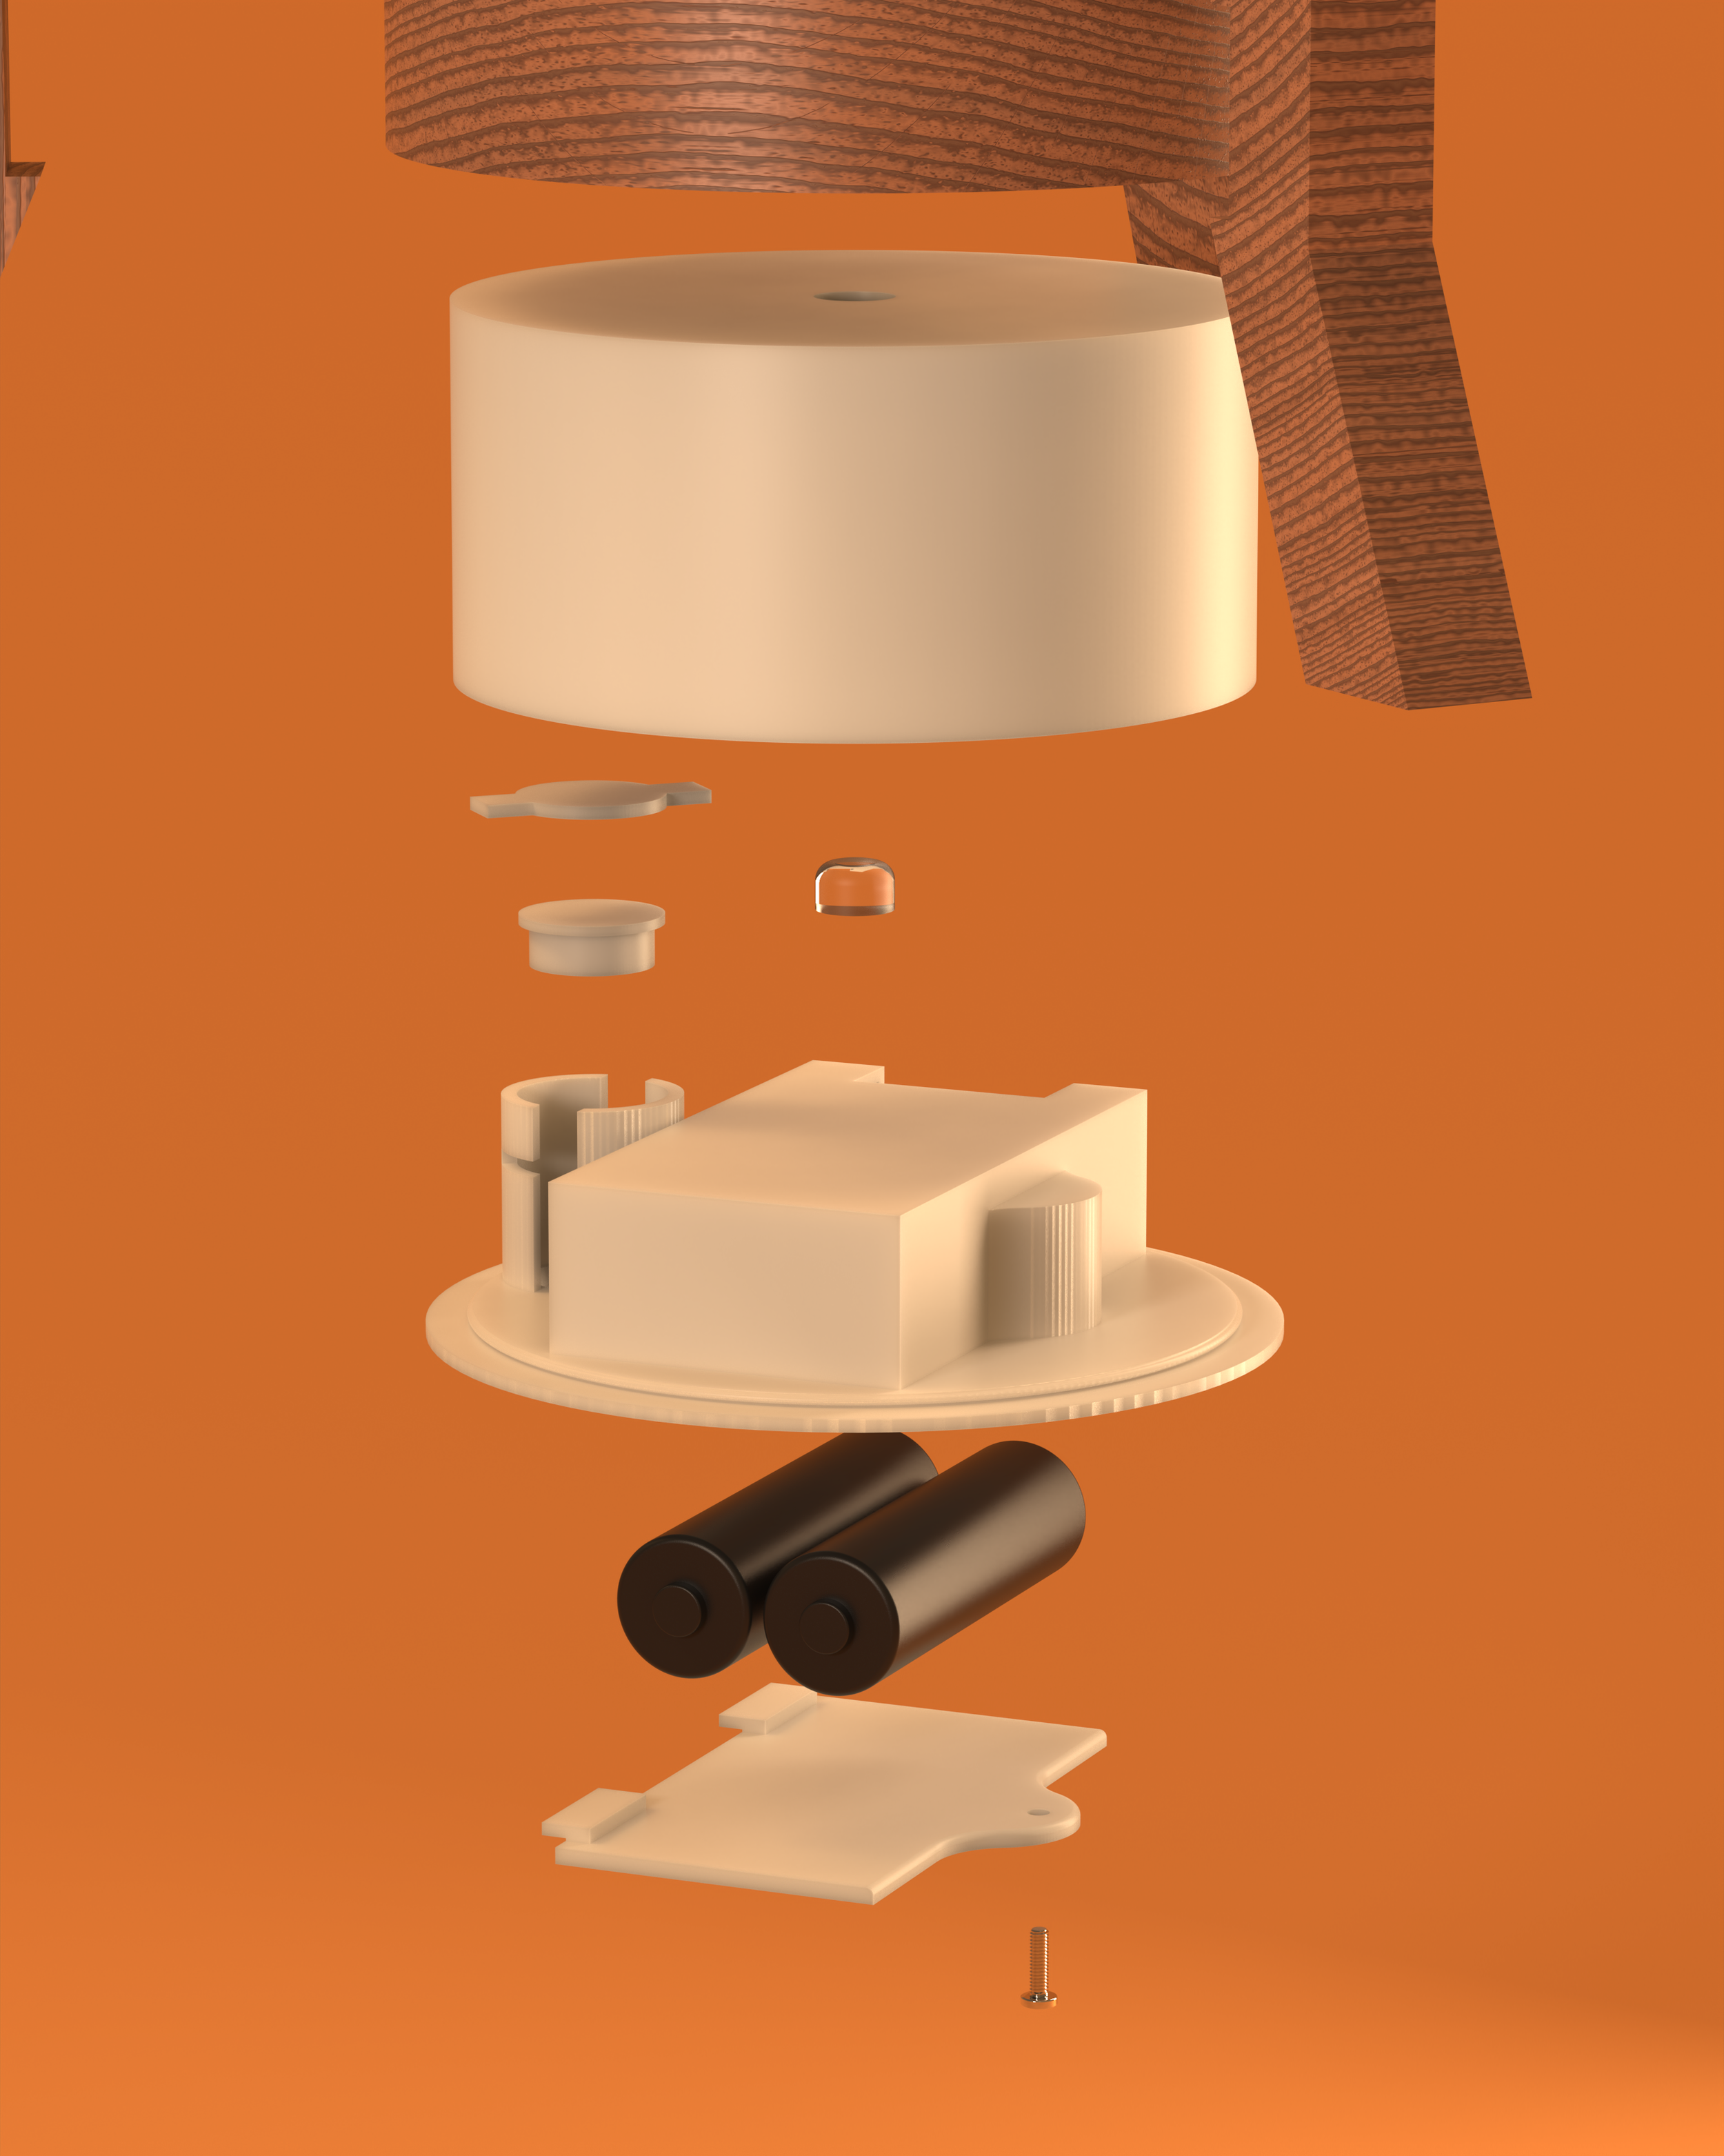
For the first print, my main focus was making sure that there was enough space for the inside components. This test print gave me a better idea of that, helped me realize that I needed to make specific pieces for the button, and that I would have to add some cuts to the legs to make sure that they would fit together and sit in the right spot on the base.
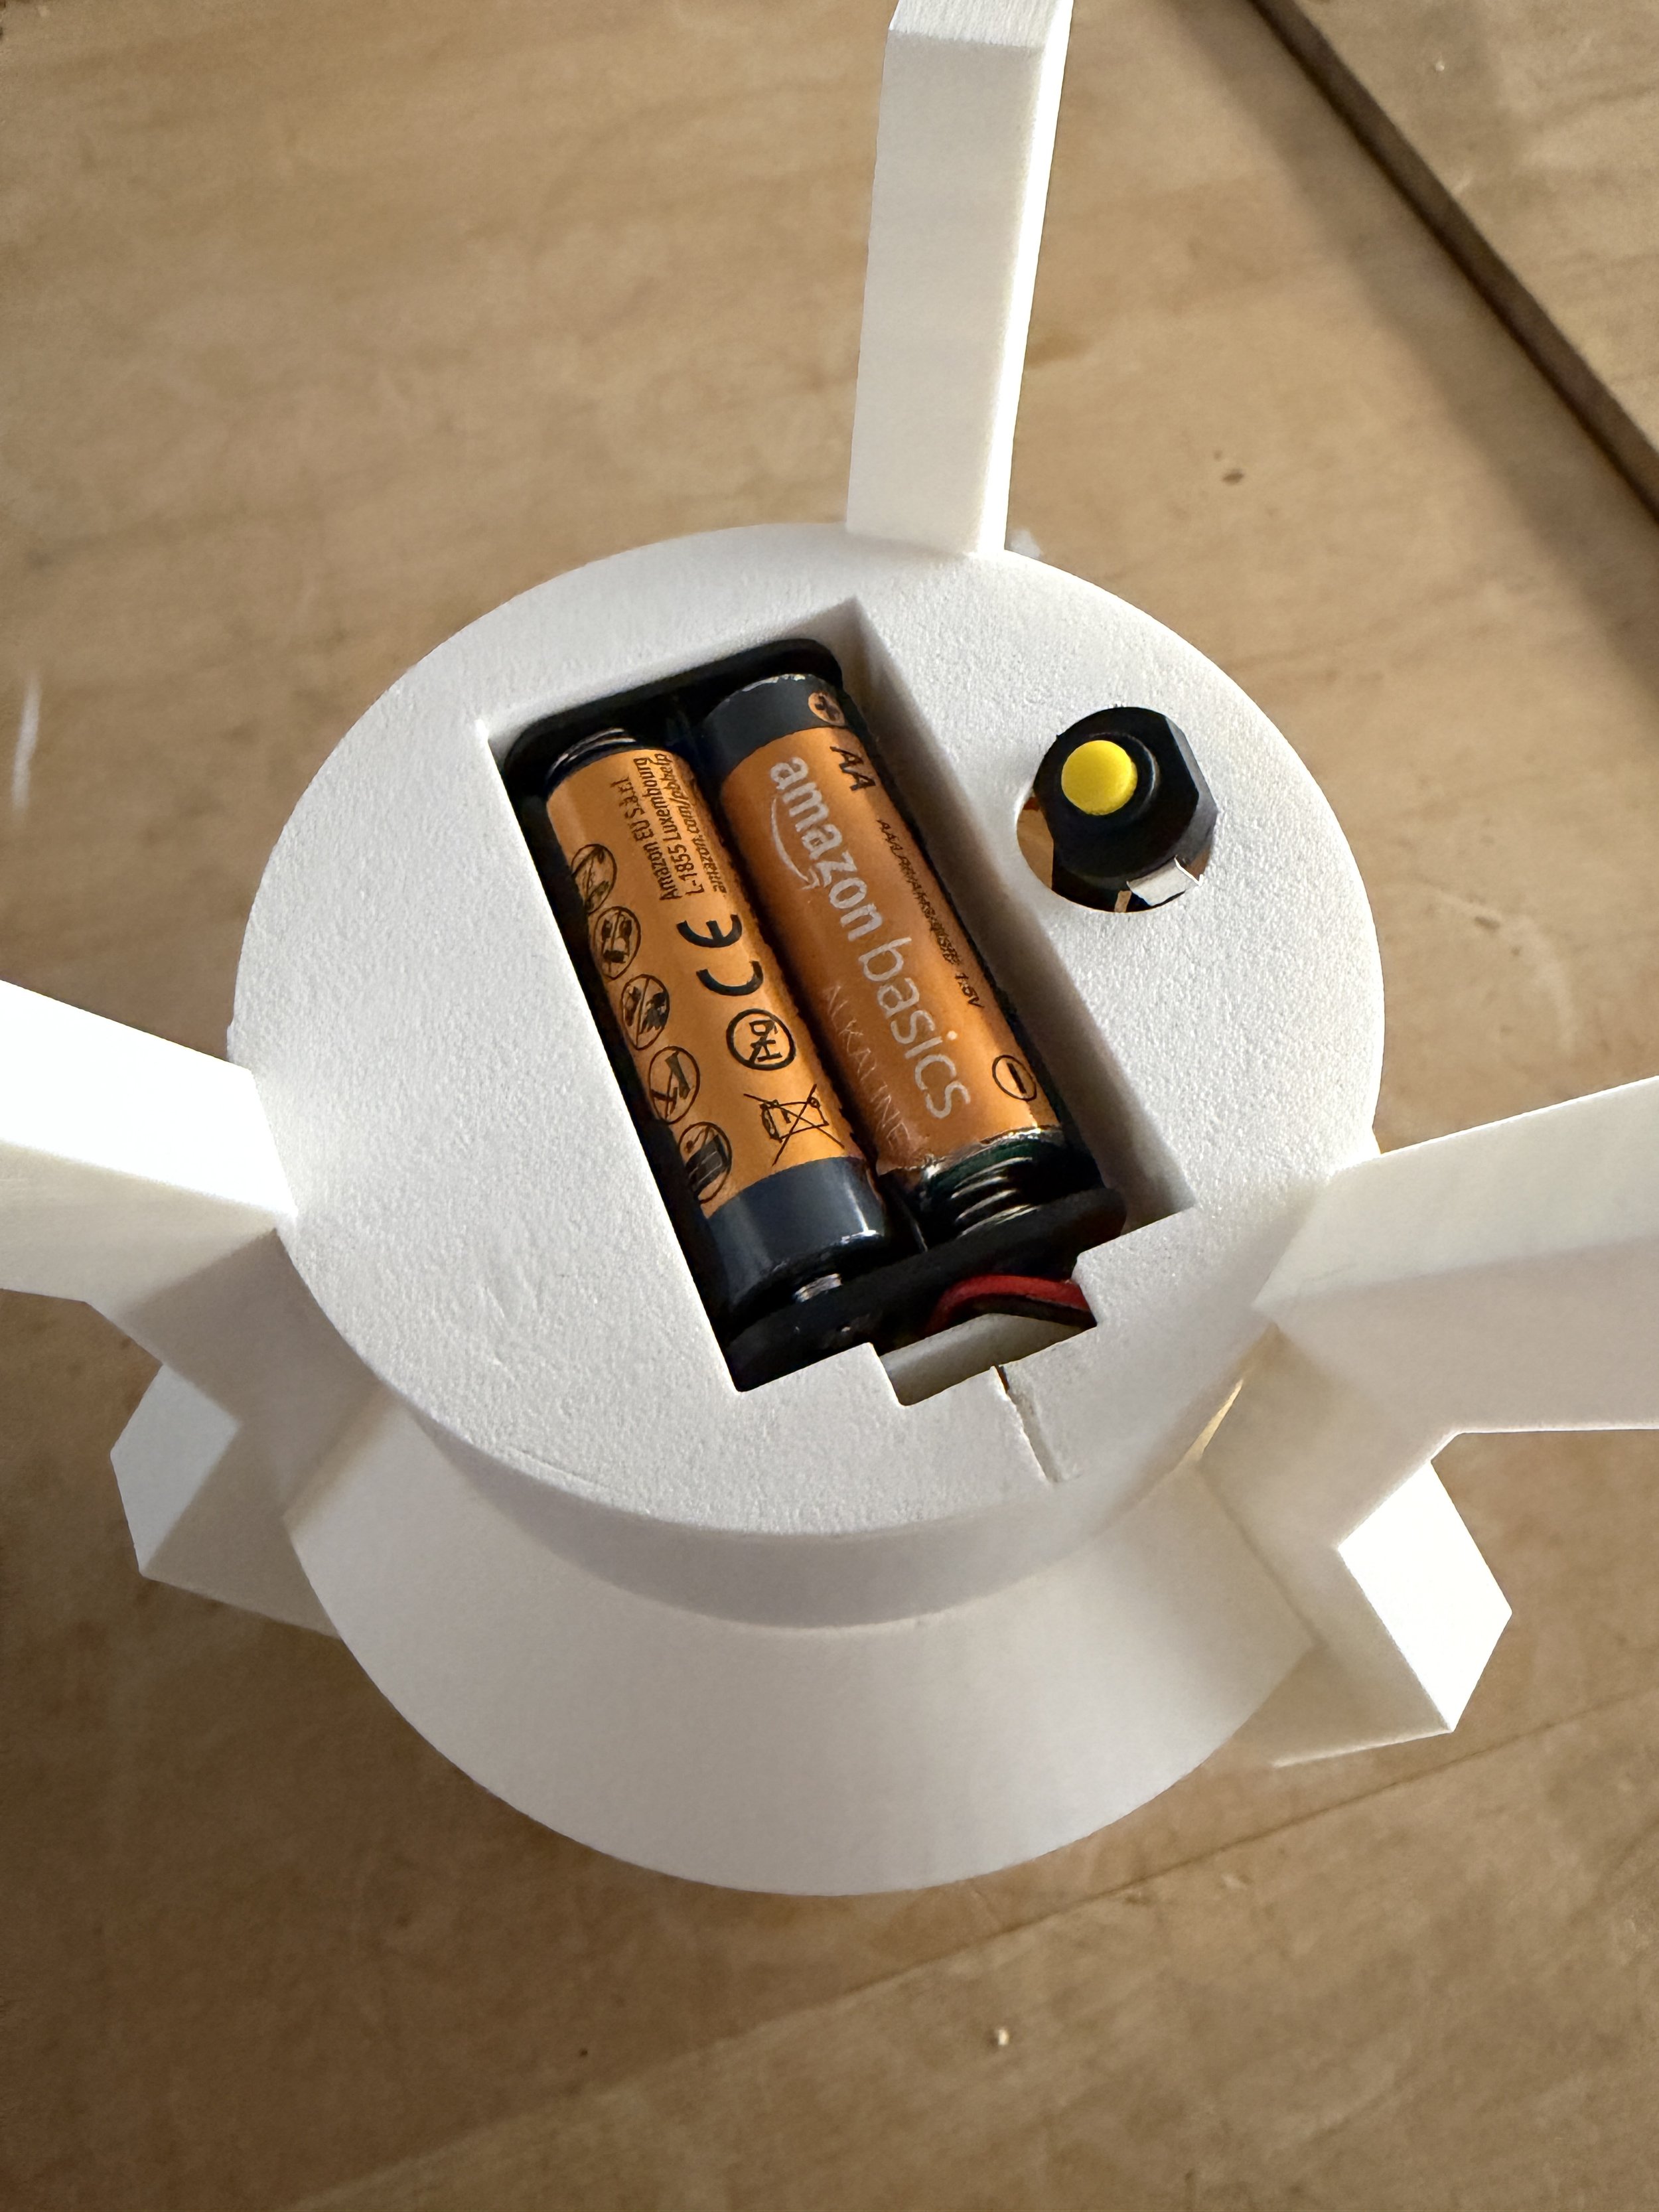
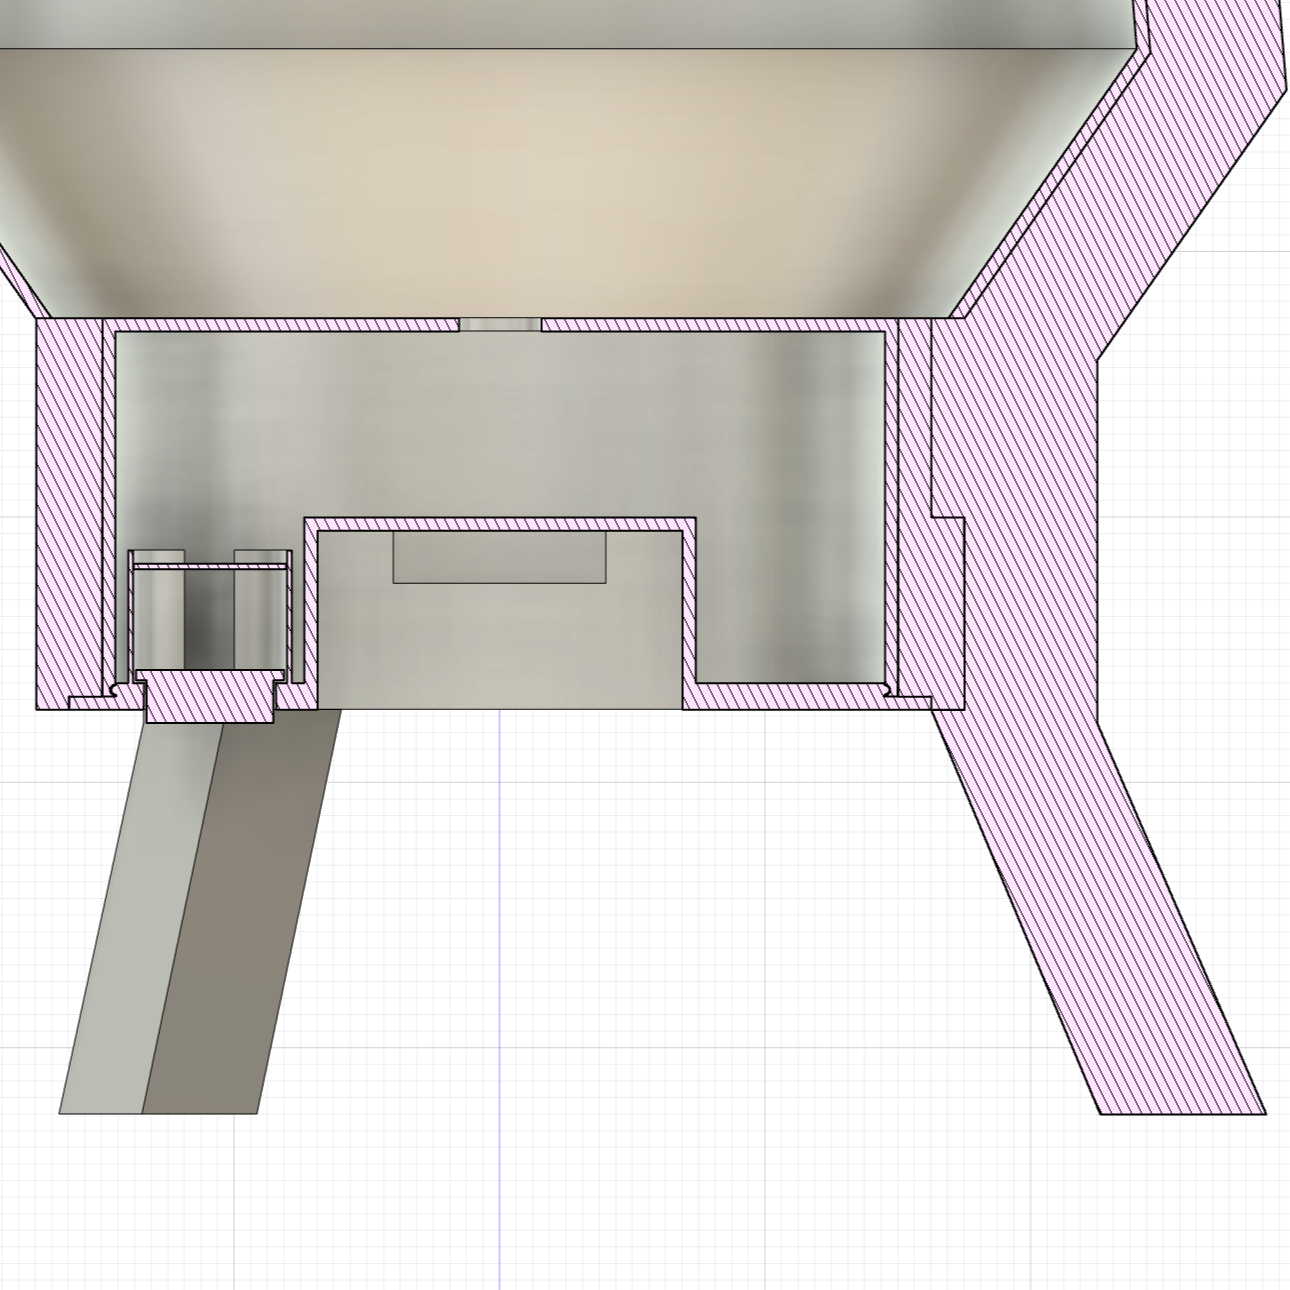
After the first model, I refined the bottom piece, testing the allowance of the bottom piece to make sure it snaps in, testing the button cover and case, as well as fixing the size of the battery compartment and adding a battery cover. I had to do a lot of testing for the button case, as the top part kept snapping due to it not being thick enough. But eventually, I got it to the correct thickness. I also did quite a bit of testing with the battery cover, as I had to do a few prints to get the sizing right for the screw.
Refining the CAD Model


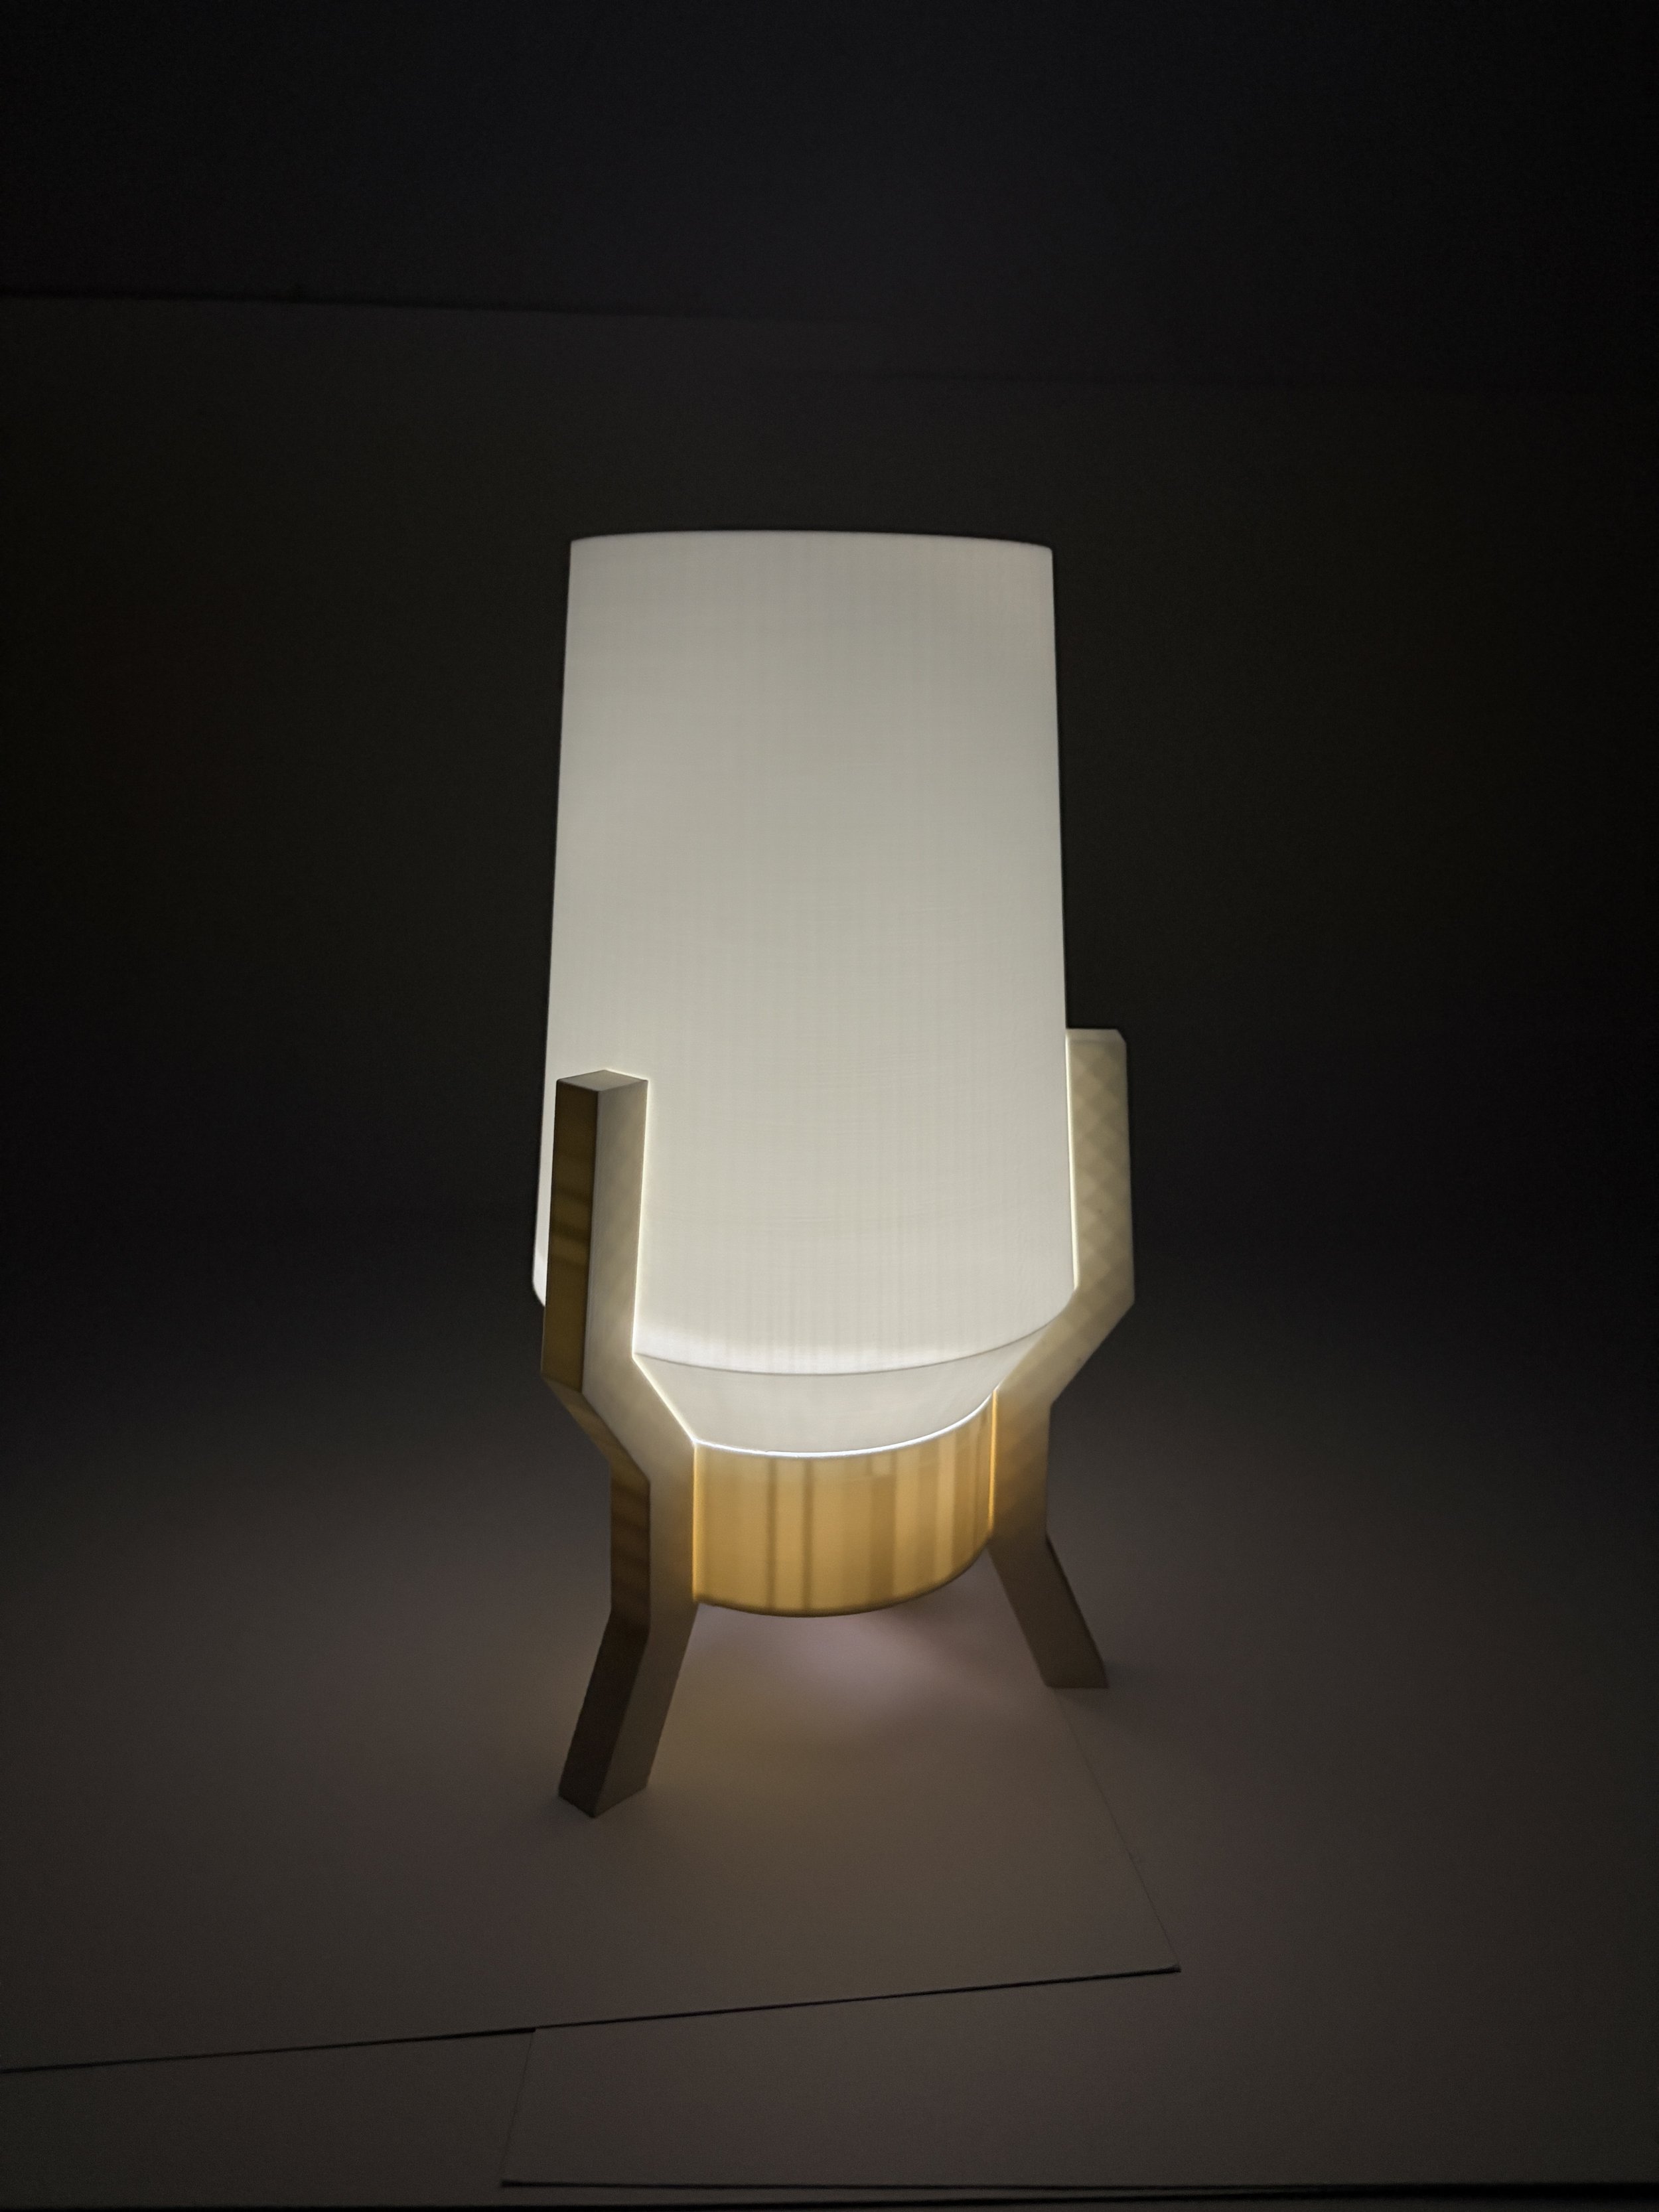
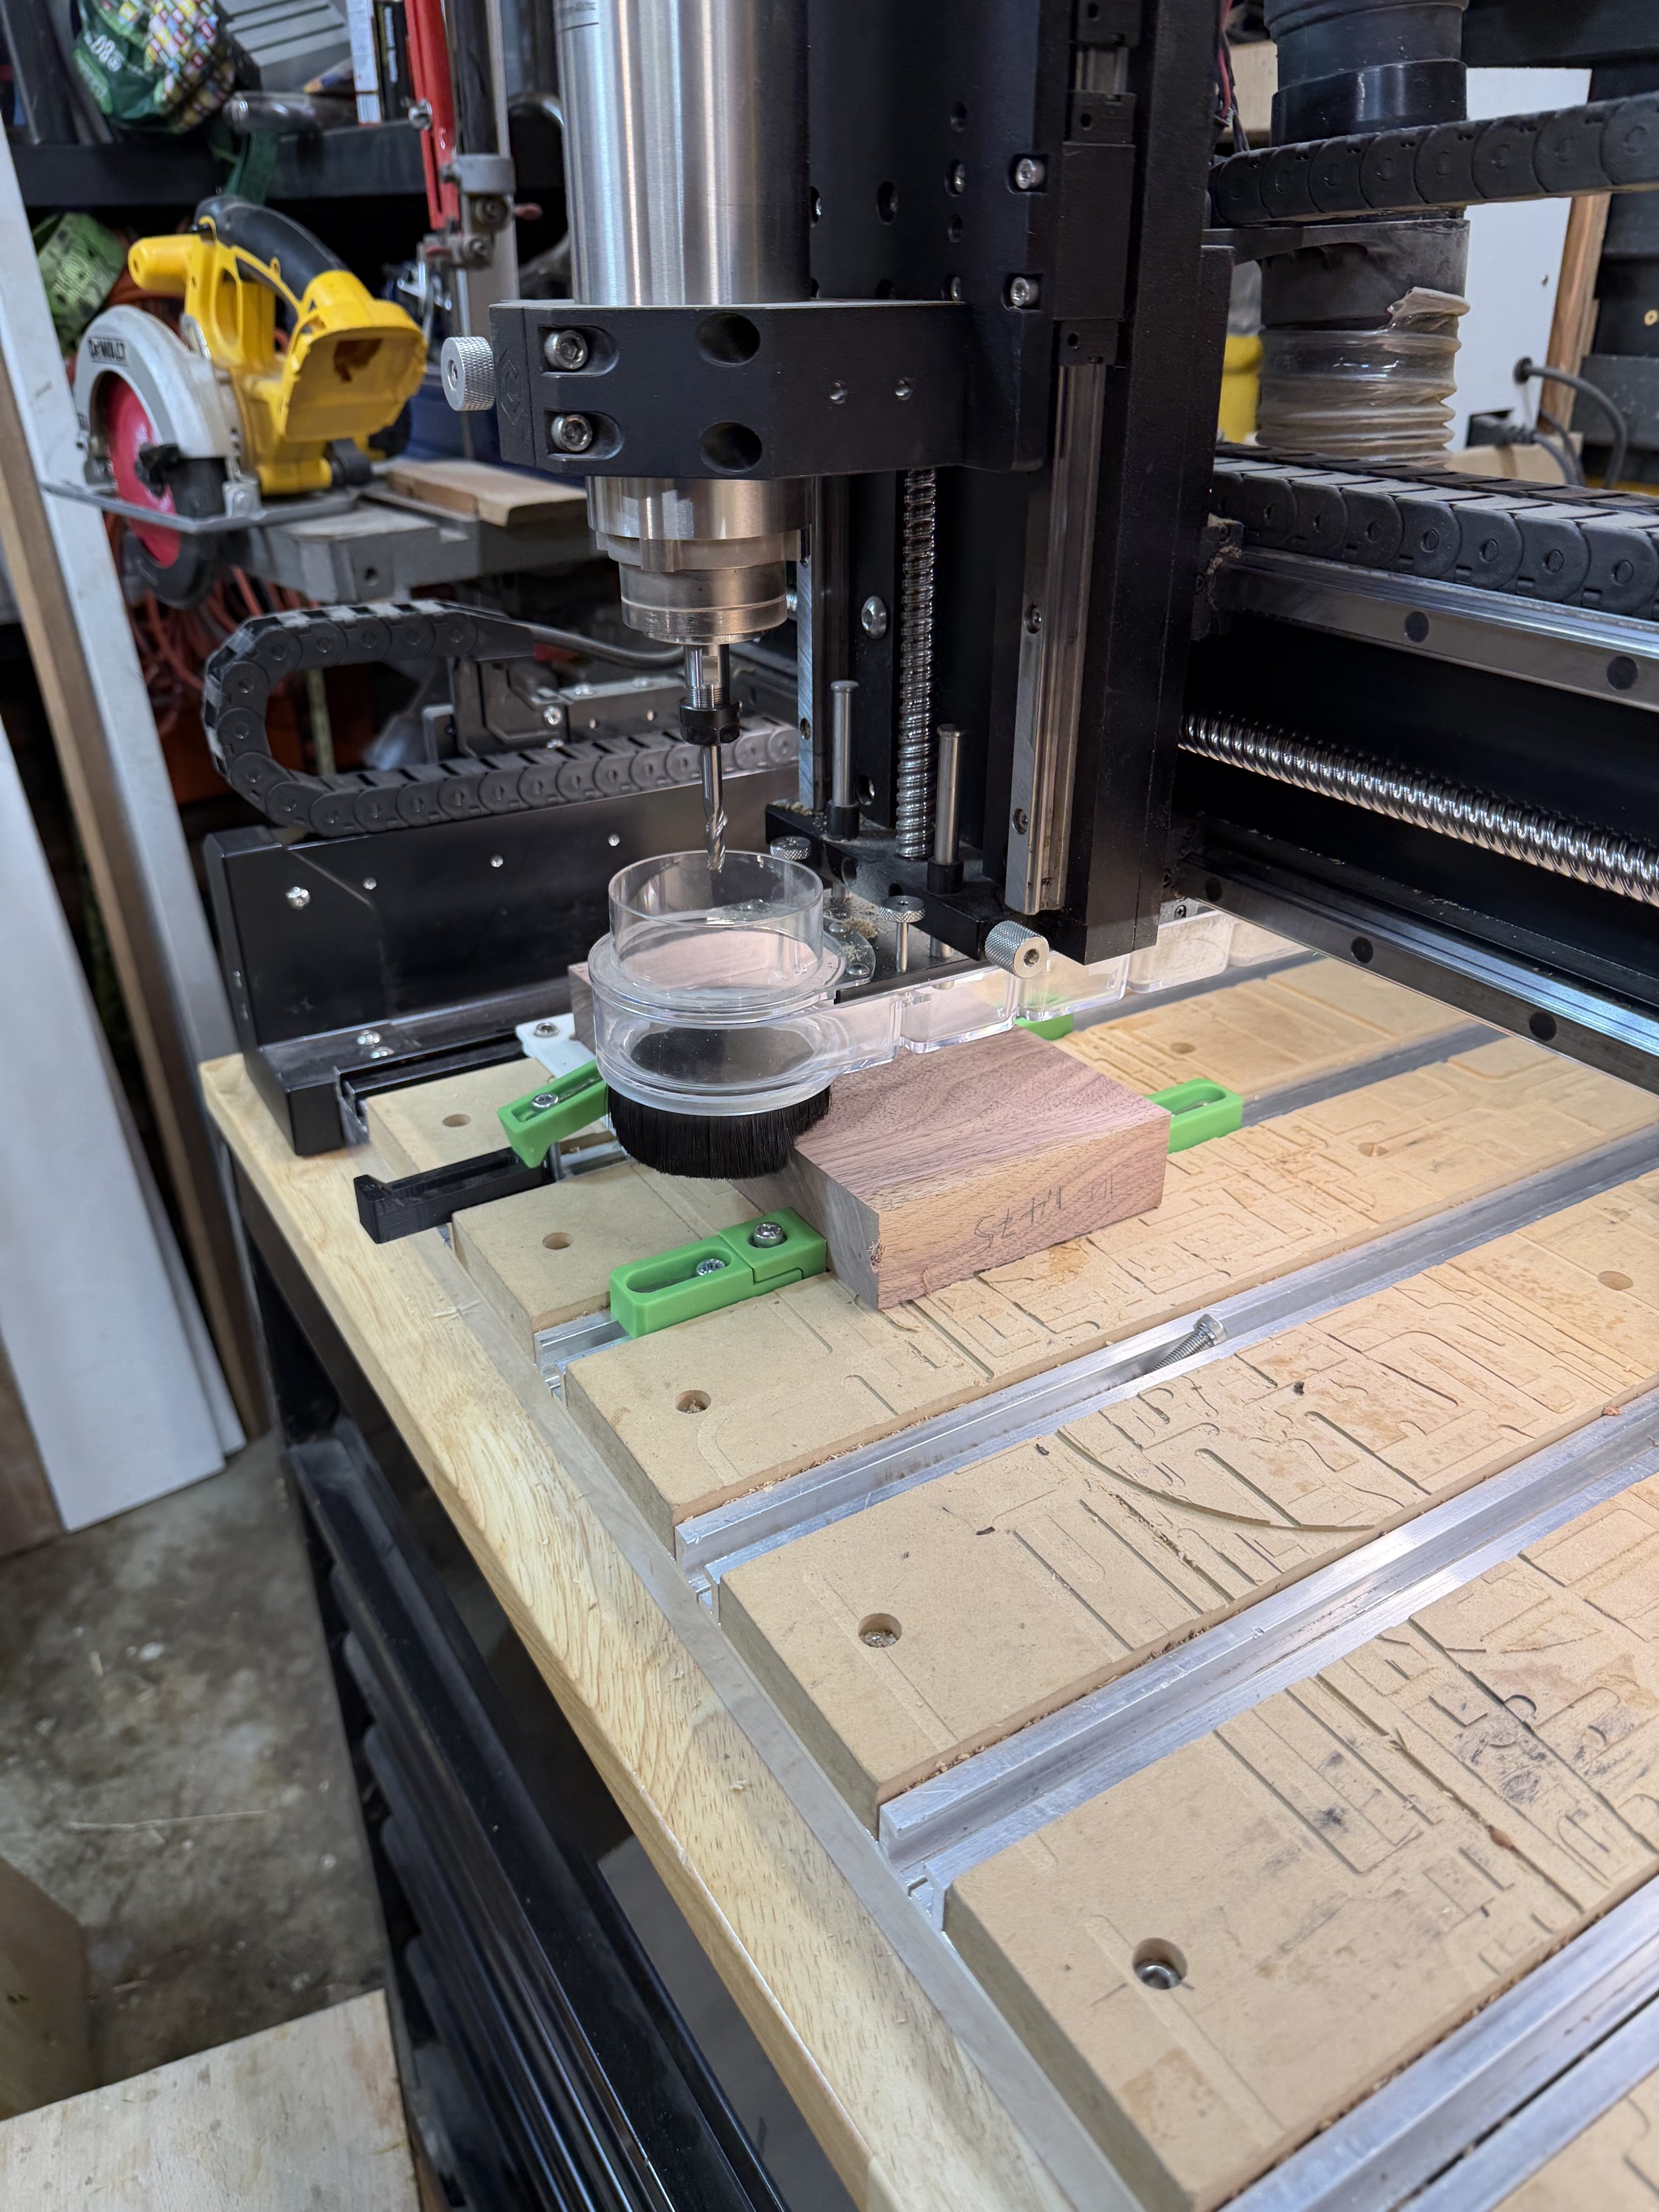
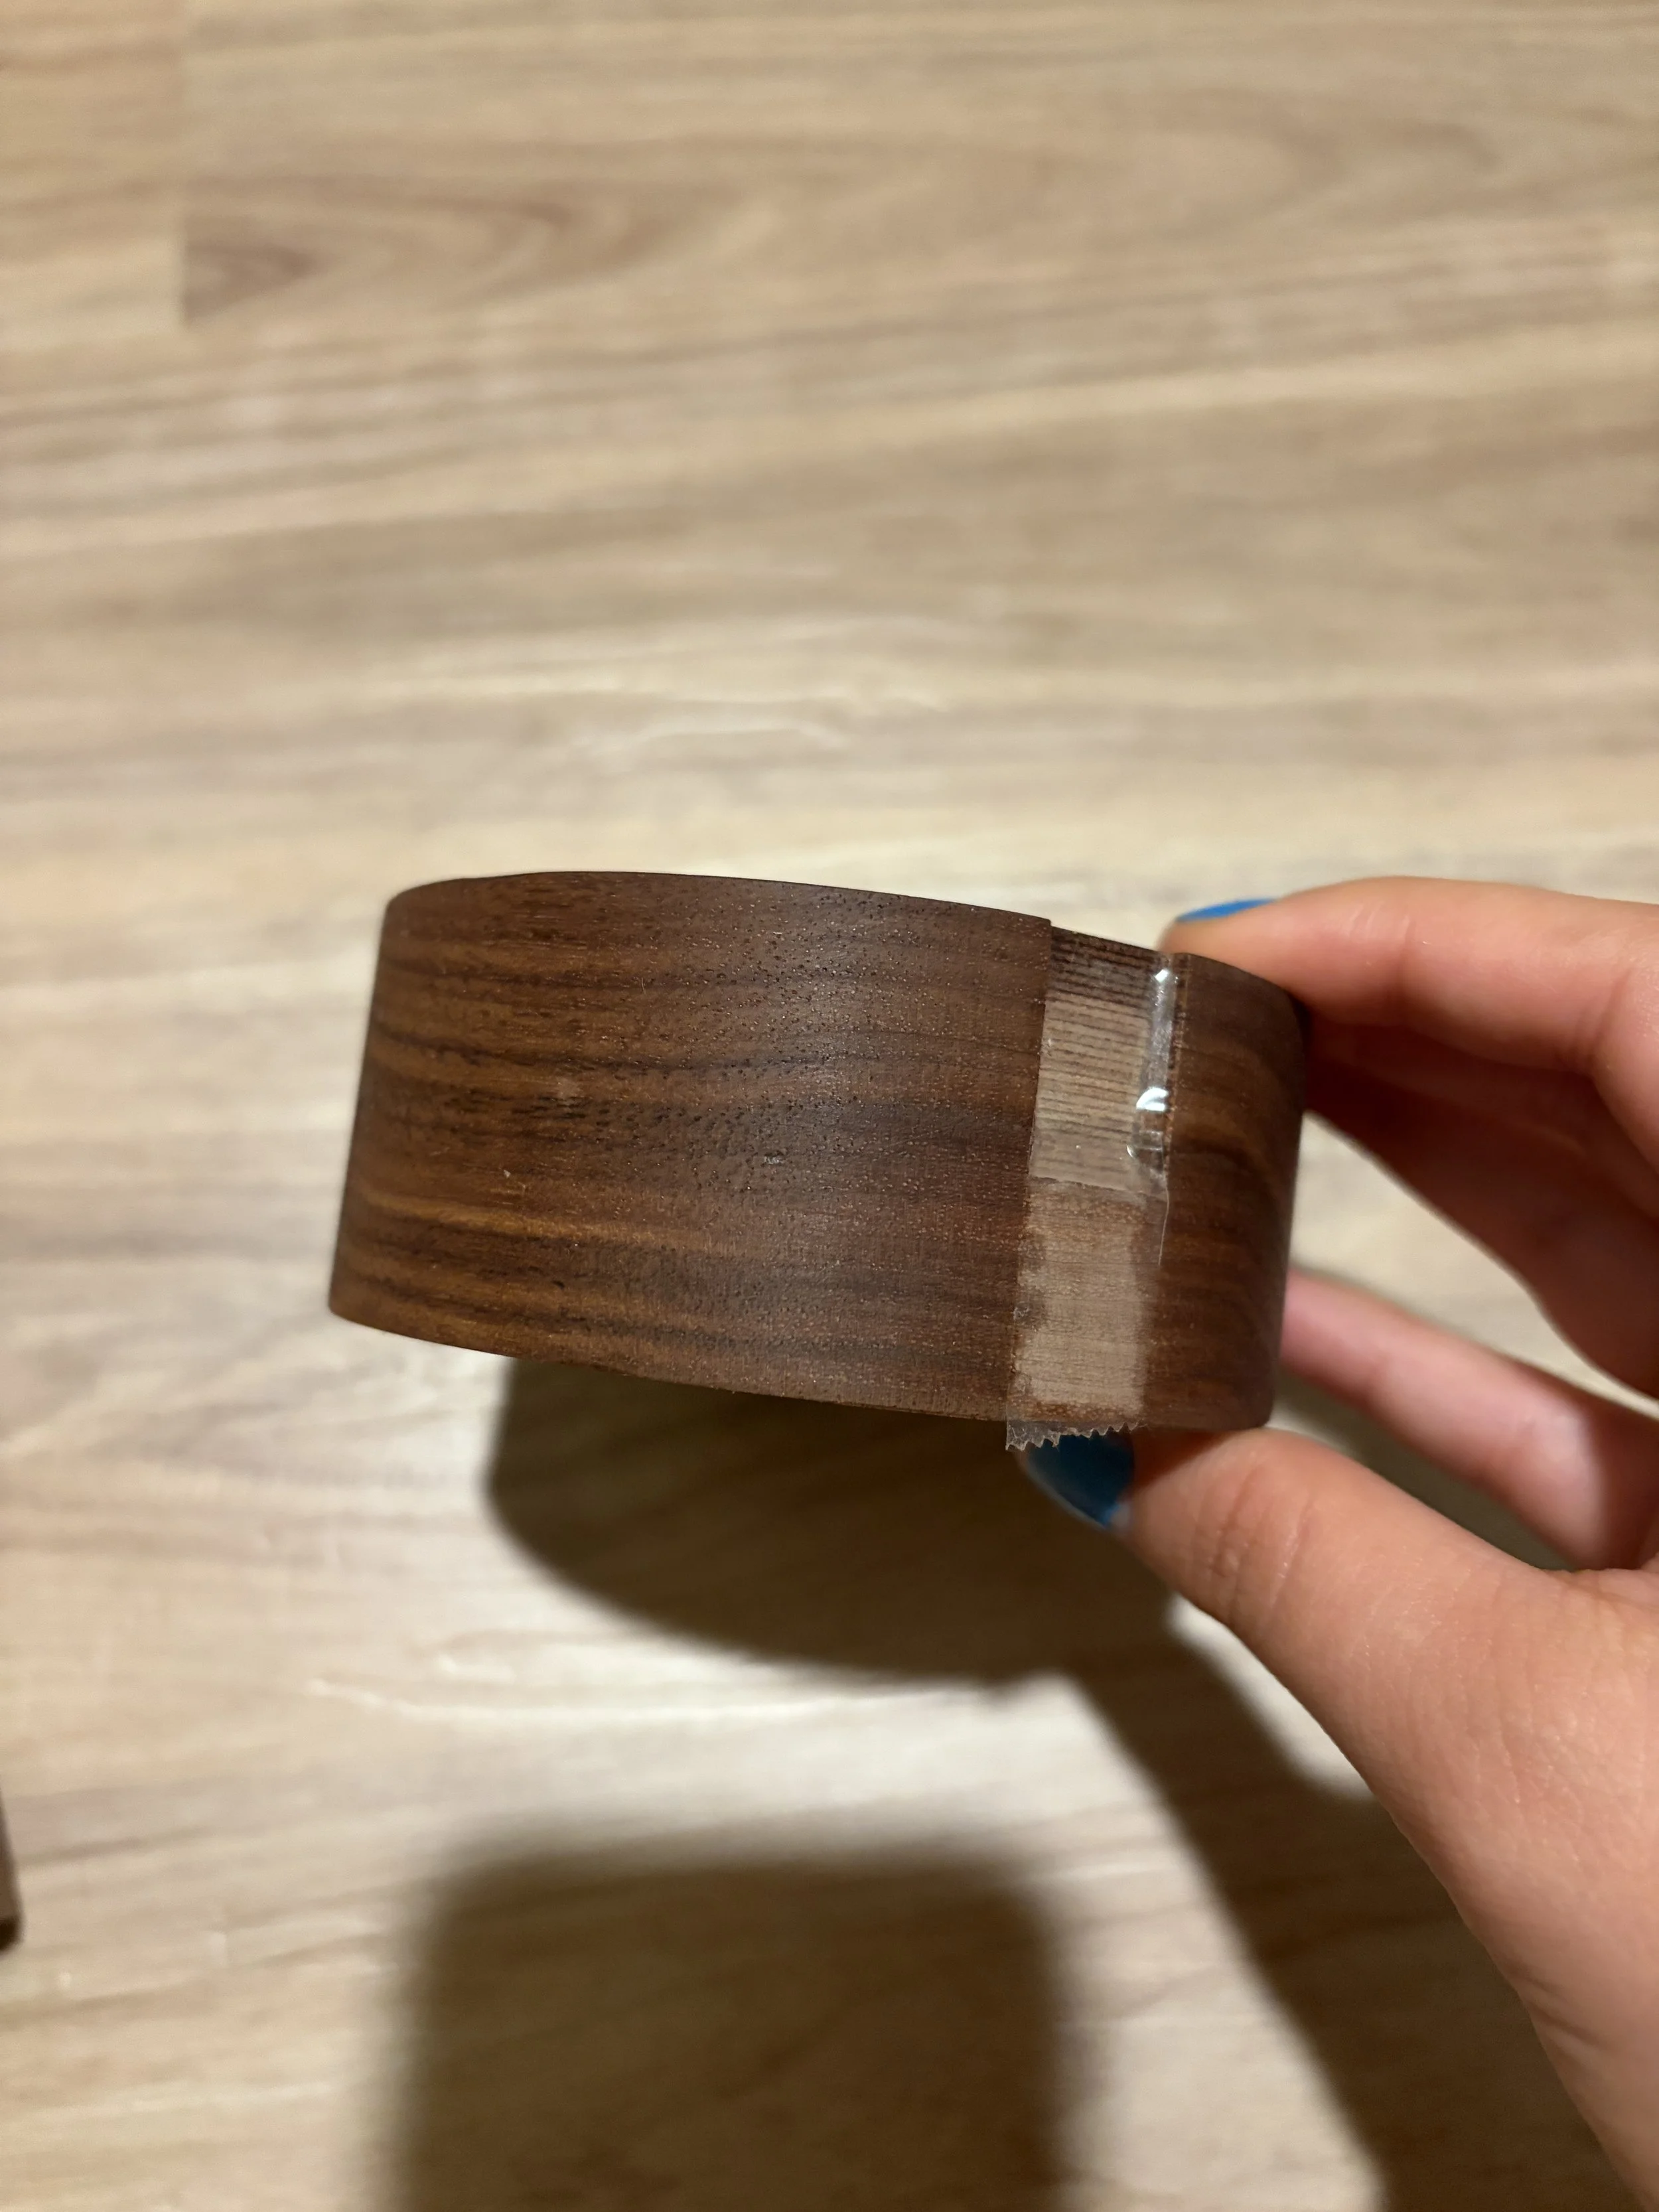
Making the Final Prototype
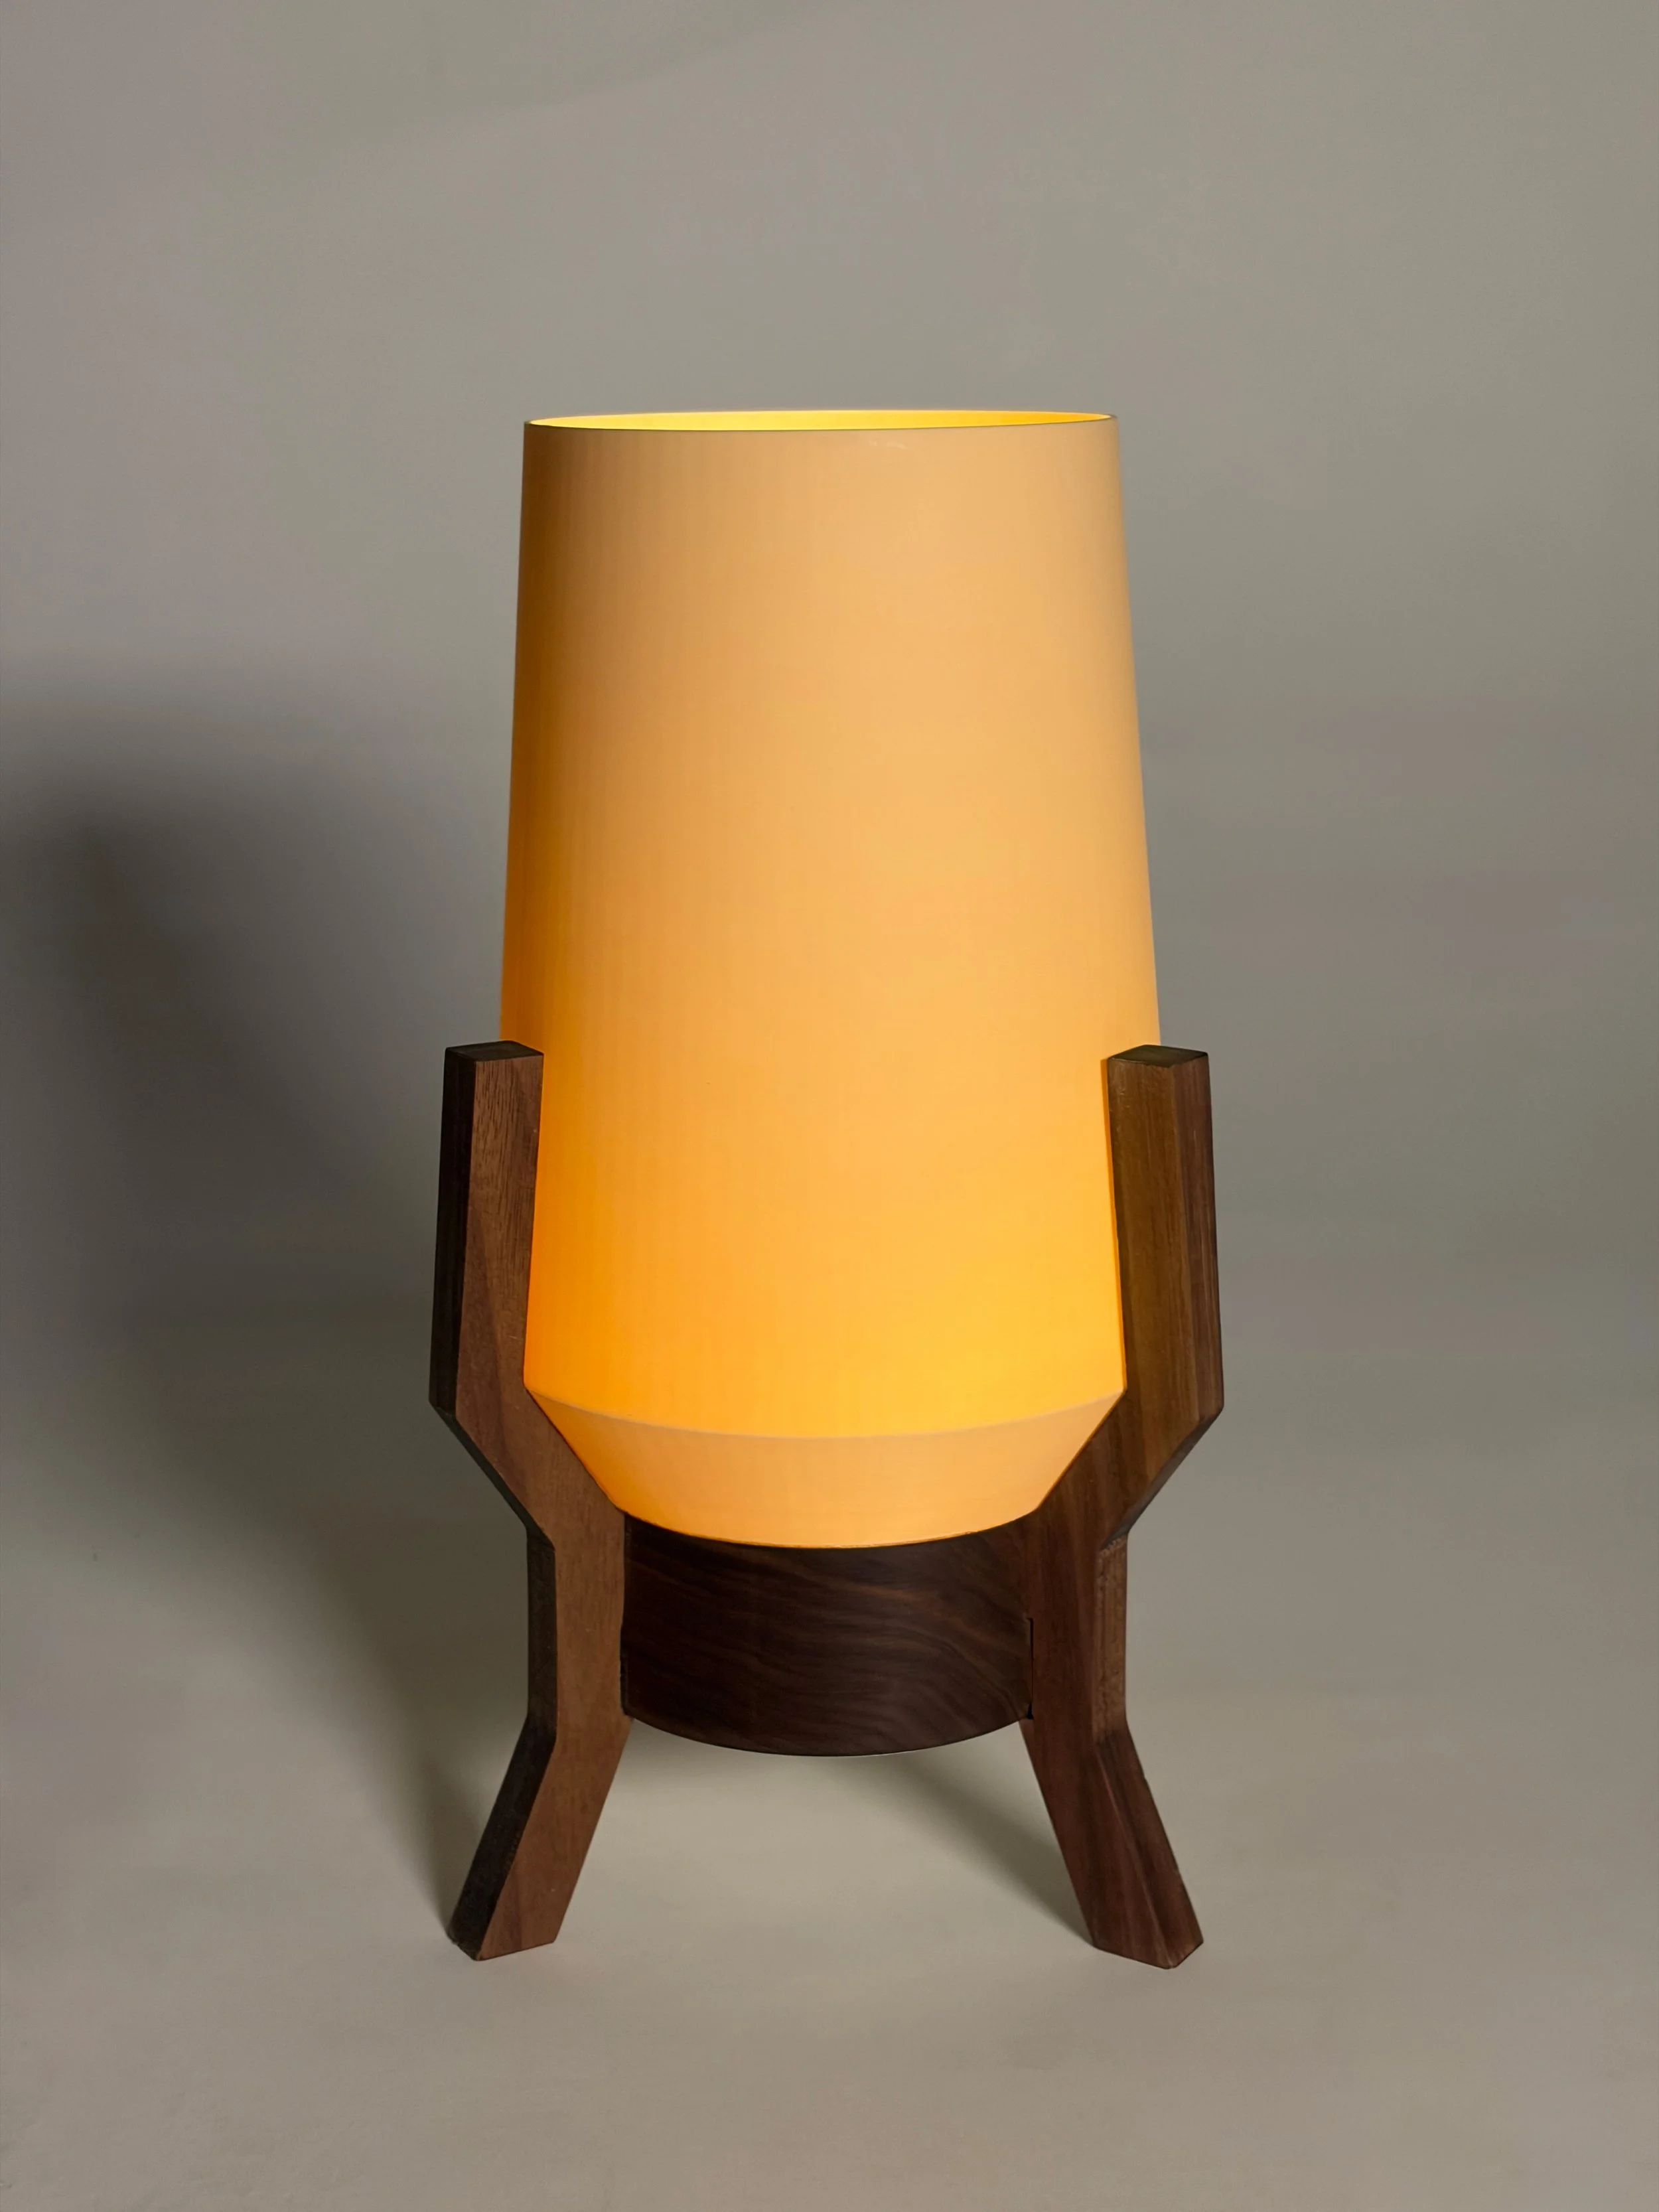
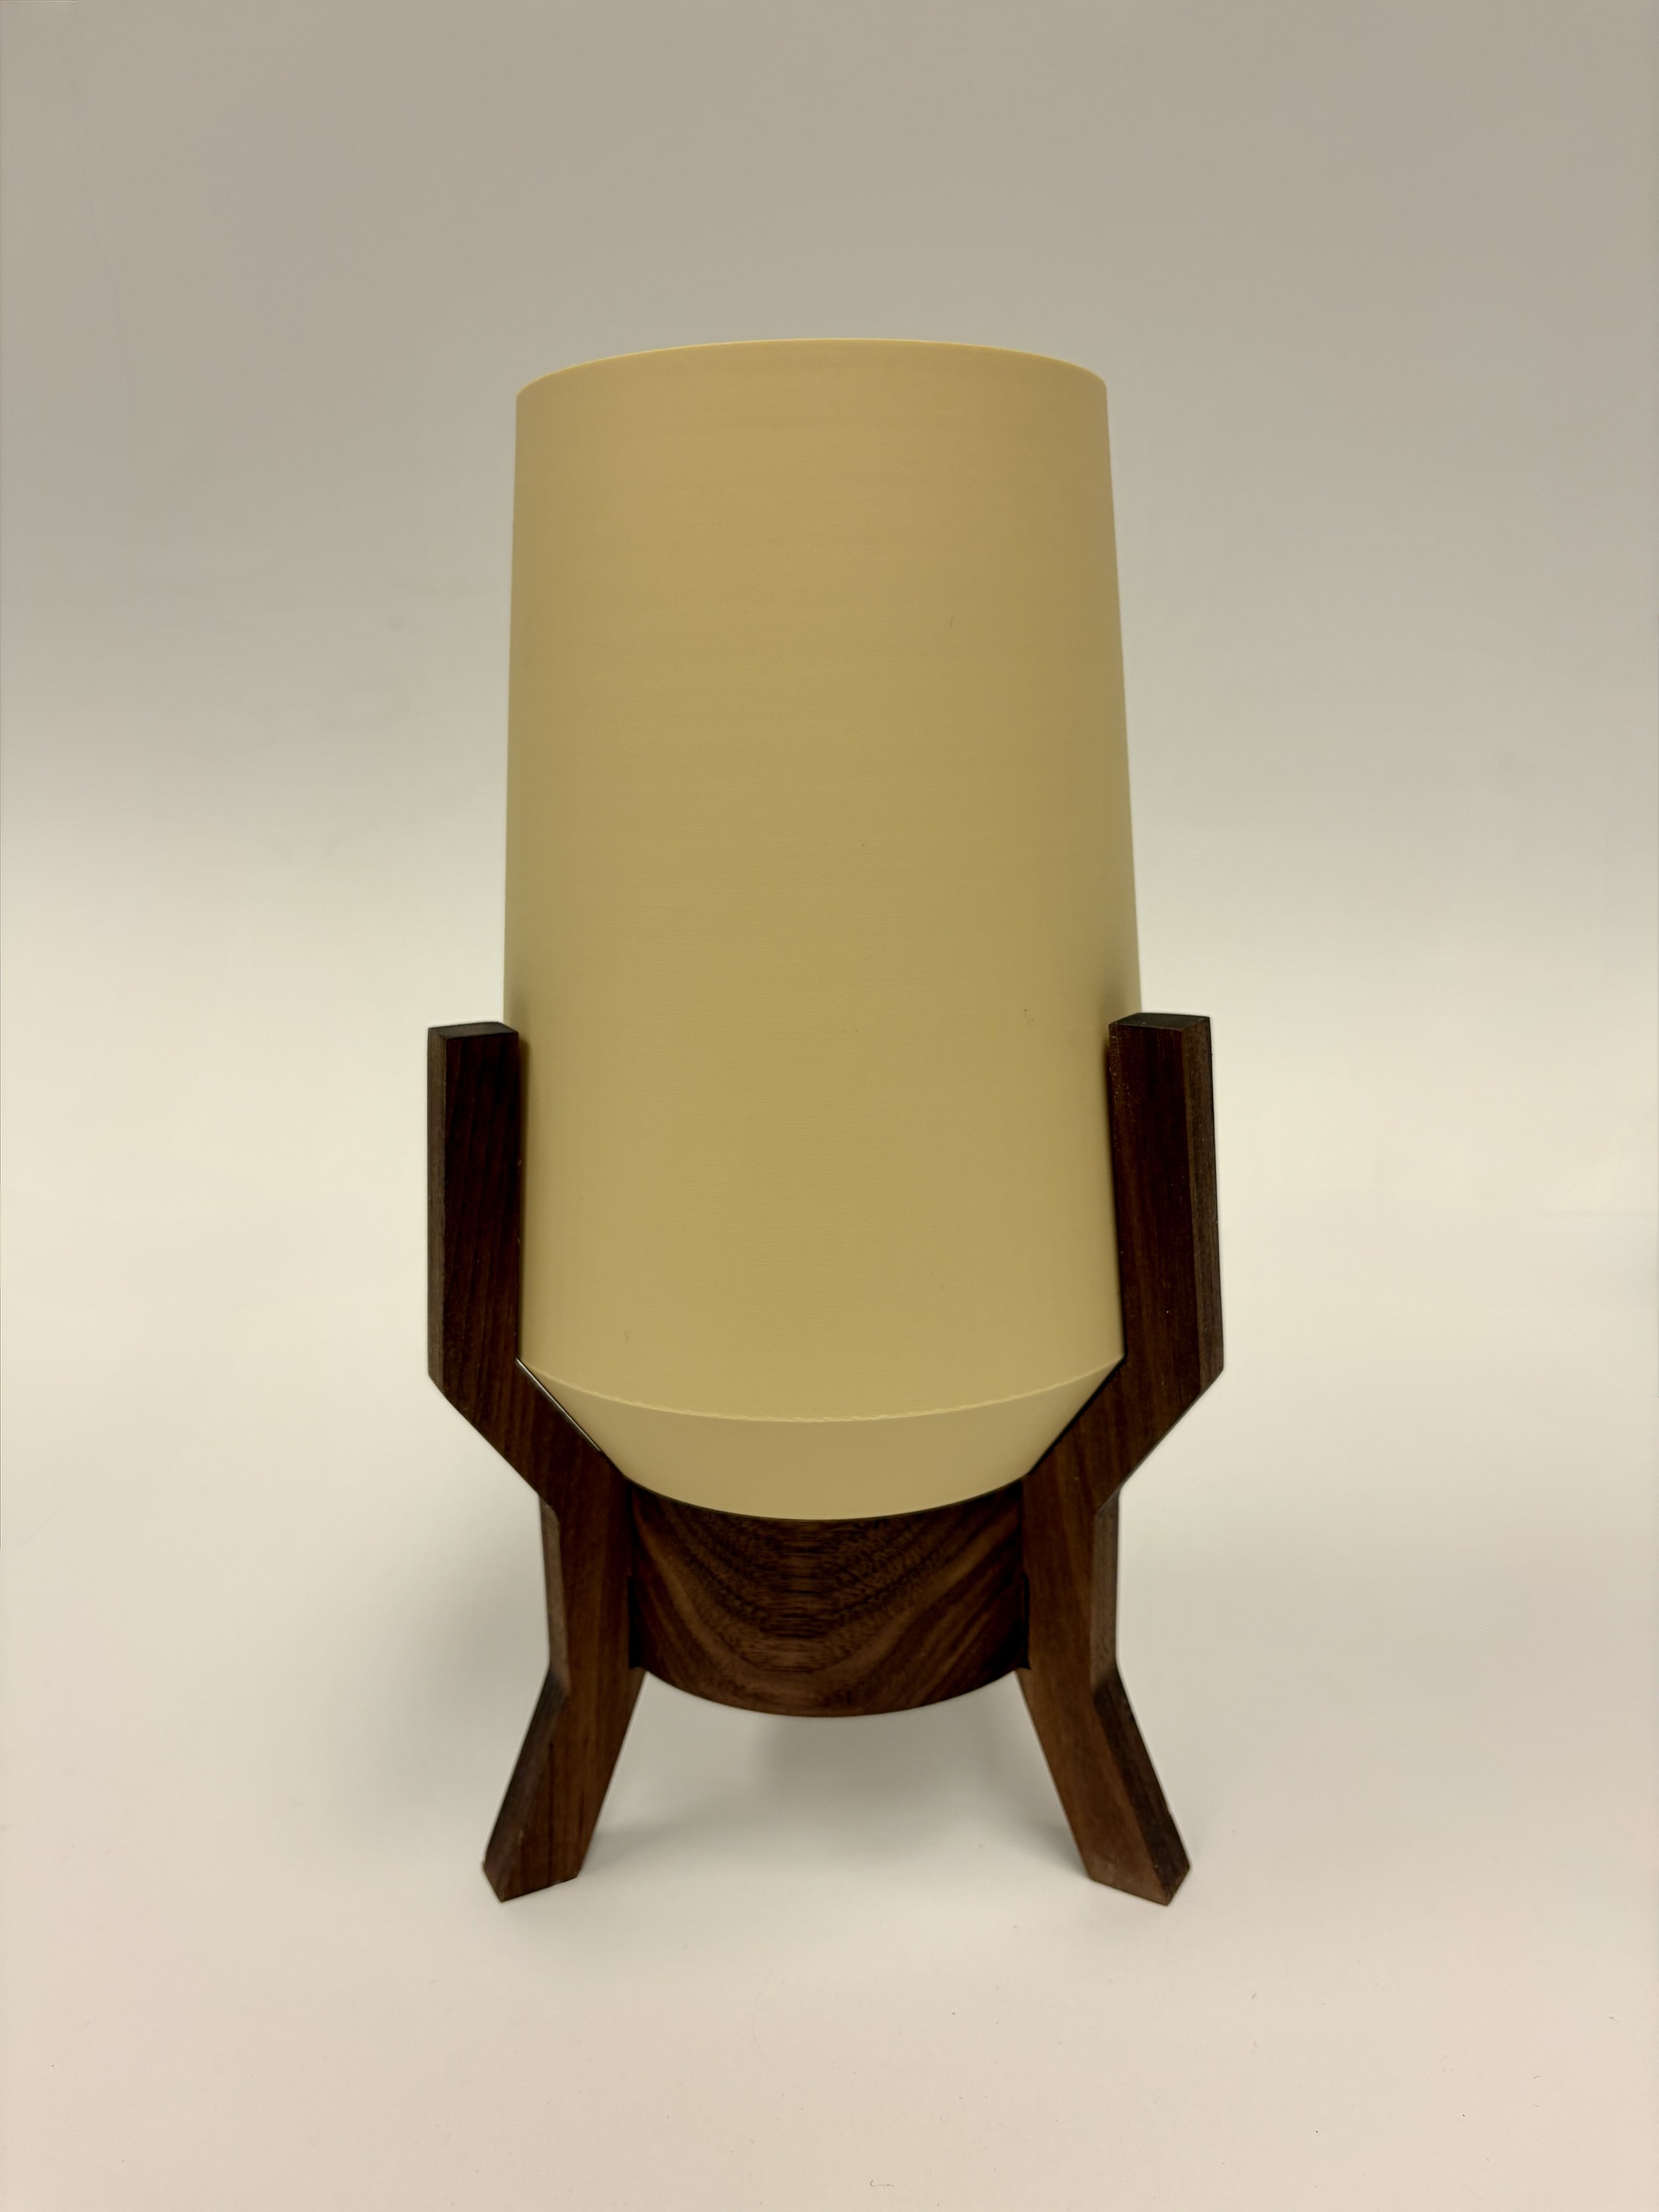
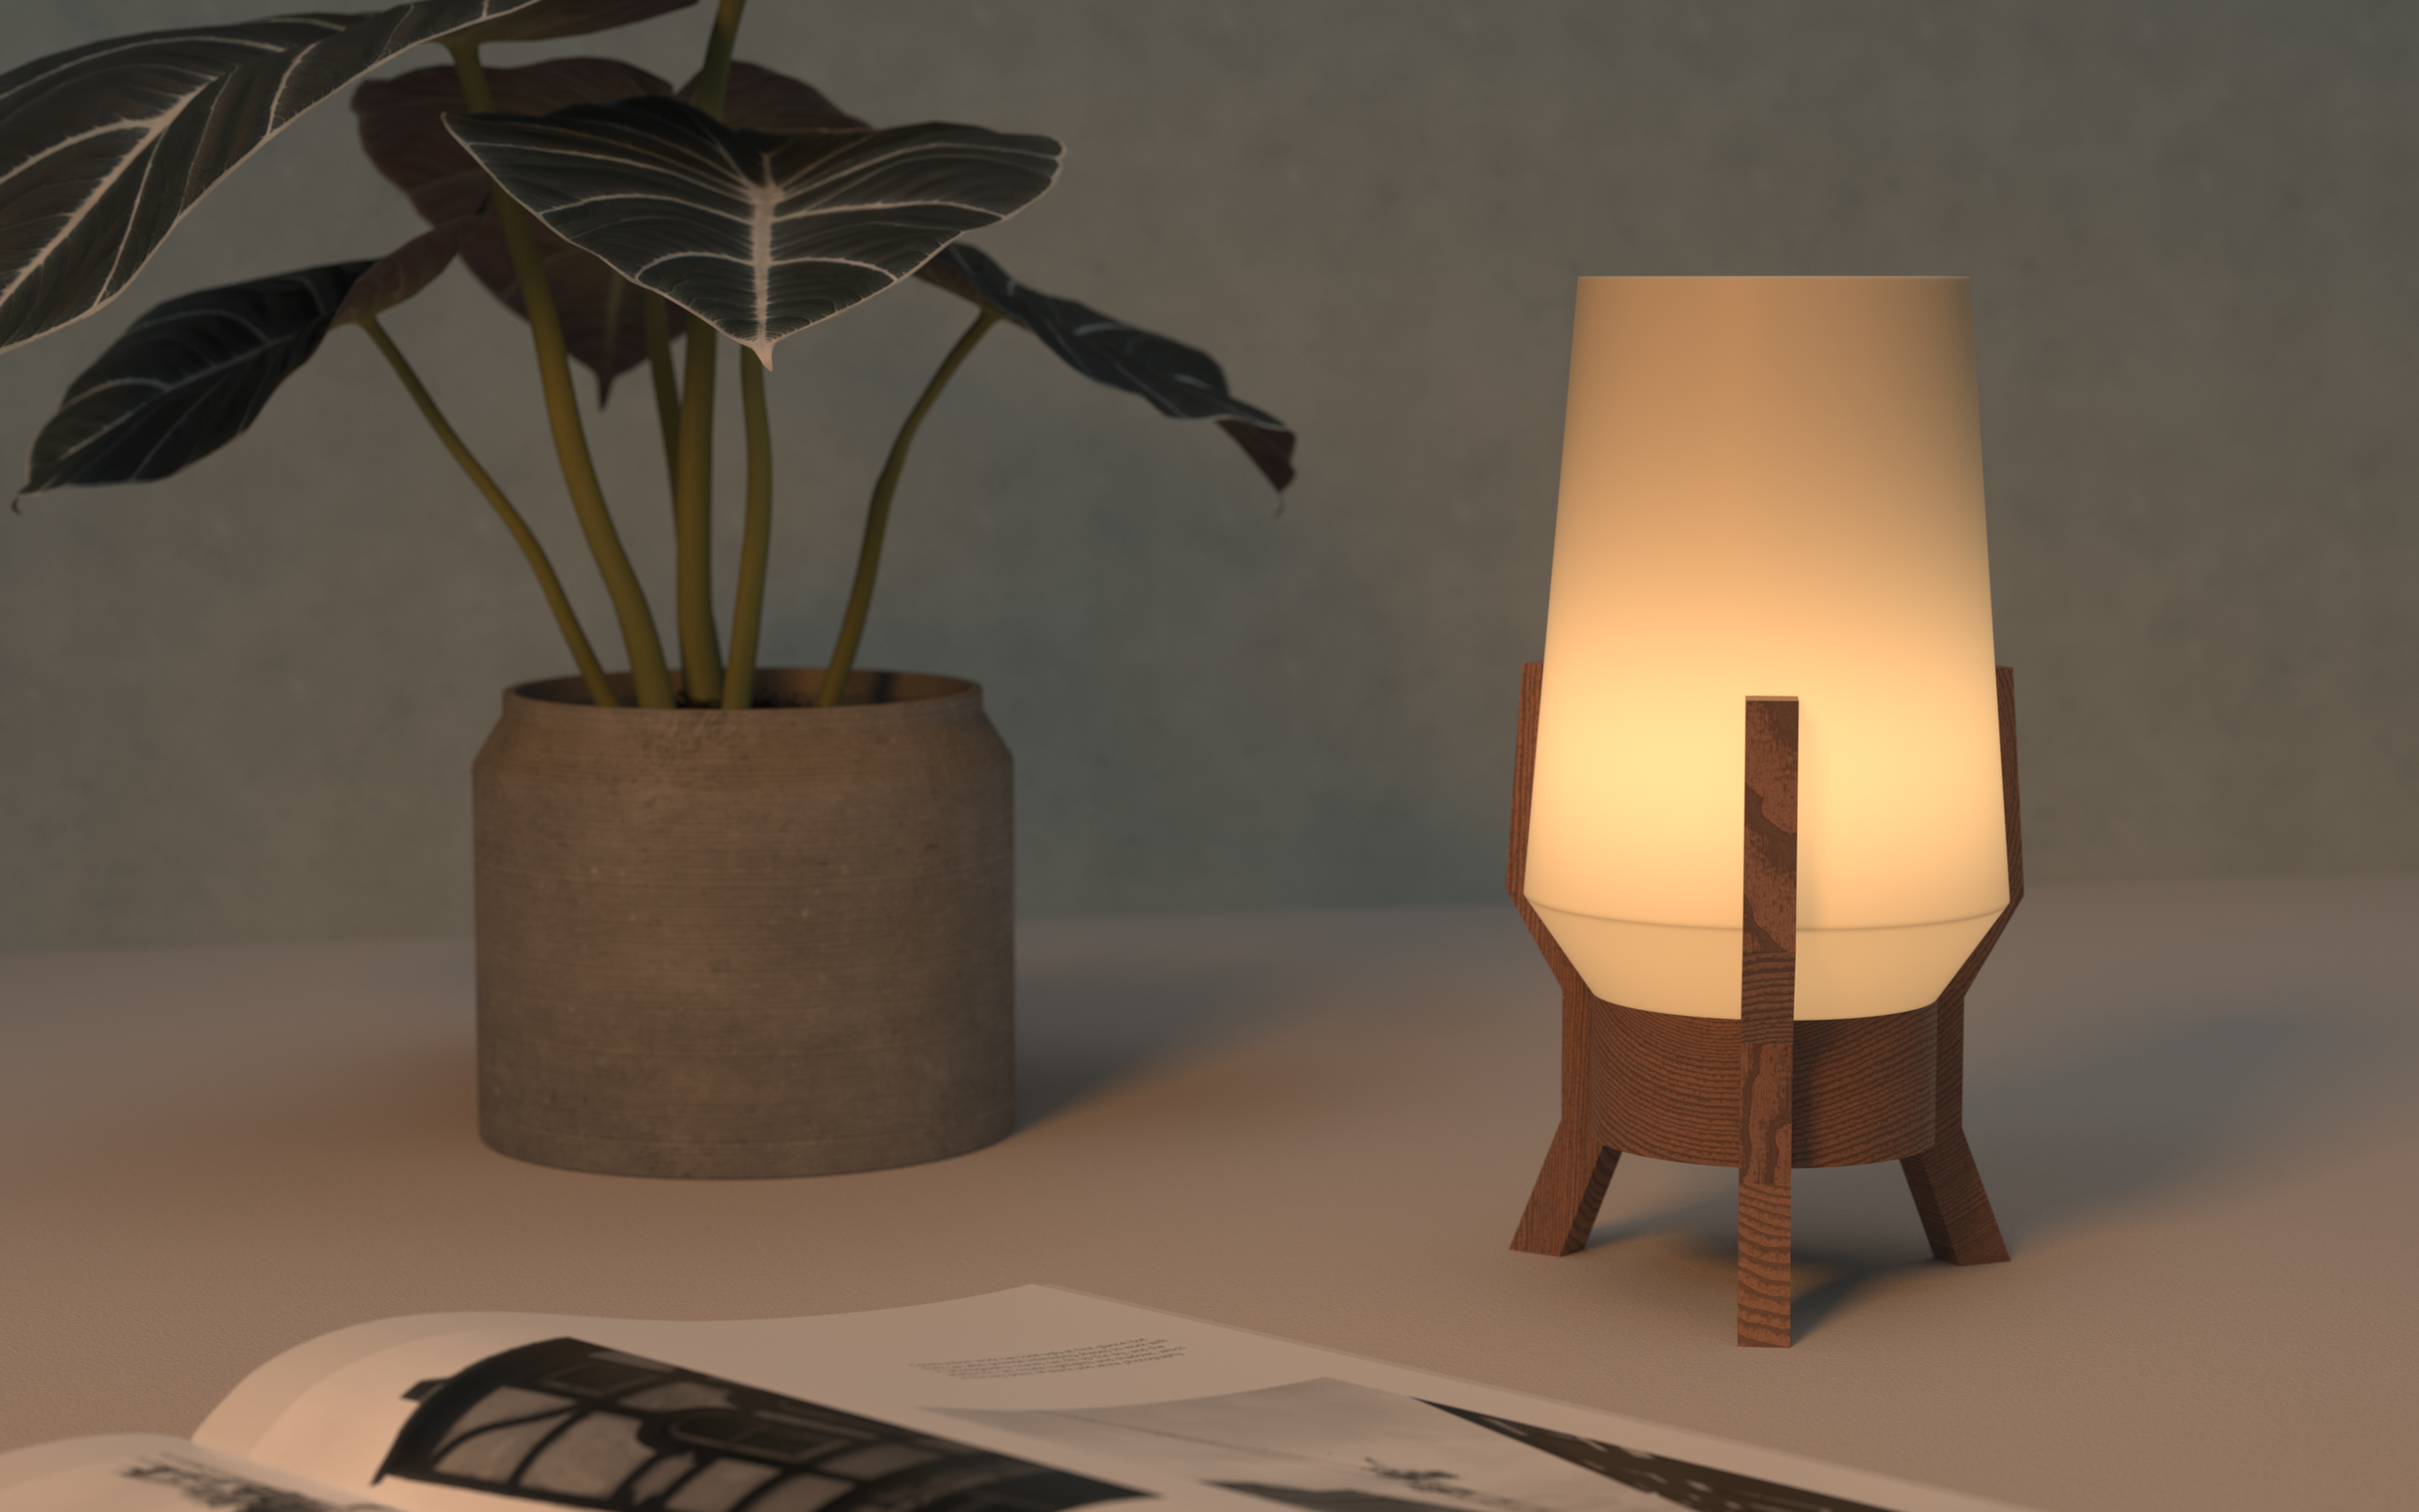
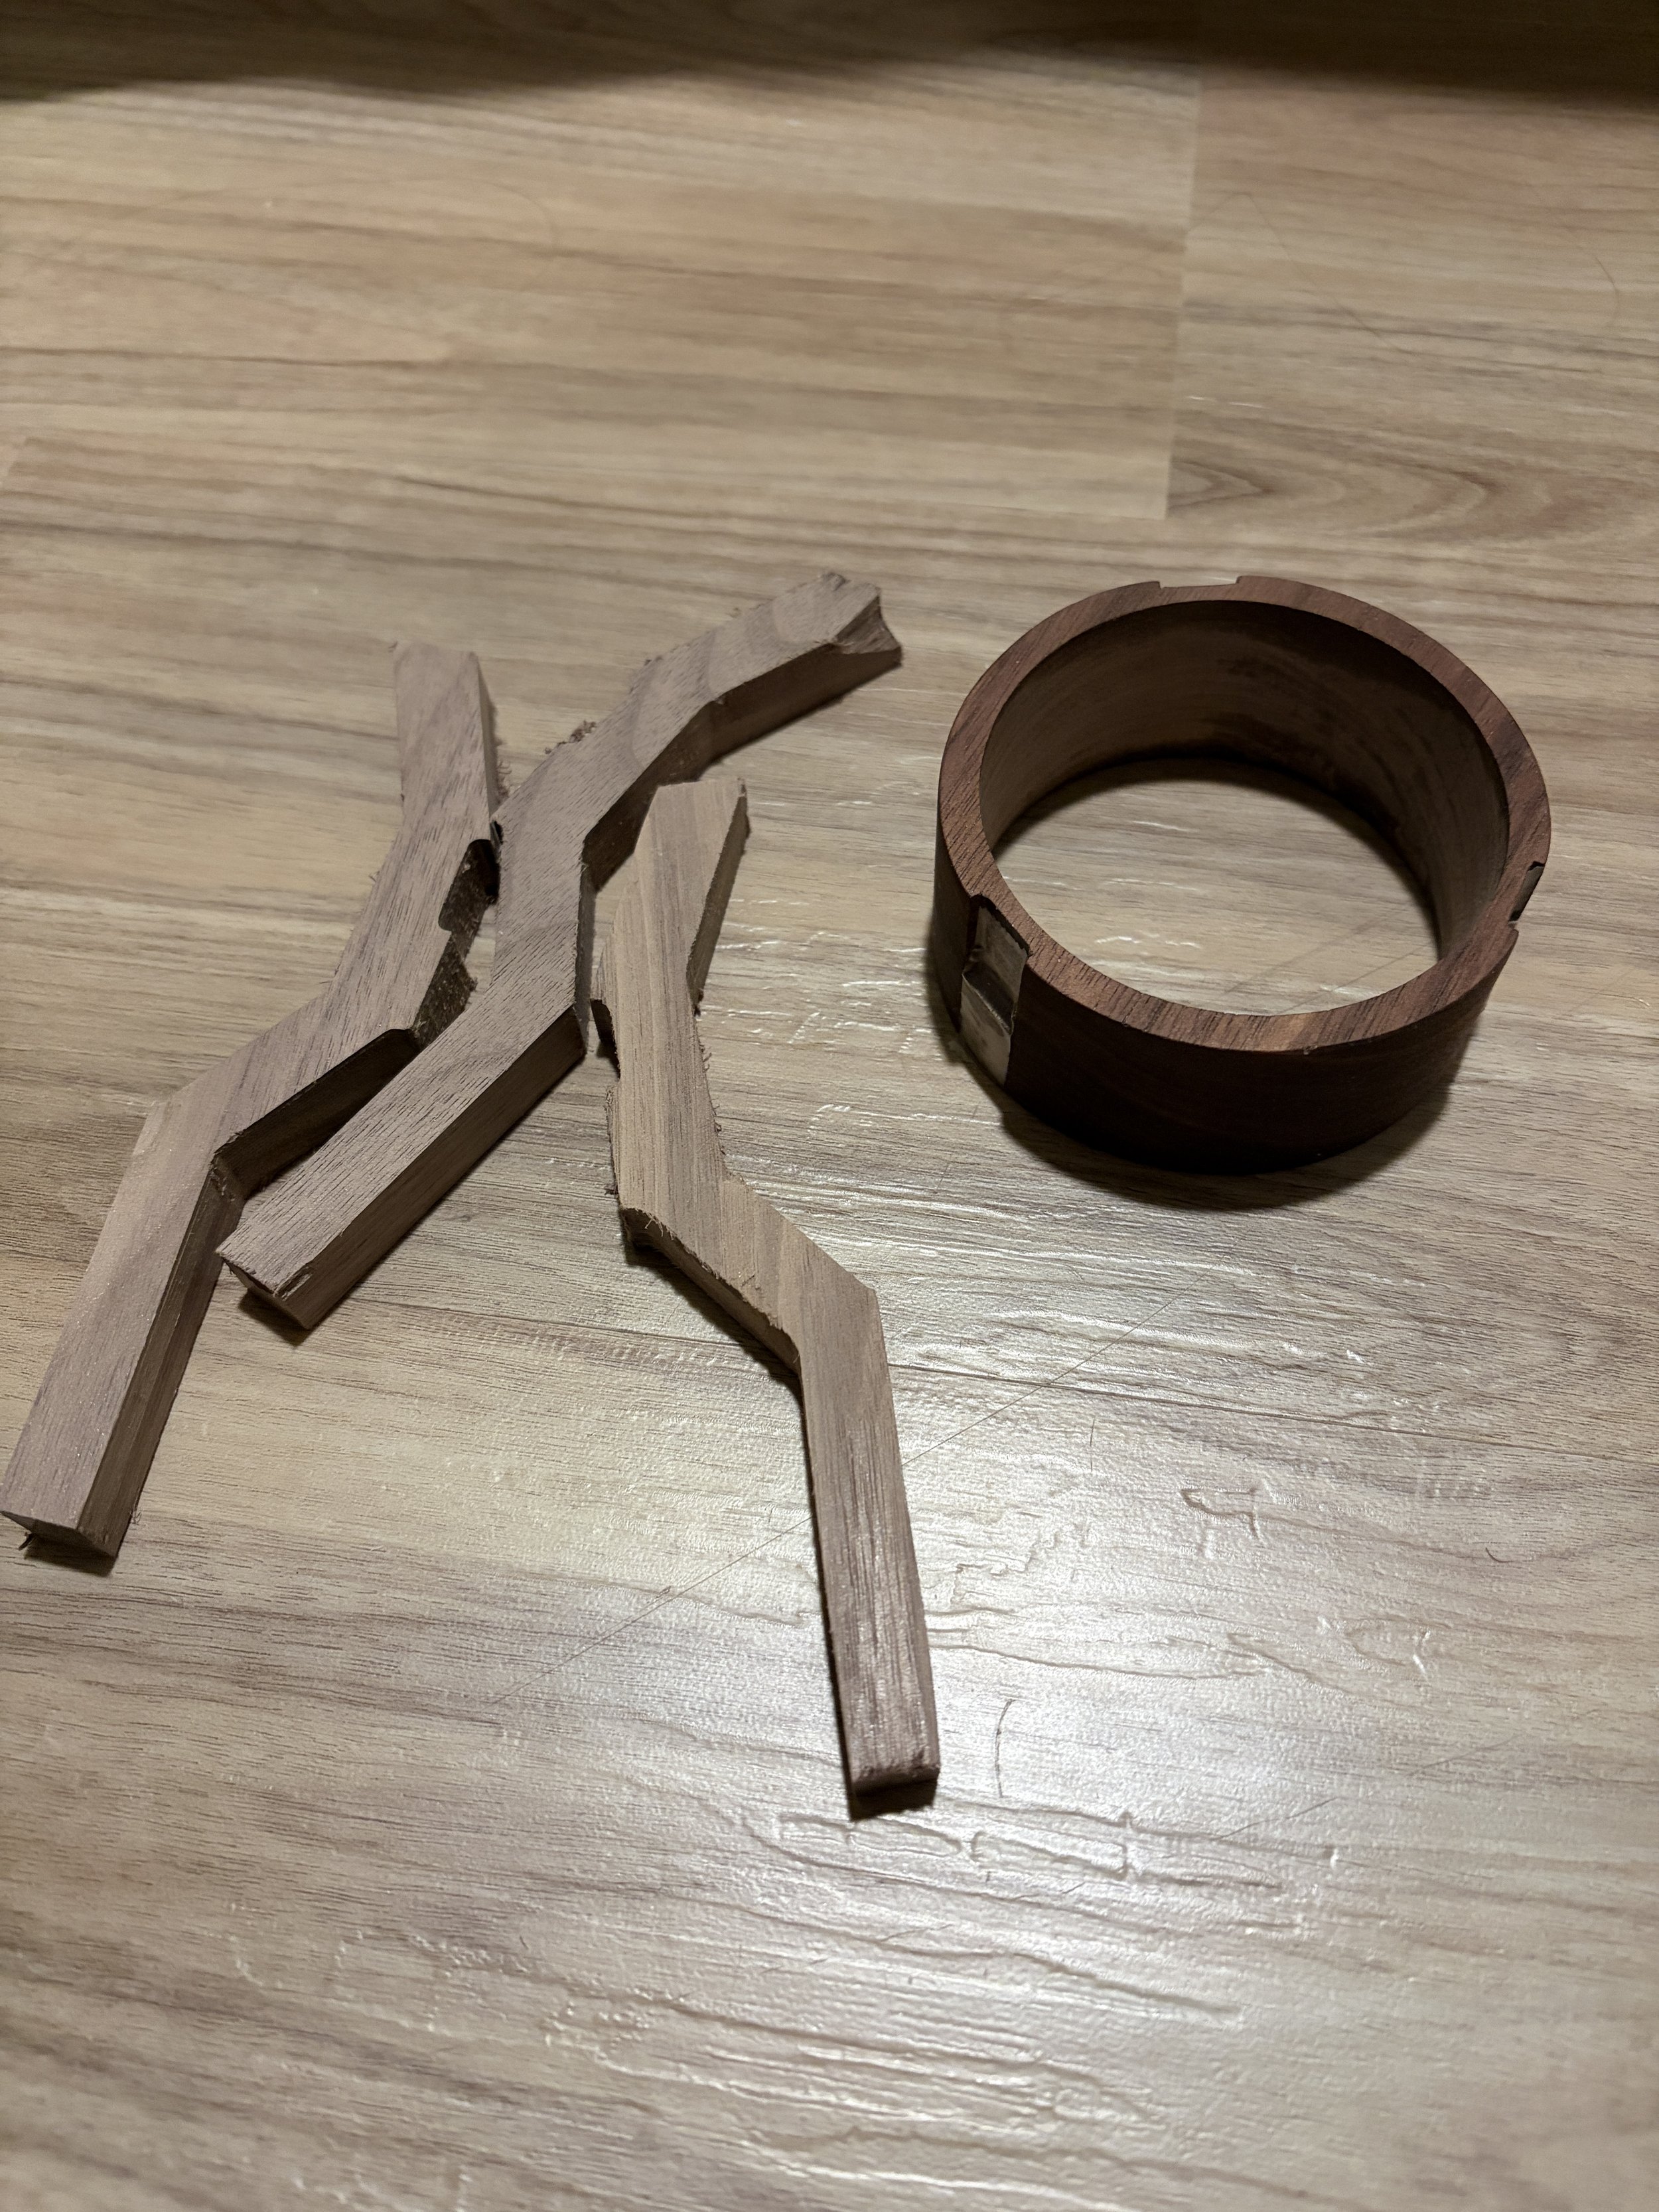
For my final prototype, I used a CNC to cut the walnut wood pieces, and a chisel after hand to get the edges sharp. I finished the walnut wood with tung oil, before gluing it together with super glue. I put the shade in the middle of the lamp before putting on the final leg, as once its put together theres no way to put the shade in. For the shade, I used a wood PLA to get the color I wanted, and I also added some orange paint over the LED to get a warmer colored light.
The Final Prototype