Goals and Restraints
This project focused on creating a set of forms that go well together and are unique, but are still identifiable as each piece of the chess set. For this project, we had lots of freedom in concept and material, but we had one major restraint: we had to make one part of it in a castable material, and that part would be the same across all pieces in the chess set. This helped to keep things simpler and more consistent.
Ideation and Initial Sketches
As the first step of this project, we began with ideation sketches. I wanted to create a chess set that was simple, yet not too basic, and my main focus during the project was to make each piece easily recognizable and differentiable from the others in the set. Because of all these factors, most of my initial sketches were simplified versions of a traditional chess set. Throughout the process of creating my initial sketches, I was also thinking of what materials I would use for each set.

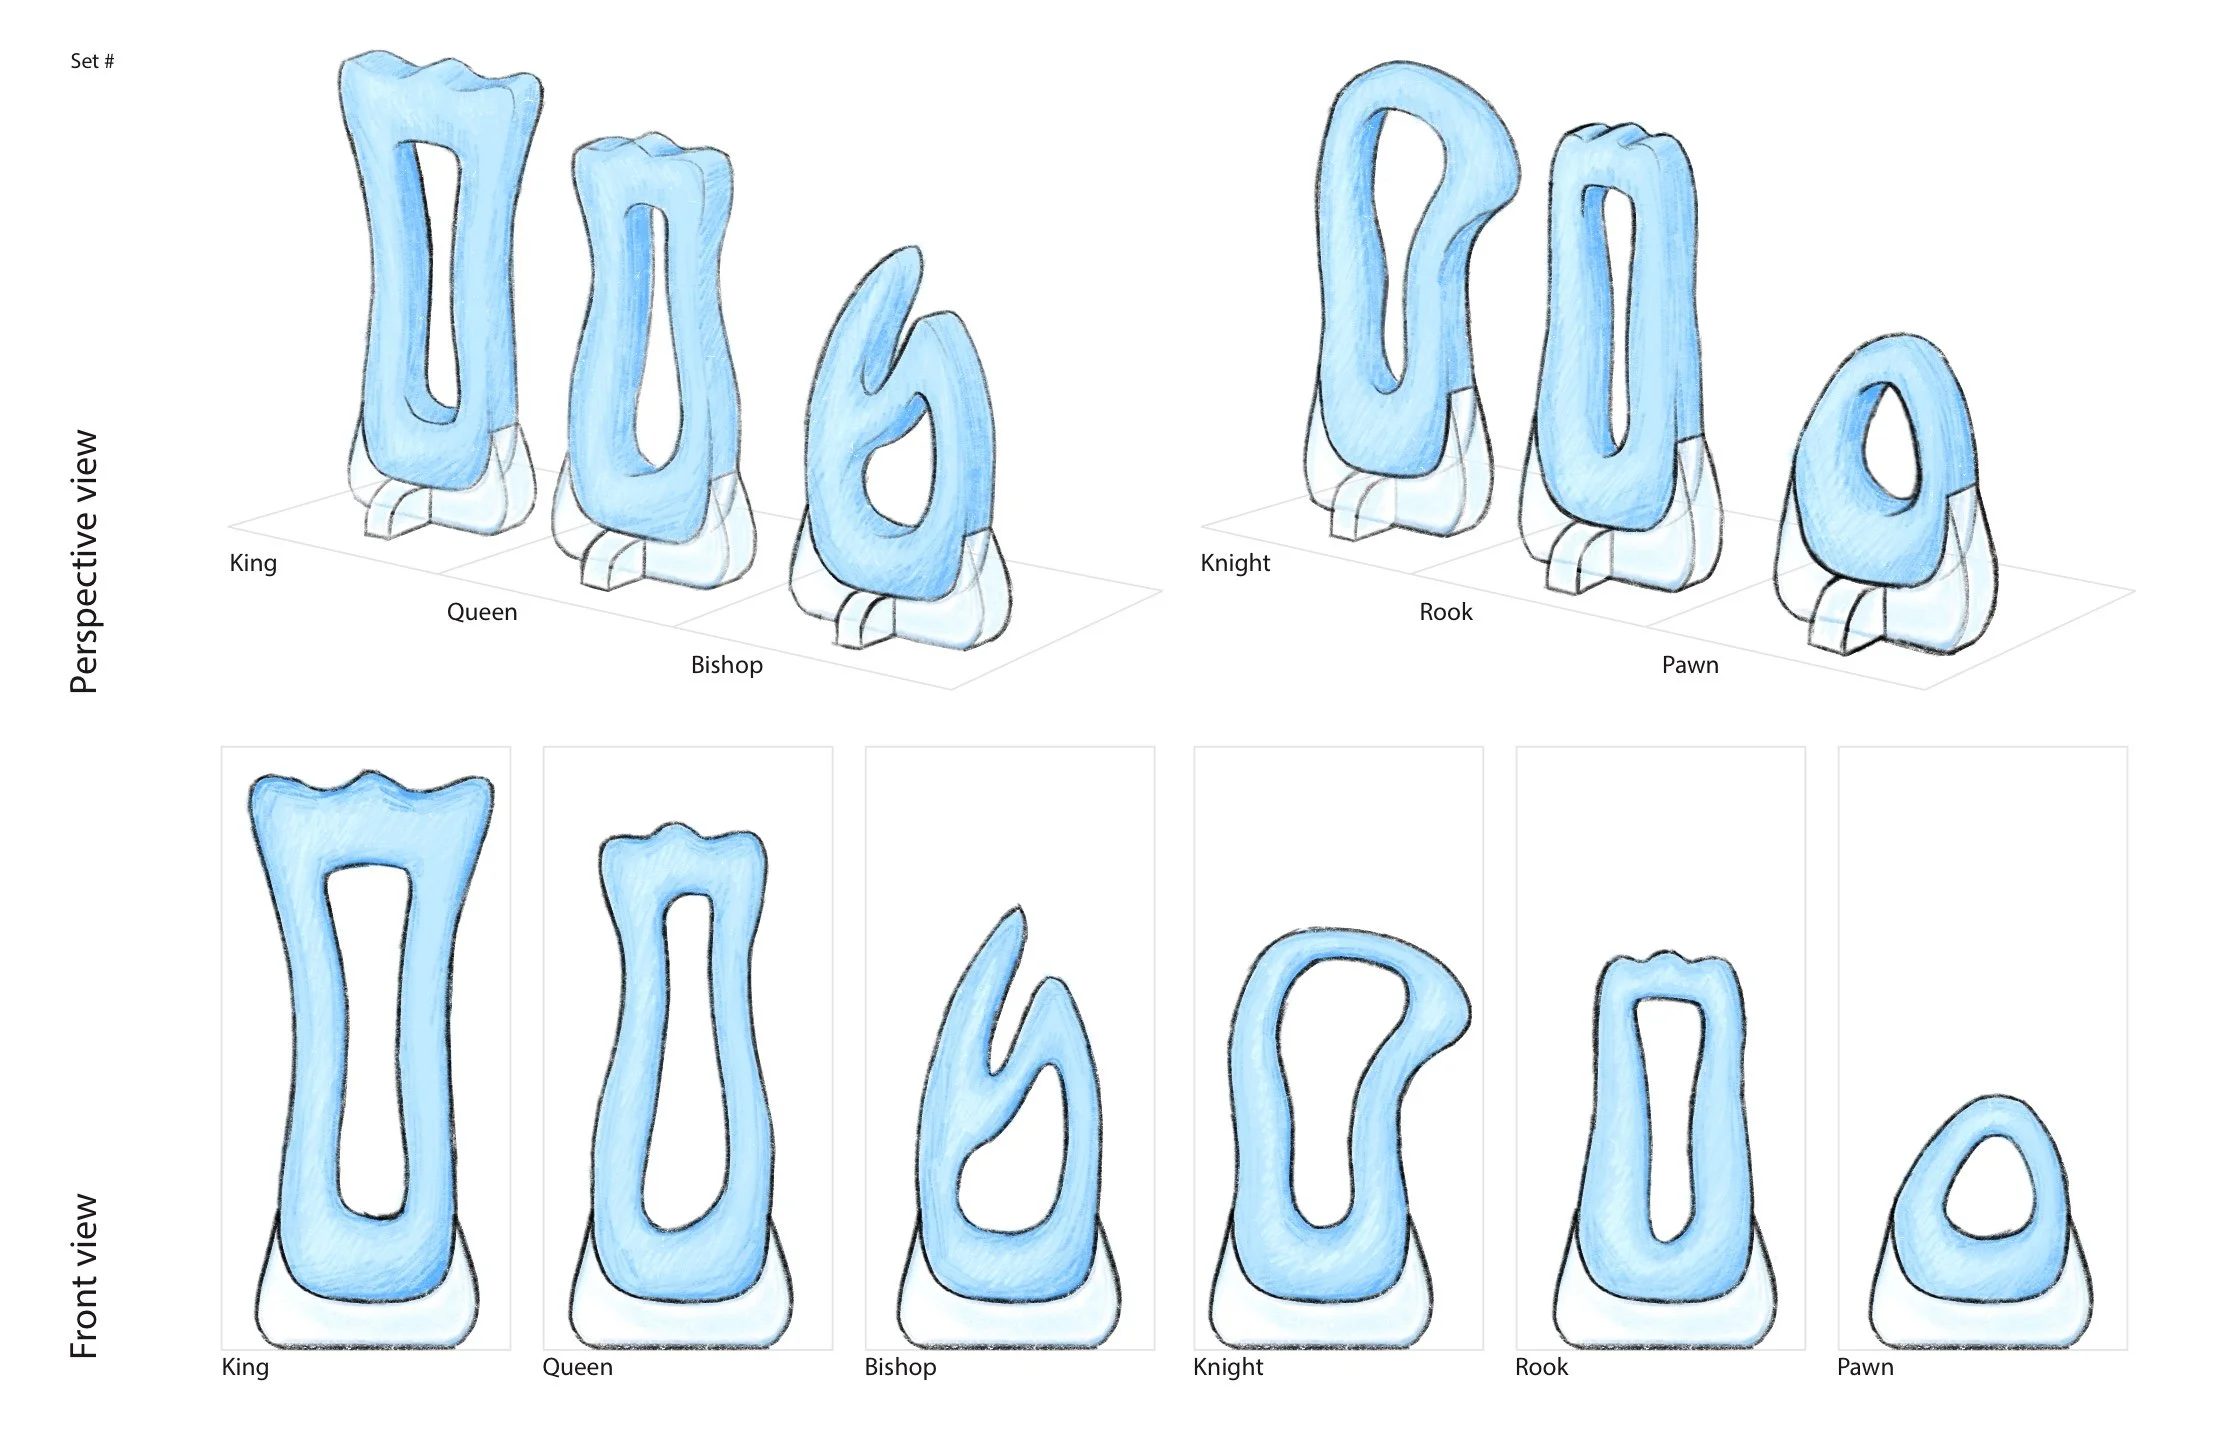
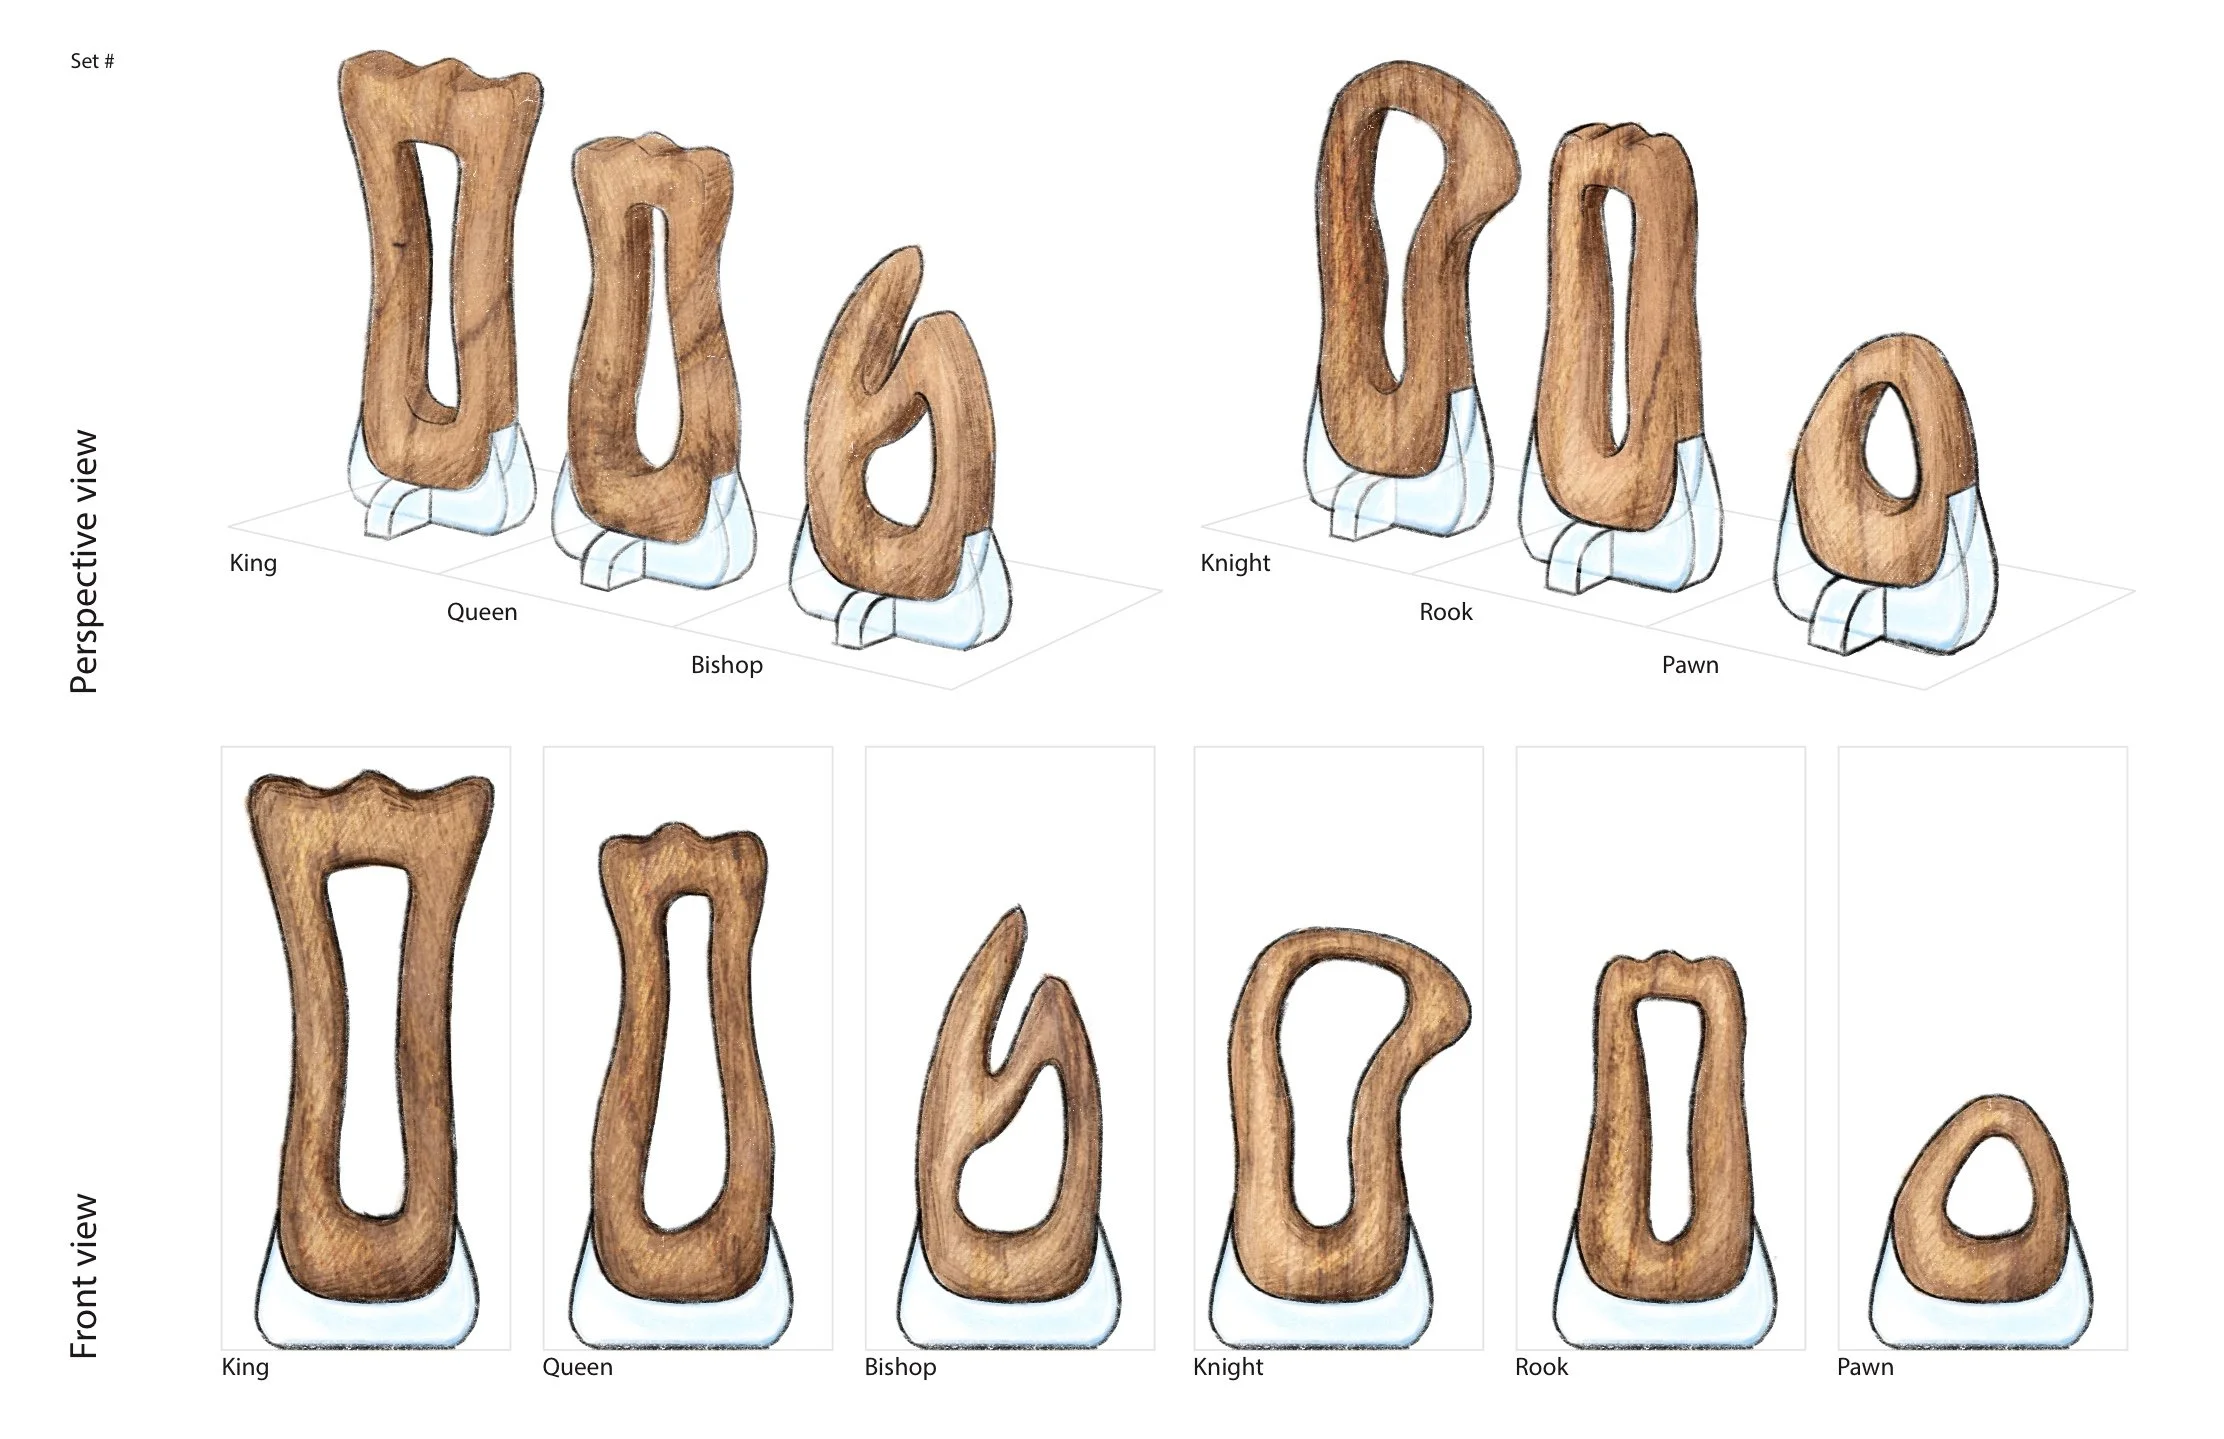
Finalizing concepts
After finally choosing a direction to go; a organic looking yet still recognizable set, I created the final rendered sketches of my set. I knew at this point that I wanted to do wood, but wasn’t sure if I wanted to leave it natural or paint it a color, and I also knew that I was going to do resin for the common piece.
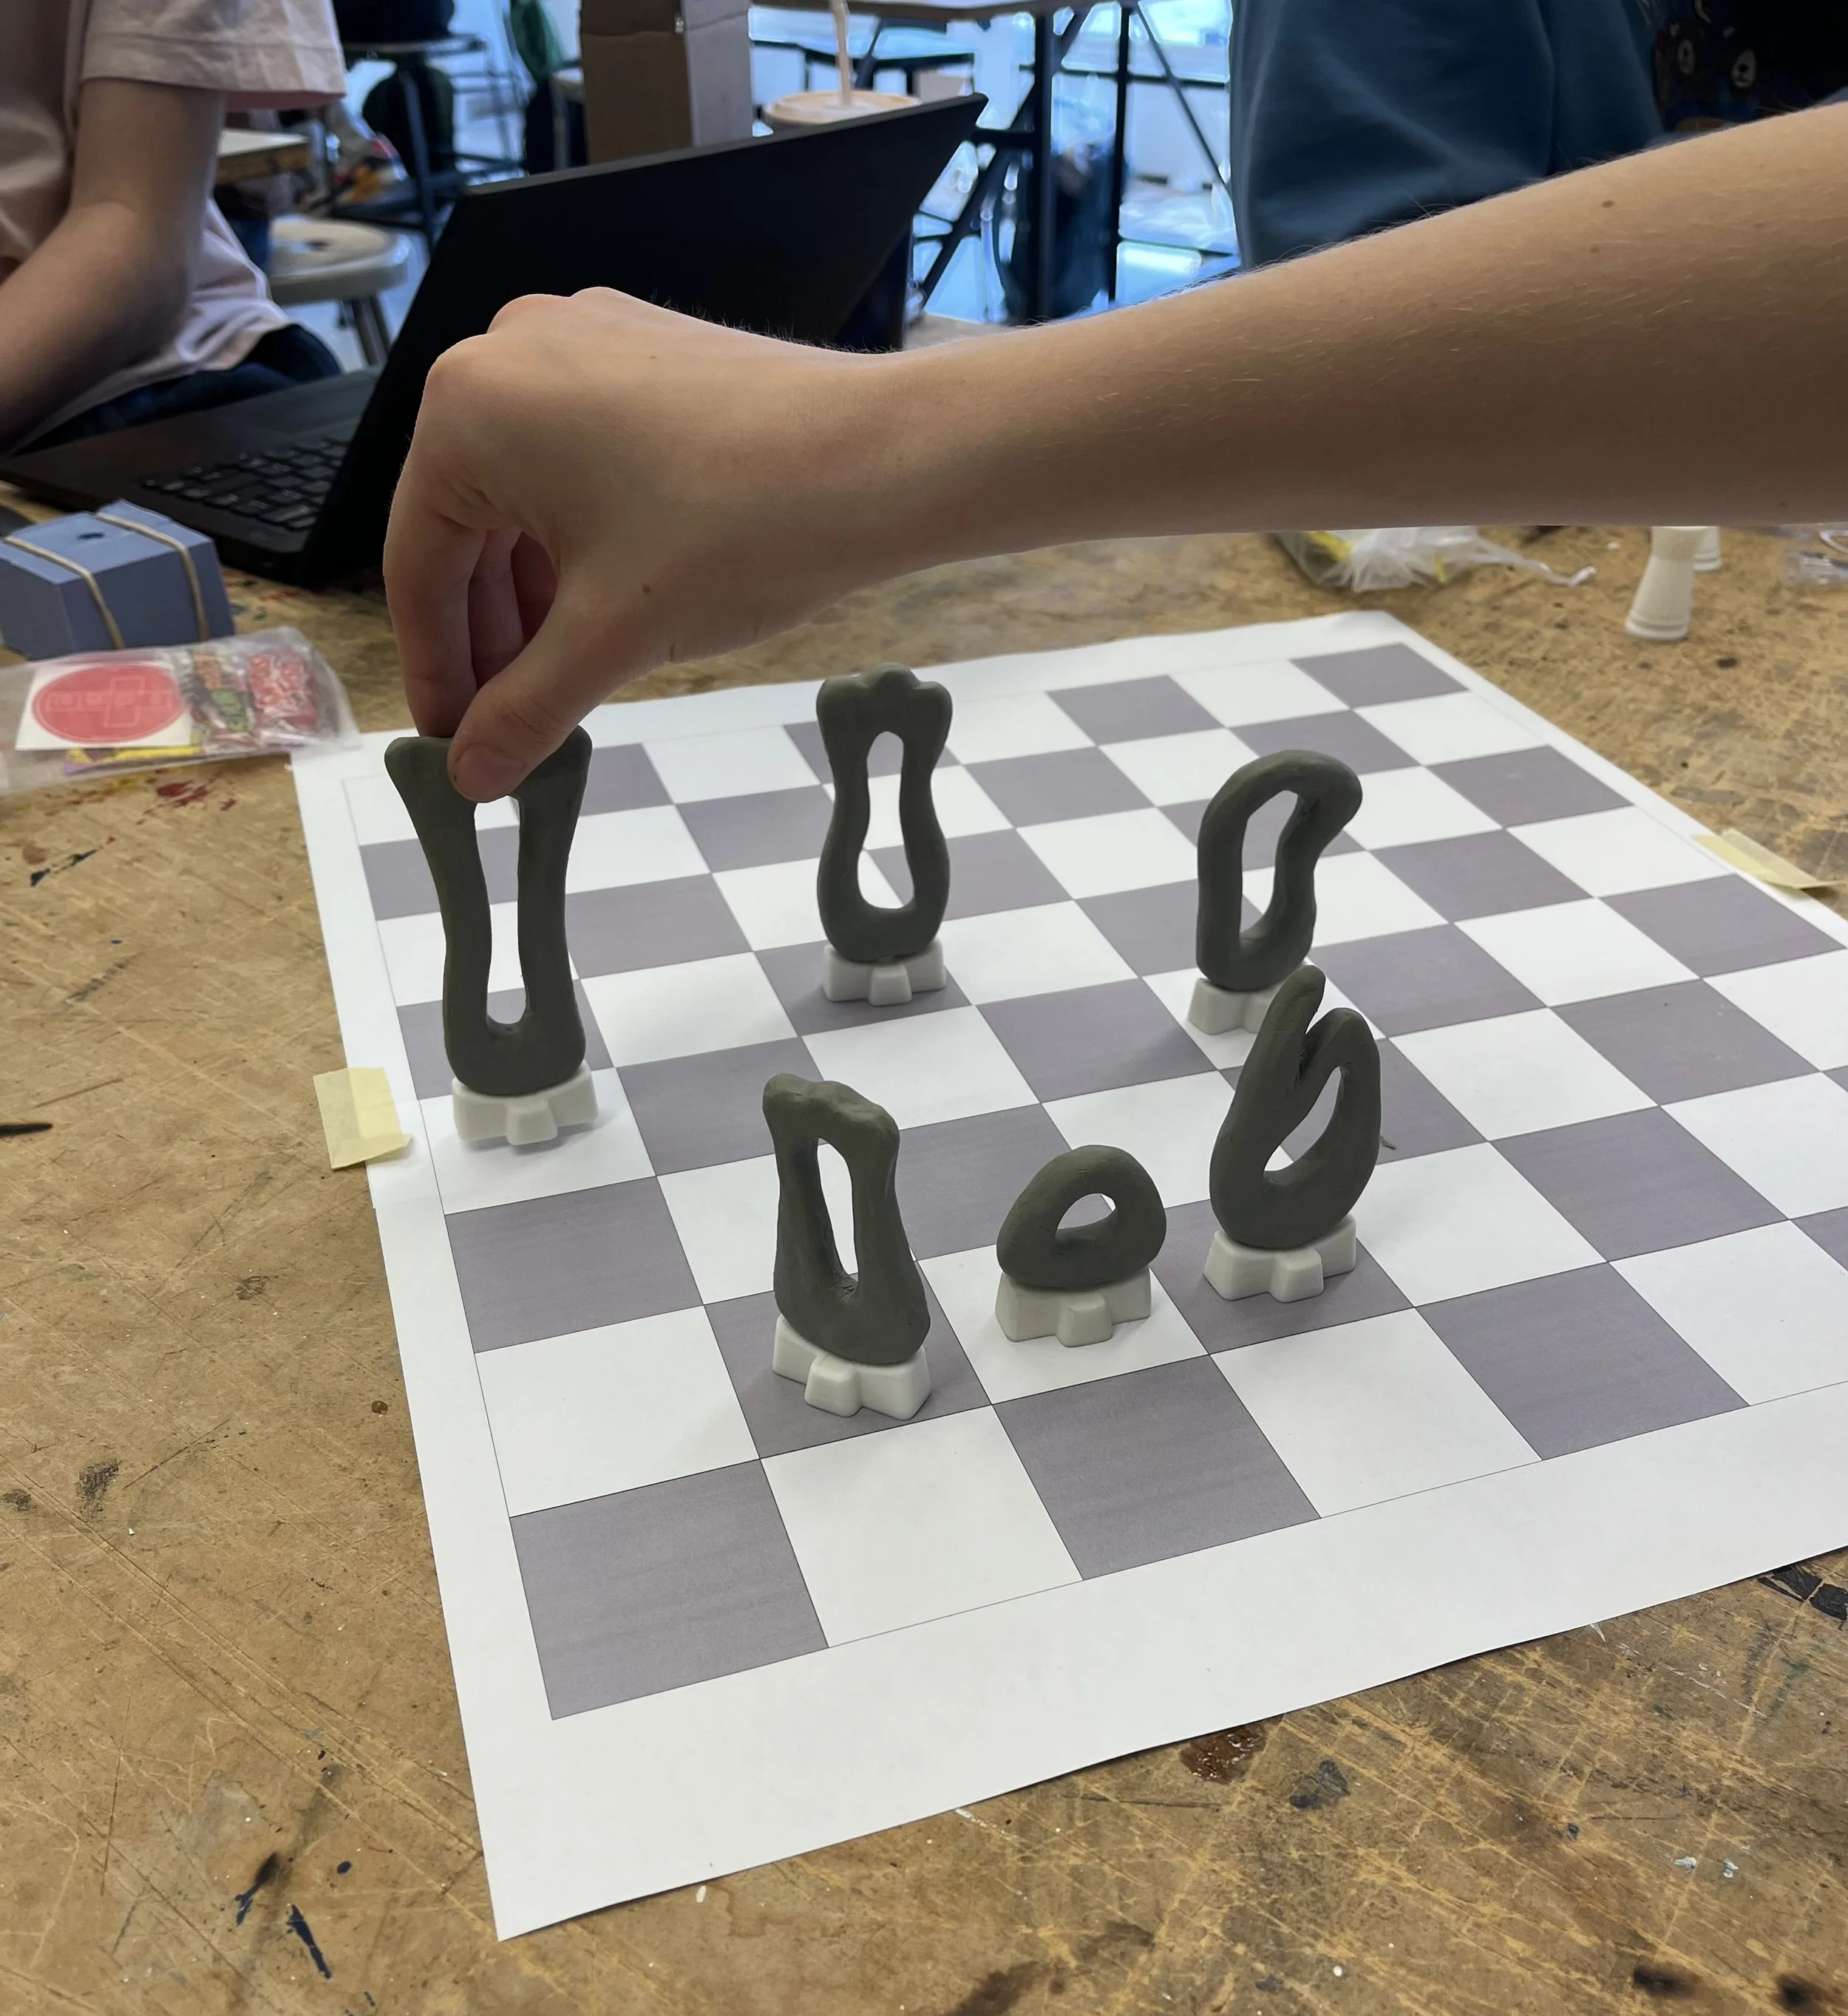
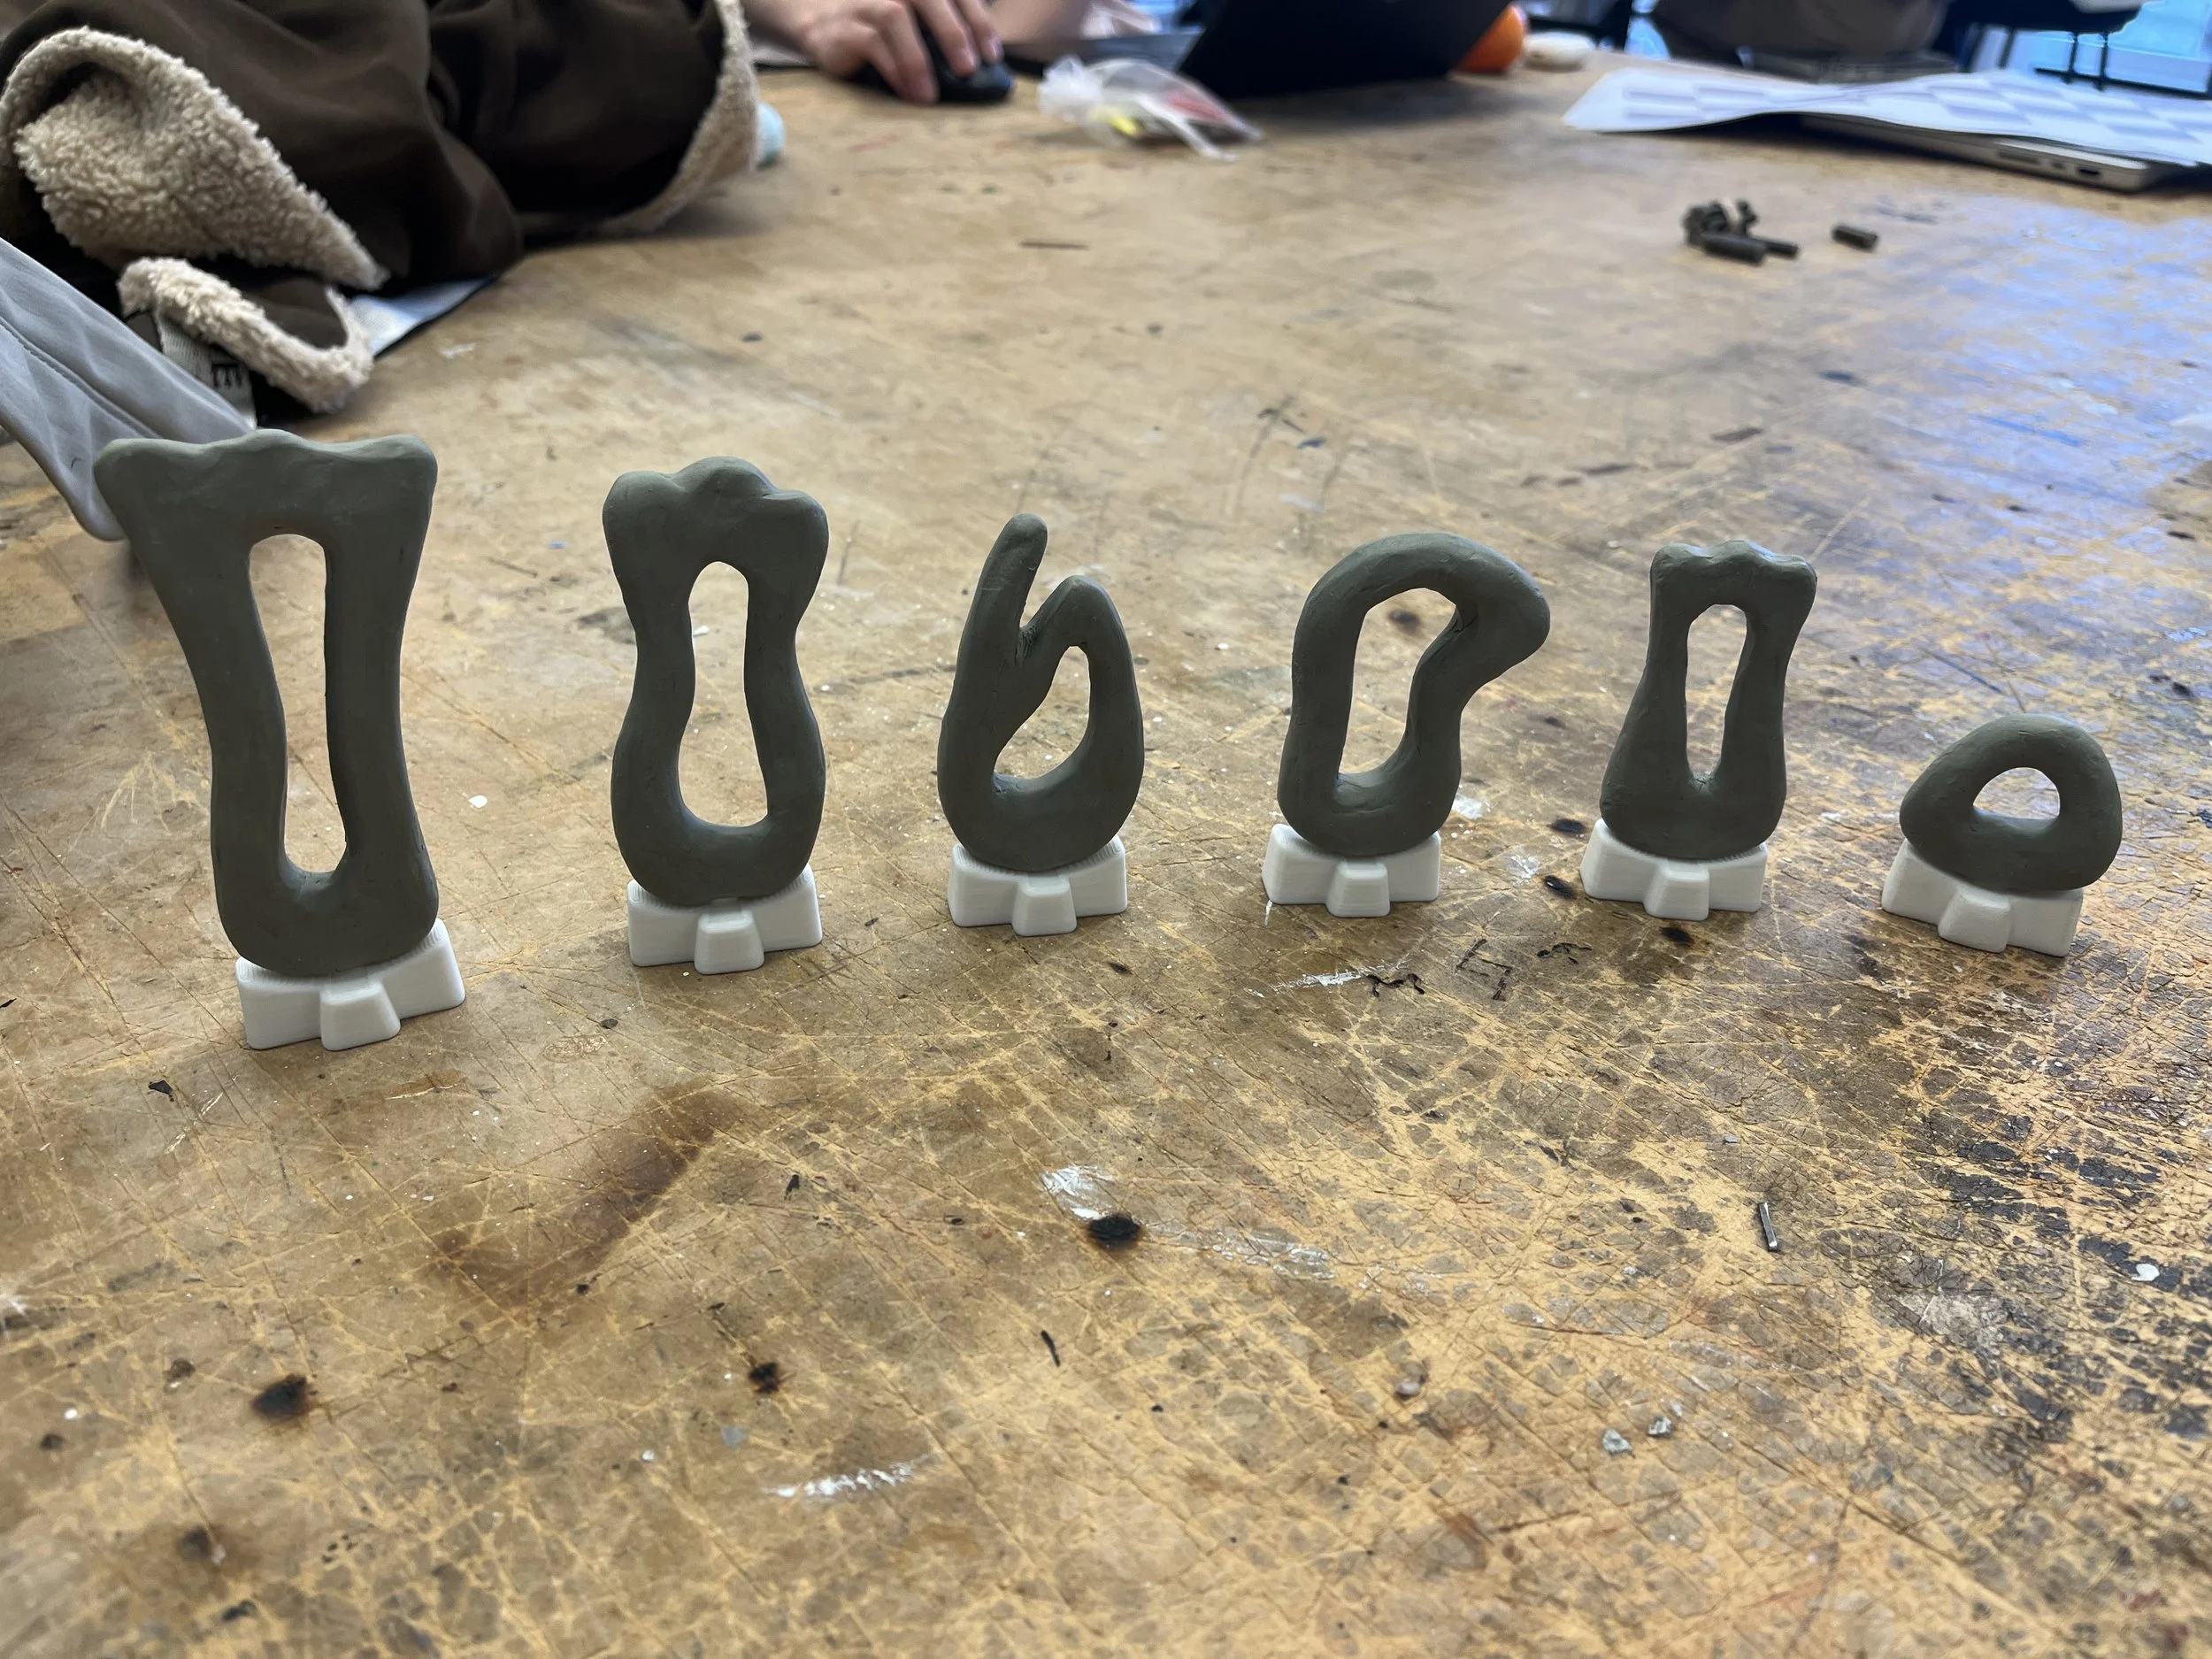
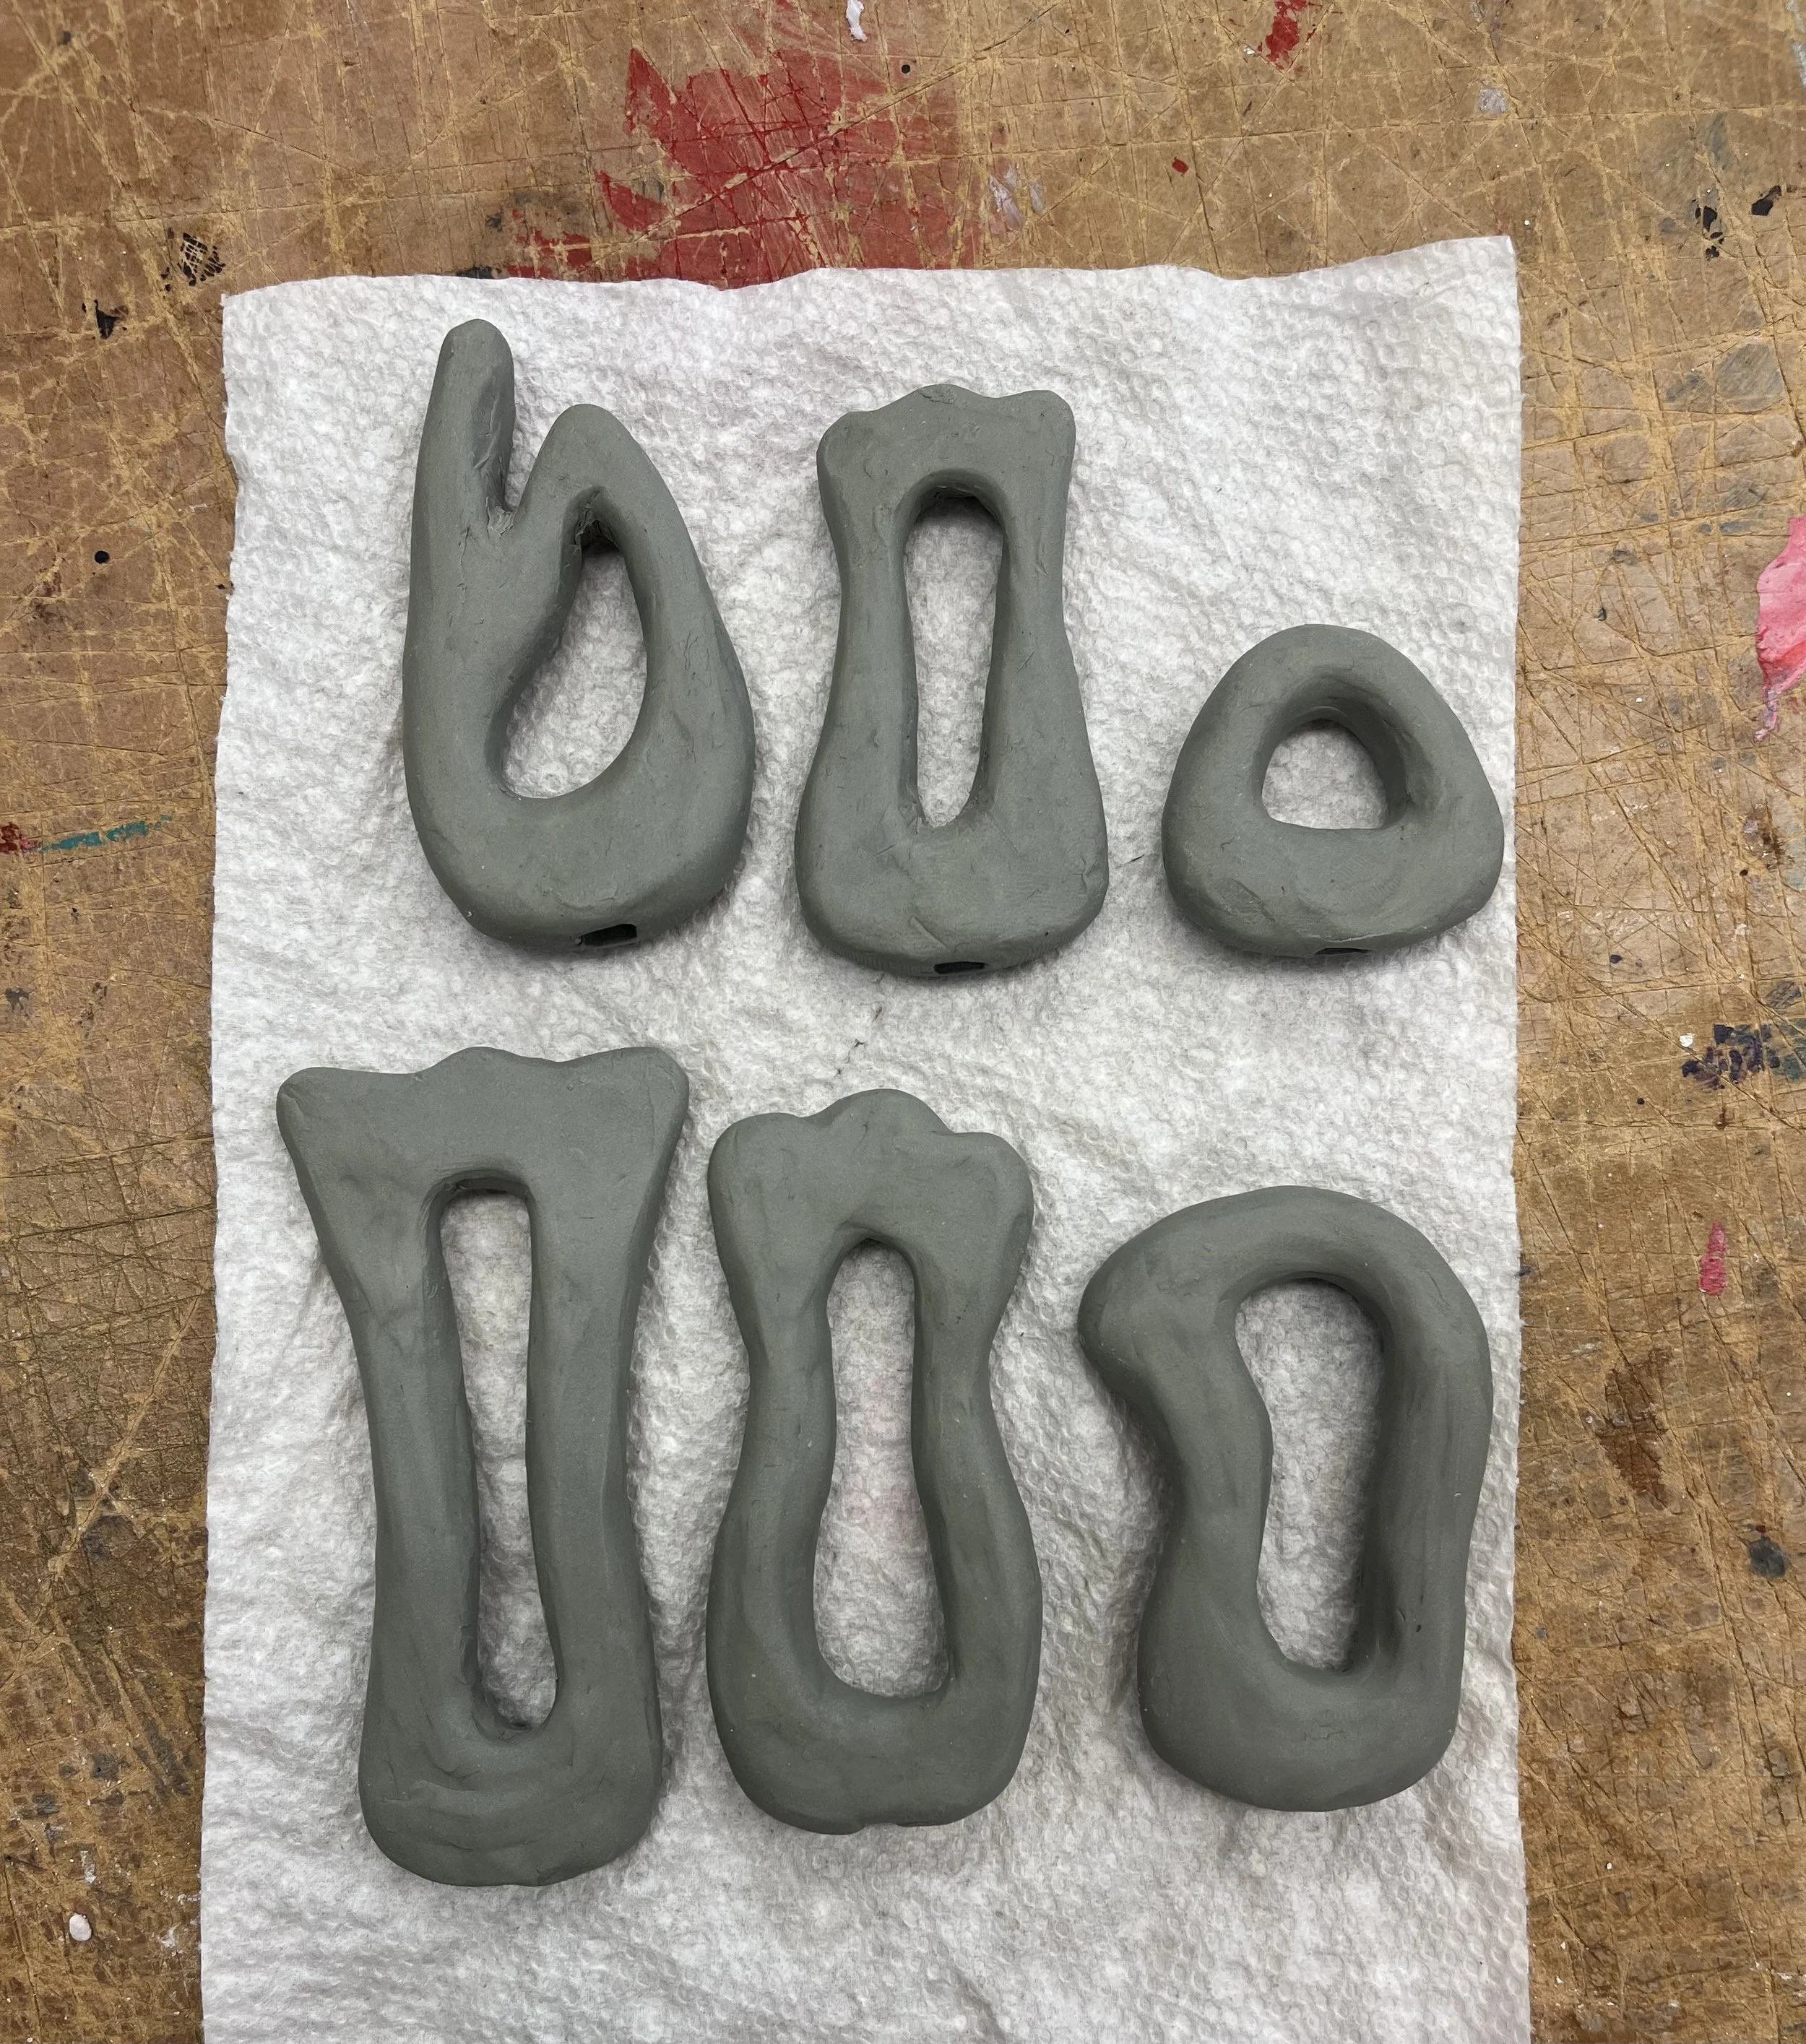
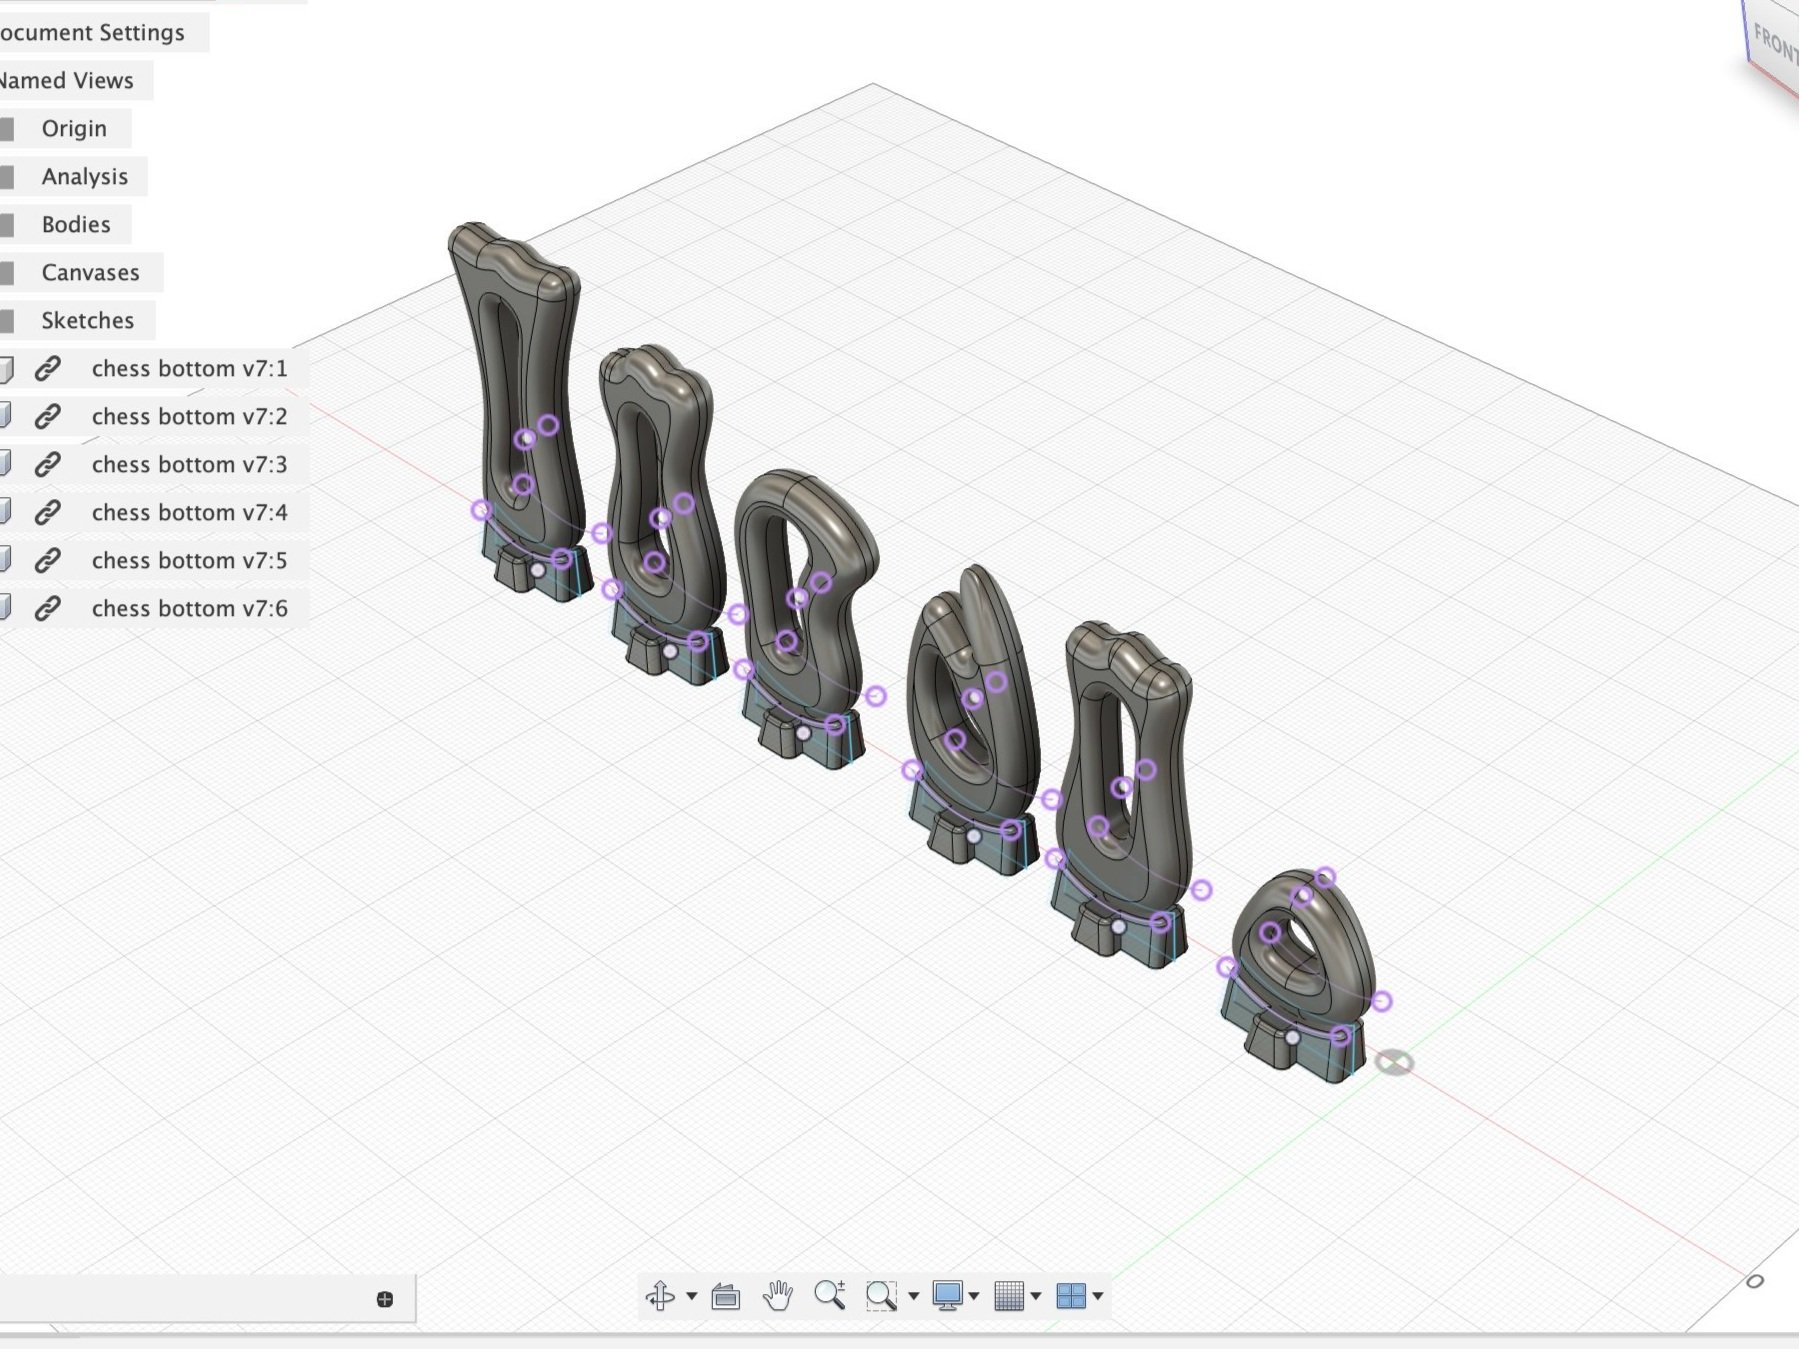
3D Ideation - Plastina Models
Before making my final set, I made some models out of plastina to make sure it was the direction I wanted to go with. I played with the forms and making them more recognizable by changing the curves and angles slightly, and also made sure the scale was correct. I also 3d printed the base part so my peers could test the pieces and give me feedback on the usability of them.
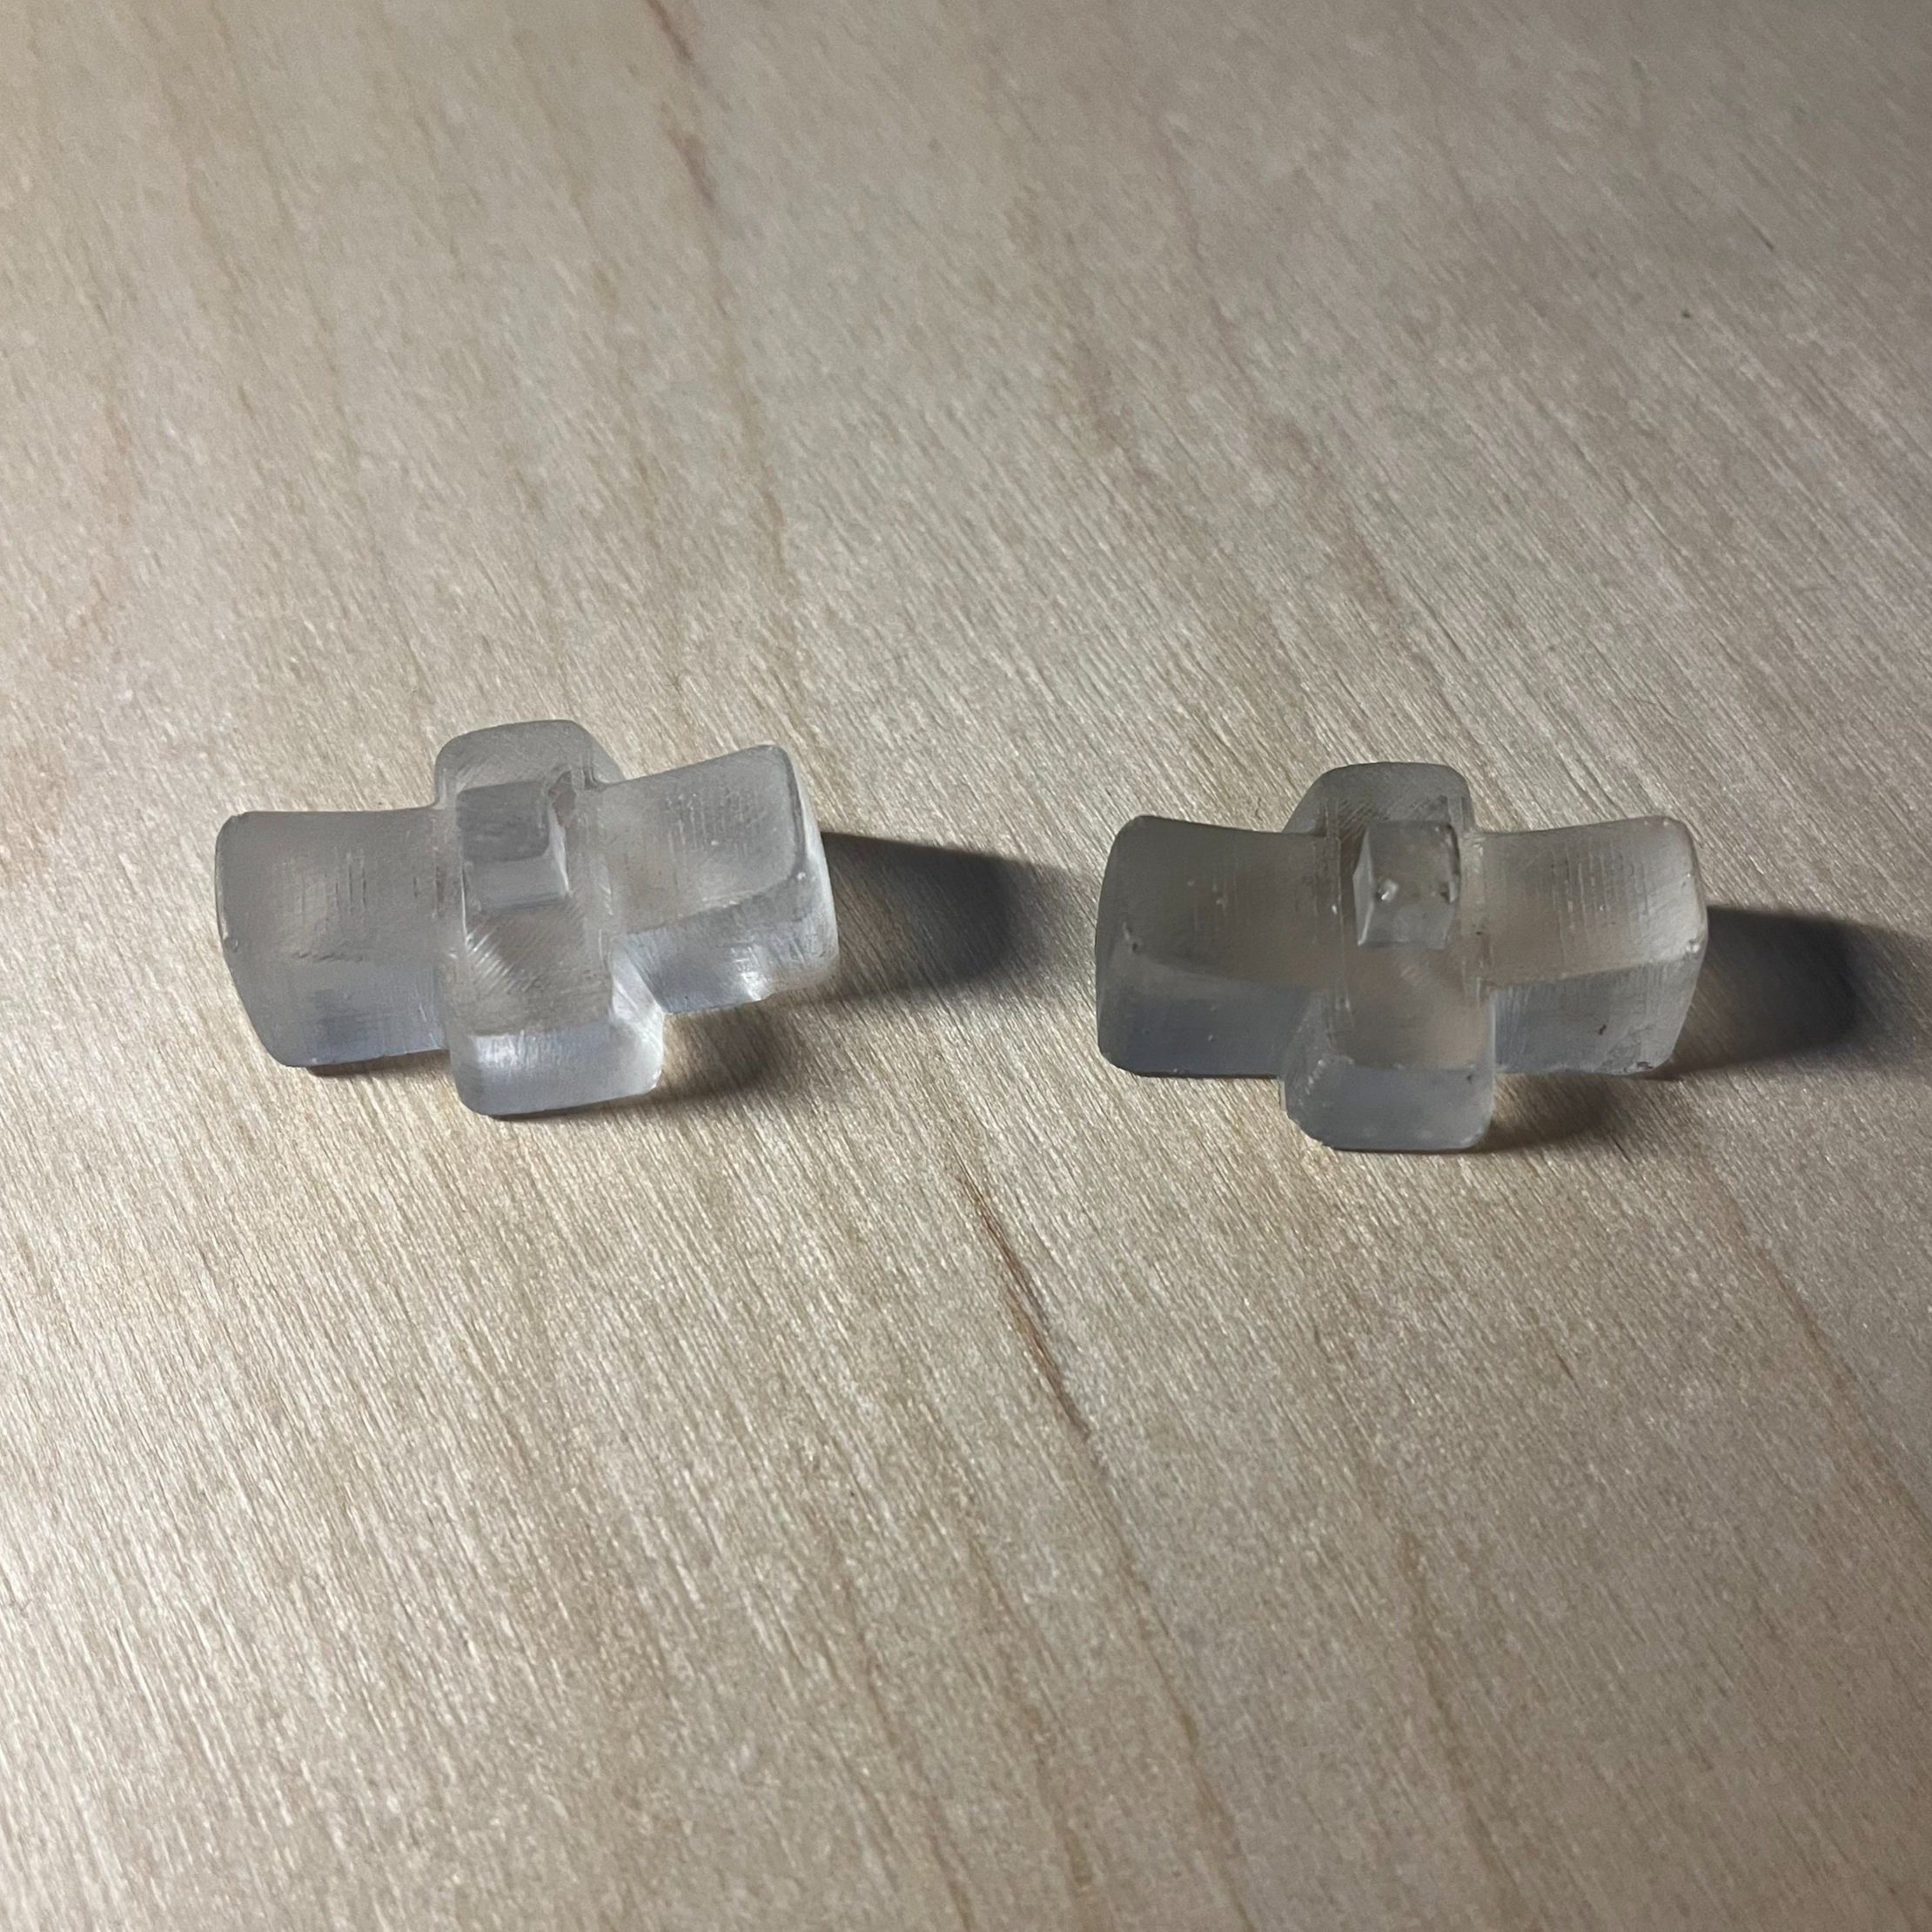
Molding and Casting
I used one of my 3d printed pieces and sanded it to use as my master piece for my mold. For the resin, I experimented with several types, and eventually chose the oomoo brand resin because the other one I was experimenting with had problems with curing.


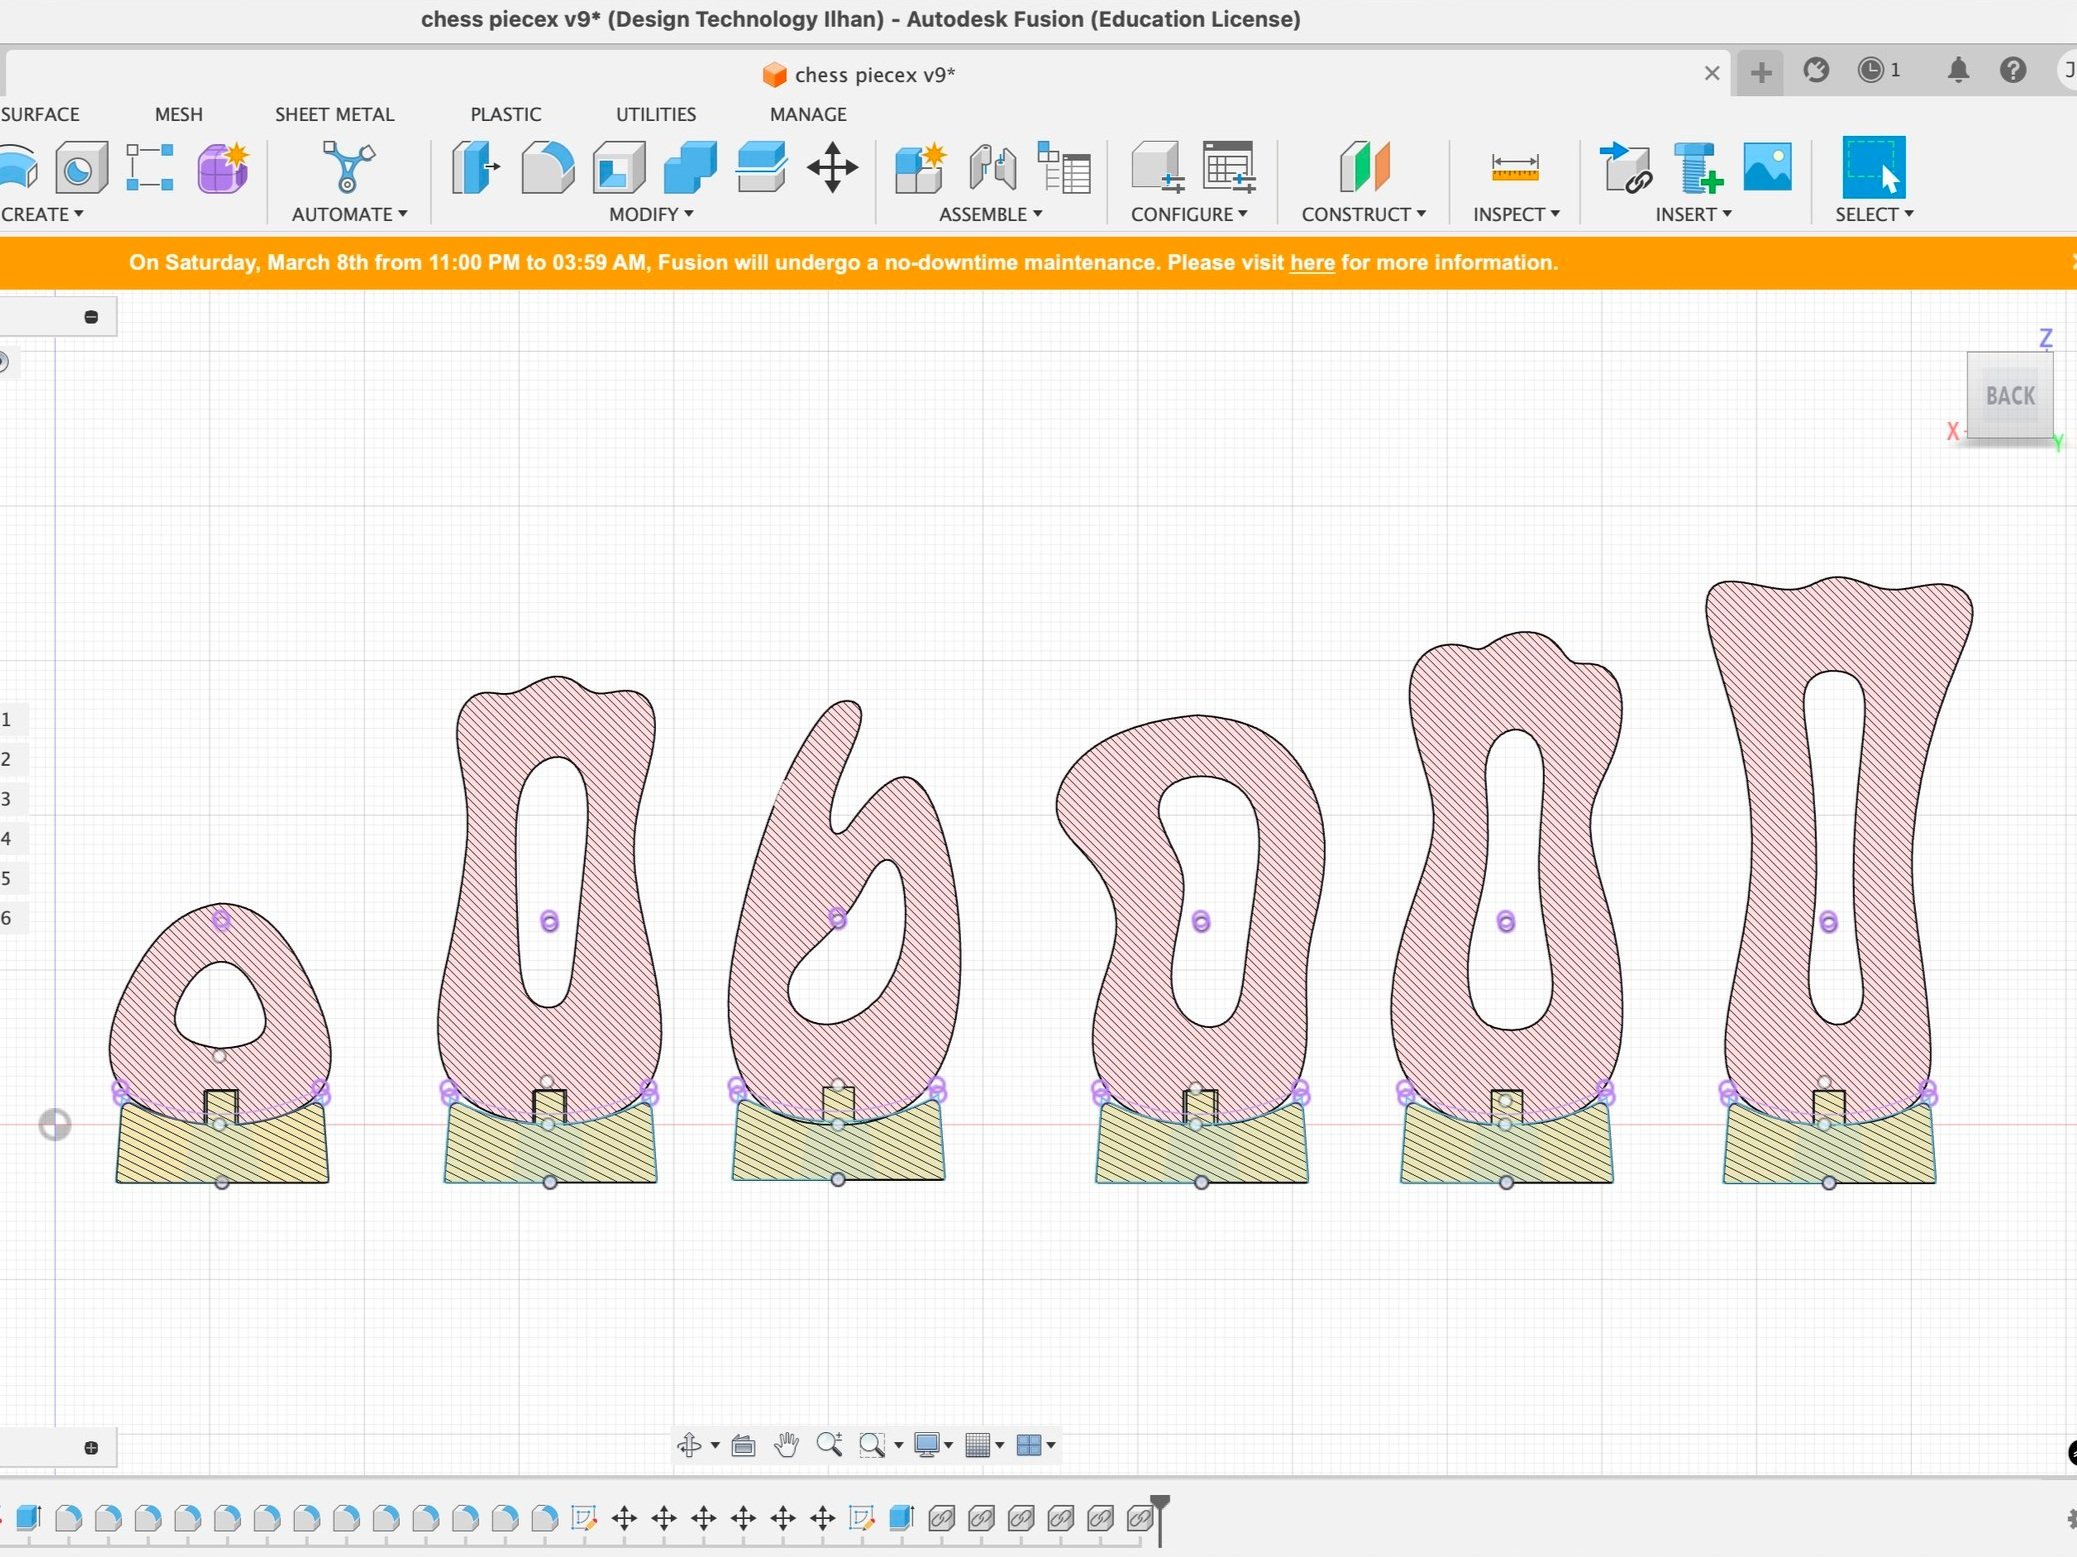
3D Modeling and Laser Cutting
For my mid fidelity model, rather than correct assembly, I was focusing on making sure I liked the silhouette of the overall form to see if I wanted to change any of the measurements before creating my final. For my revised mid-fidelity, I made the back panel sliding, although it didn’t completely fit because it was a bit too tight, but it was still good to get an idea of what the back would look like.

Sanding and Assembly
After laser cutting my pieces, I had to glue them together so that there was a hole left at the bottom, where my resin piece would snap in. After letting them dry, I had to sand them, and I used a few kinds of rasps, as well as sandpaper to try to round out the edges as much as possible.


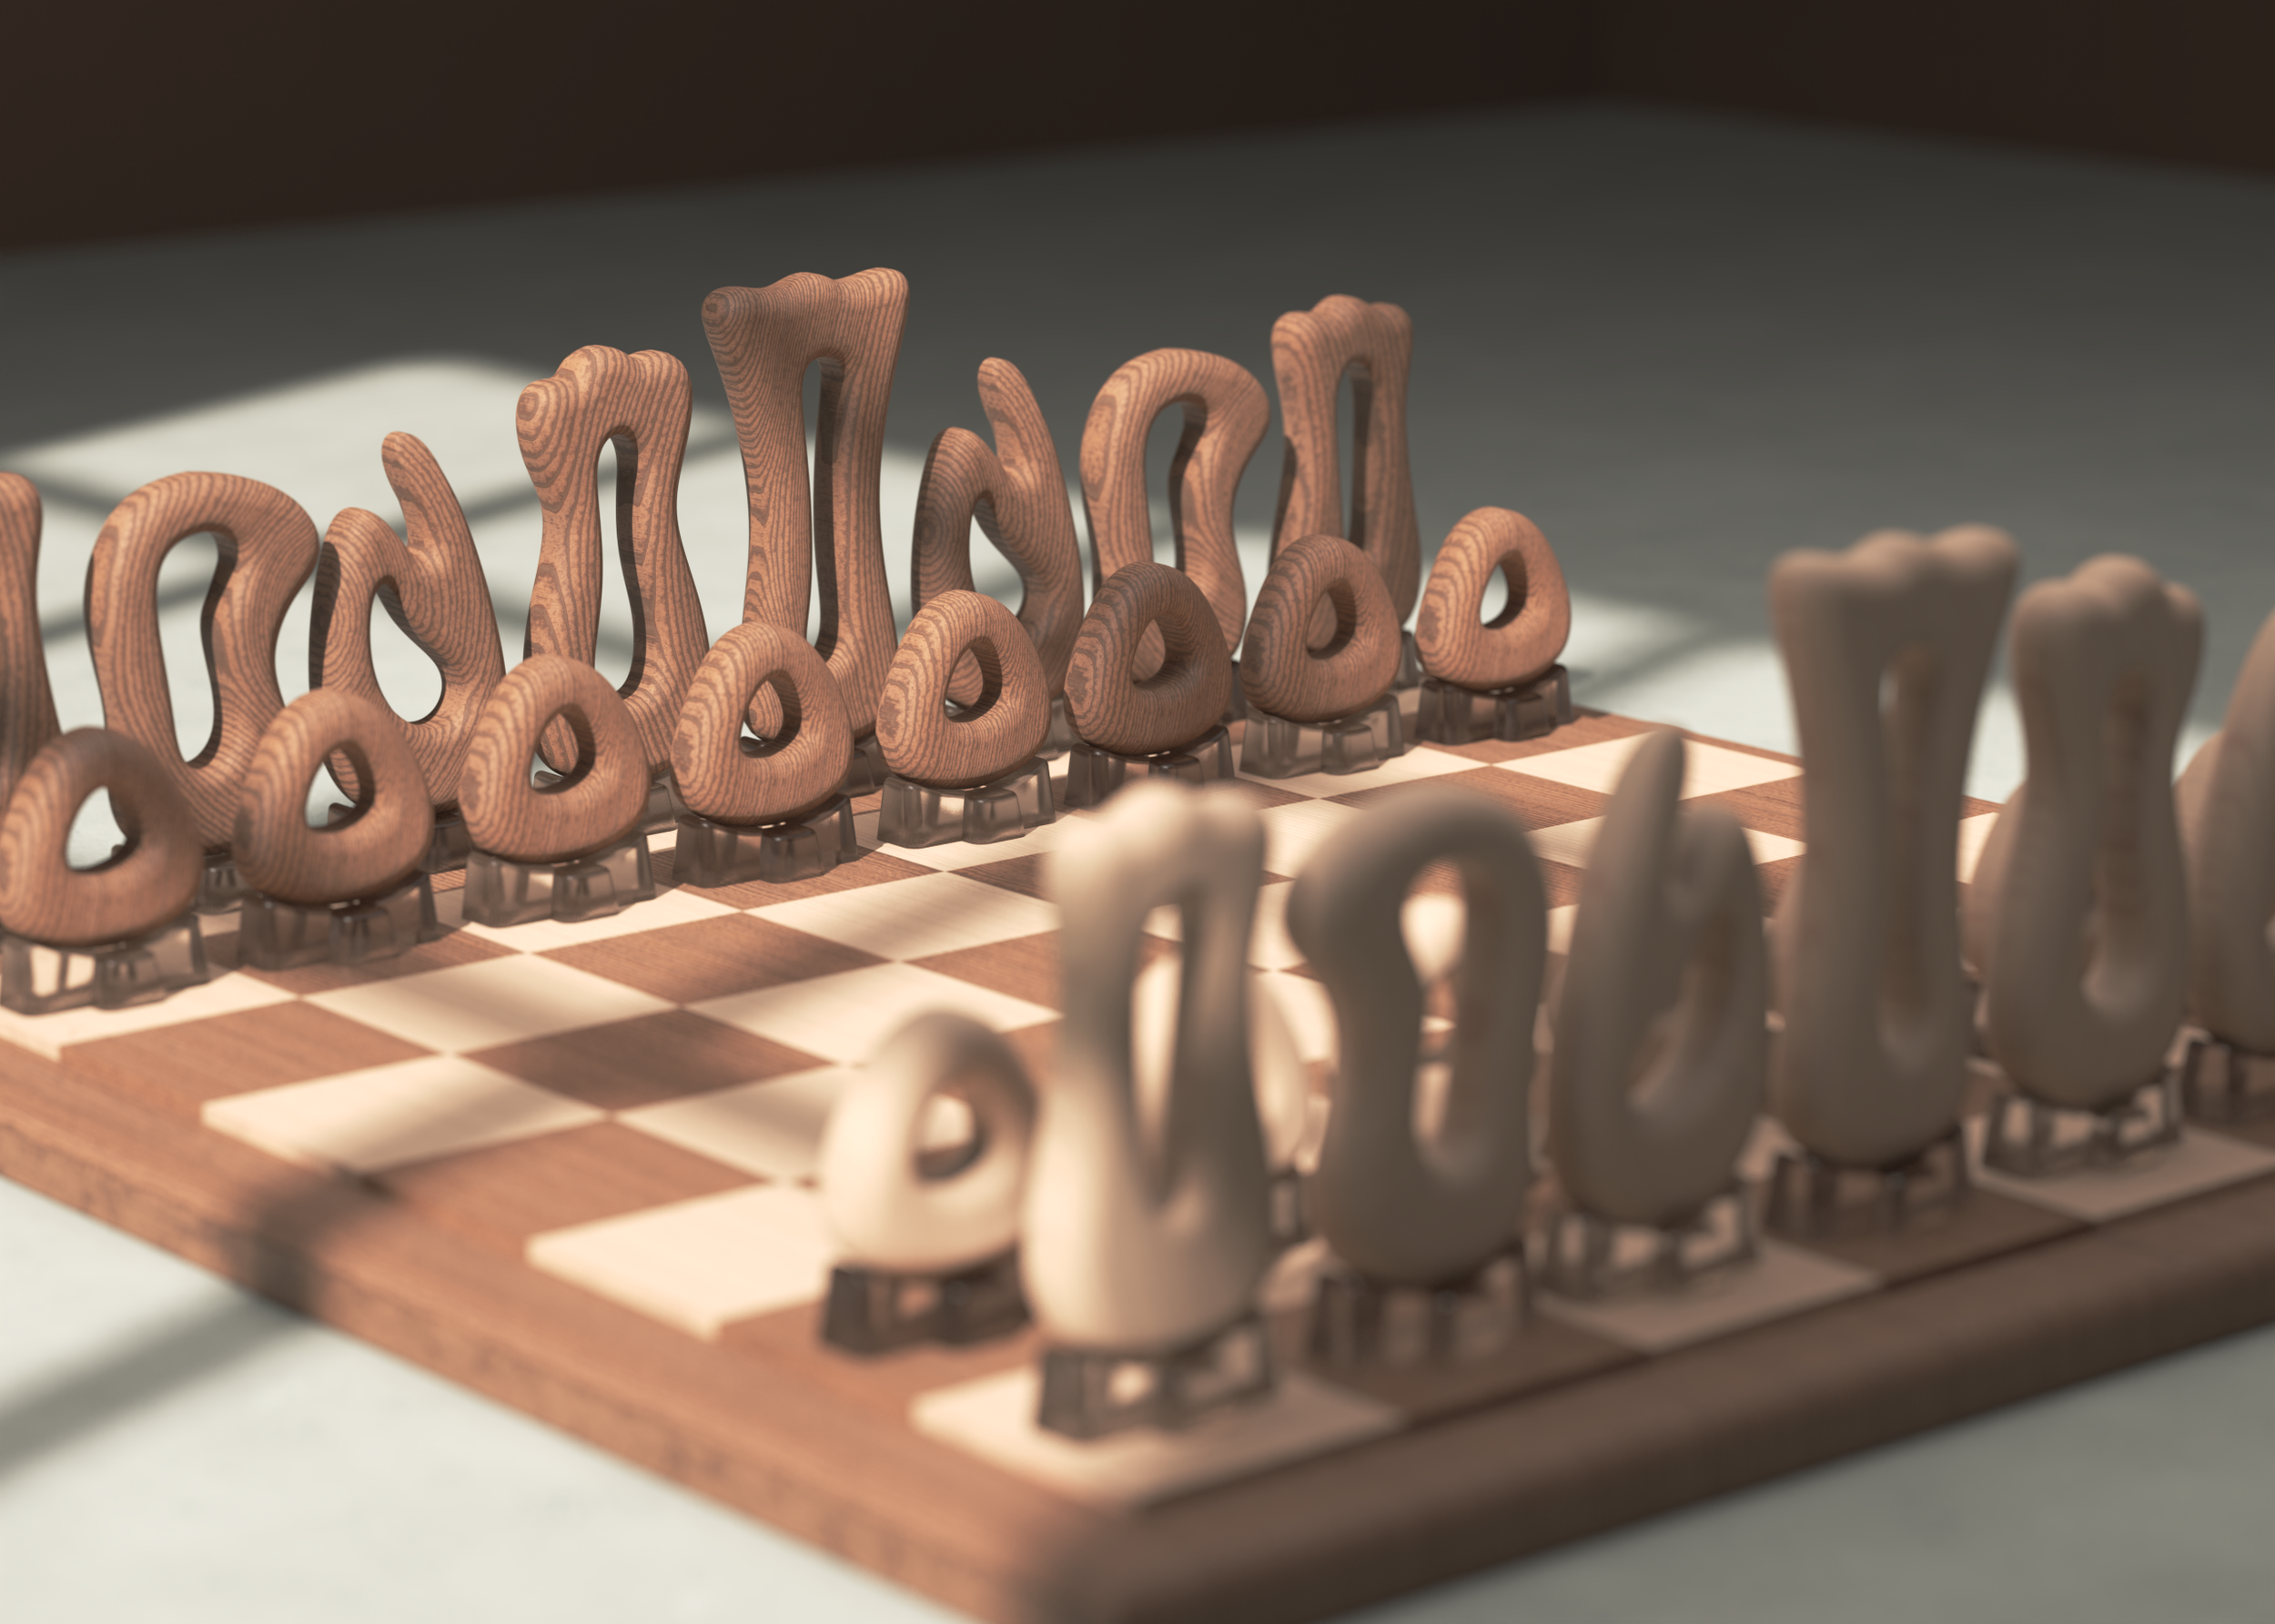
Final Product
I created a render of what a full set of my design would look like, and rendered the board as well. I had fun experimenting with the lighting of the scene and the wood texture. For my final pieces, I did not finish them or glue the bottoms in place, as I planned on further sanding them, filling in a few chips that were caused during sanding, and then finishing them after.


