Chess- family of form
Ideation
As the first step of the chess project, we began with ideation sketches. I wanted to create a chess set that was simple, yet not too basic, and my main focus during the project was to make each piece easily recognizable and differentiable from the others in the set. Because of all these factors, most of my initial sketches were simplified versions of a traditional chess set. Throughout the process of creating my initial sketches, I was also thinking of what materials I would use for each piece. We had to use one material for a molded piece that was used for each of the six pieces, and for all my concepts the common piece was the bottom.

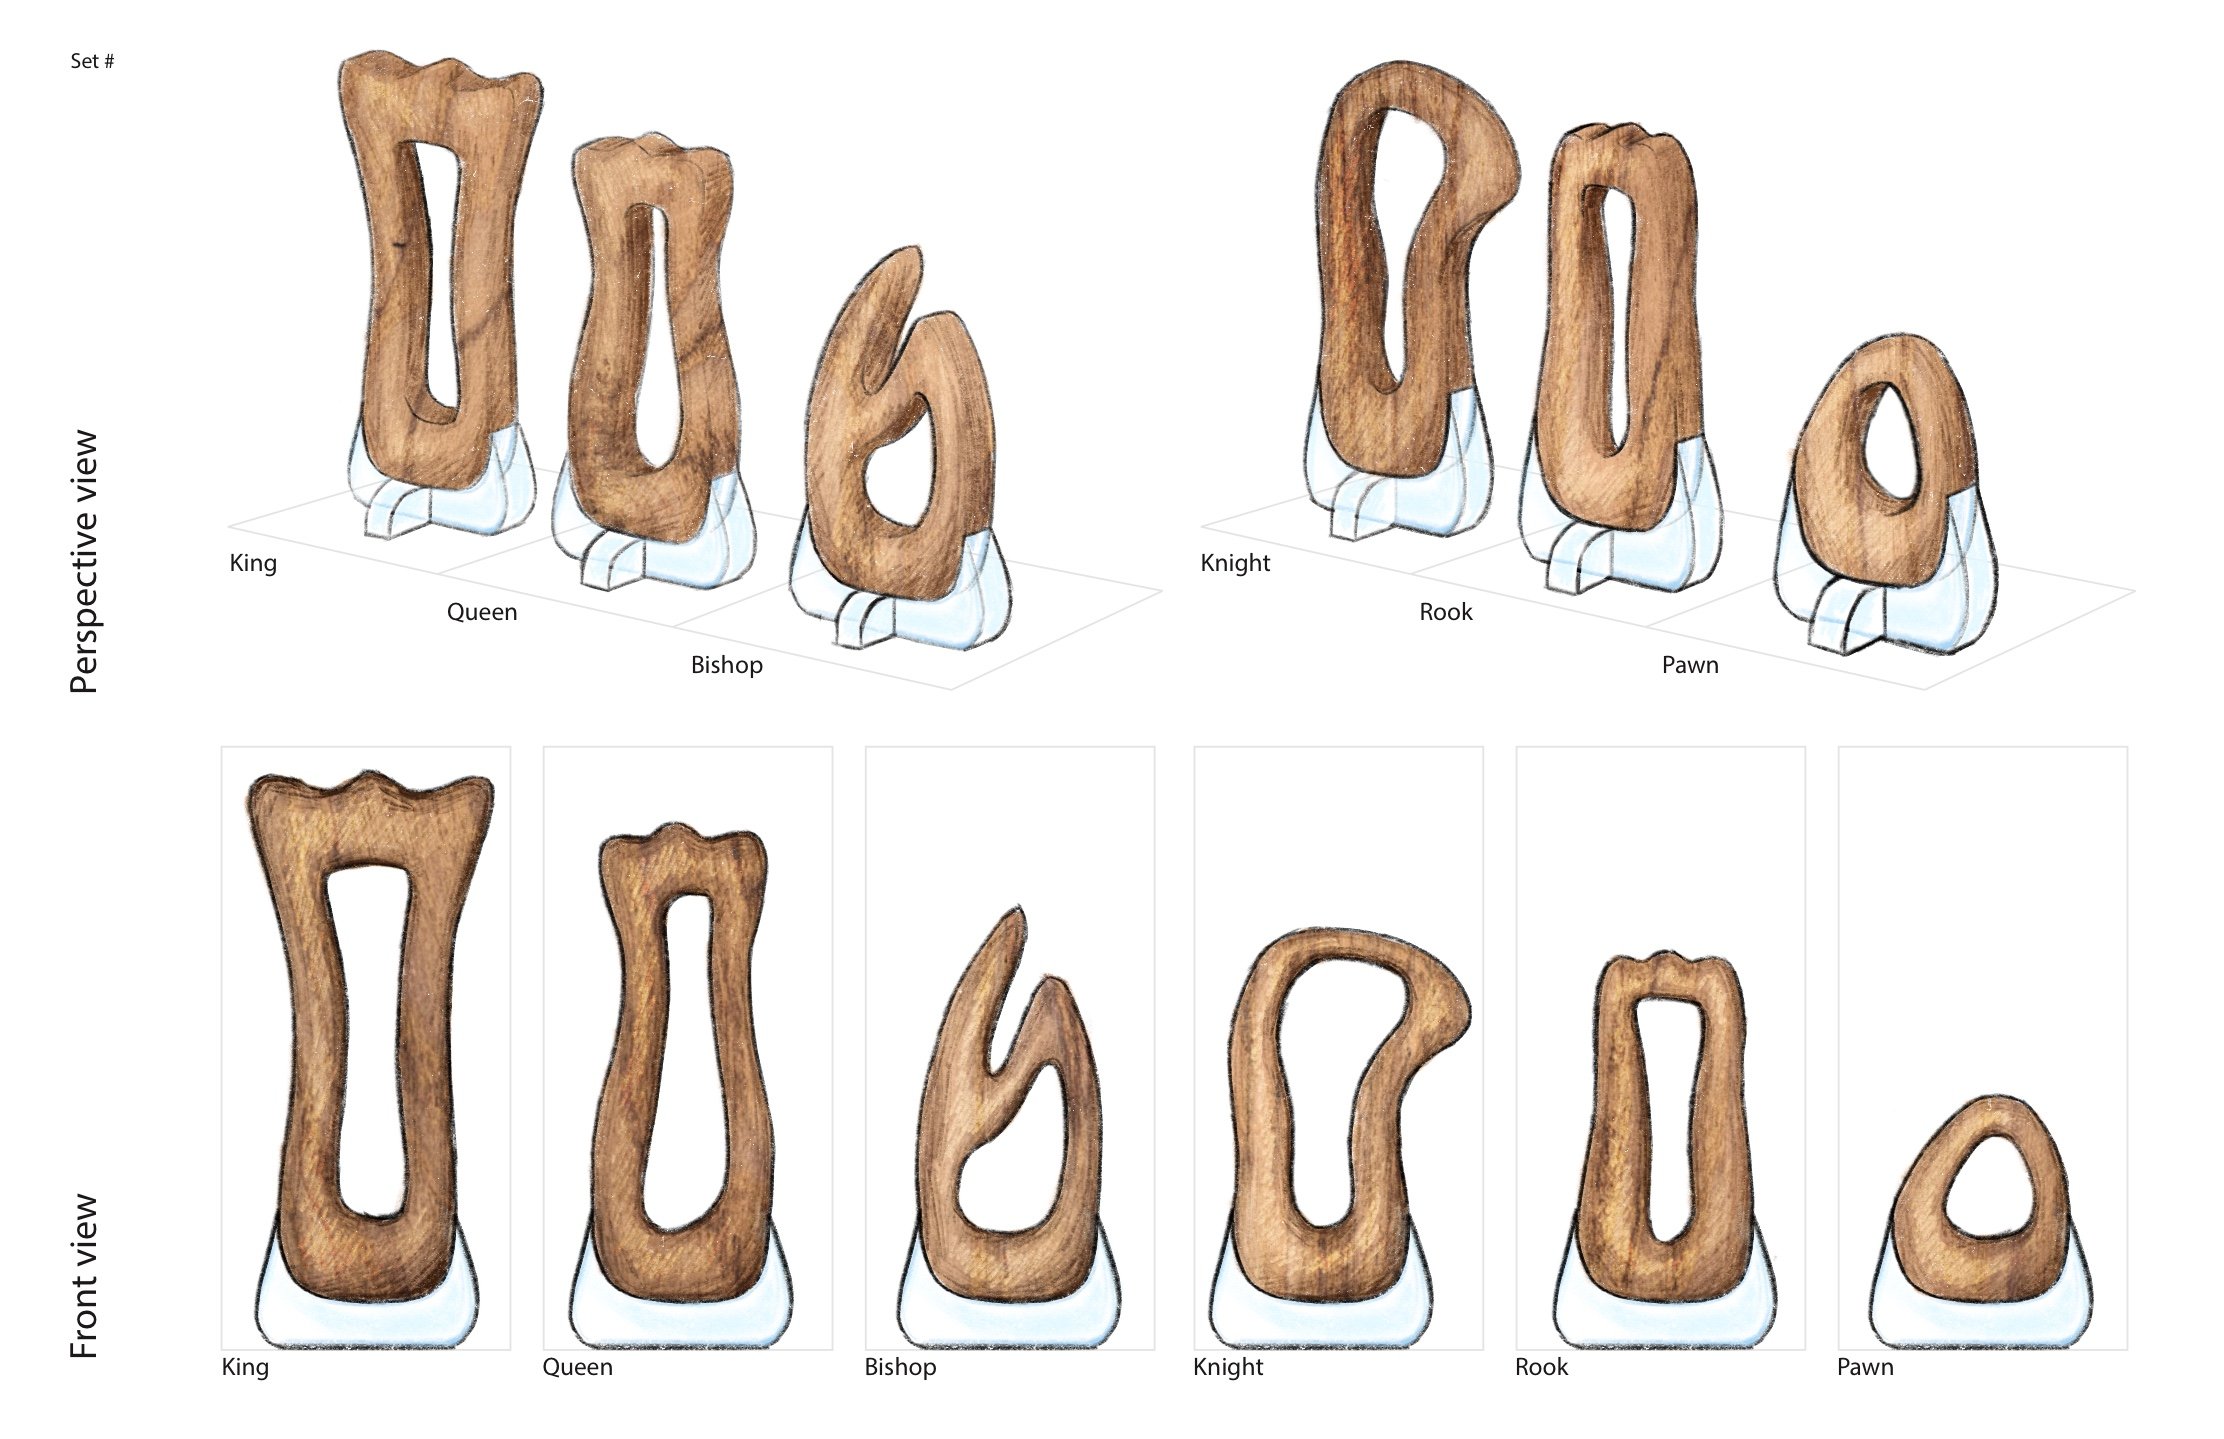
Finalizing concepts
After finally choosing a direction to go; a organic looking yet still recognizable set, I created the final rendered sketches of my set. I knew at this point that I wanted to do wood, but wasn’t sure if I wanted to leave it natural or paint it a color, and i also knew that I was going to do resin for the common piece.

3D Ideation
Before making my final set, I made some models out of plastina to make sure it was the direction I wanted to go with. I played with the forms and making them more recognizable by changing the curves and angles slightly, and also made sure the scale was correct. I also 3d printed the base part so my peers could test the pieces and give me feedback on the usability of them.


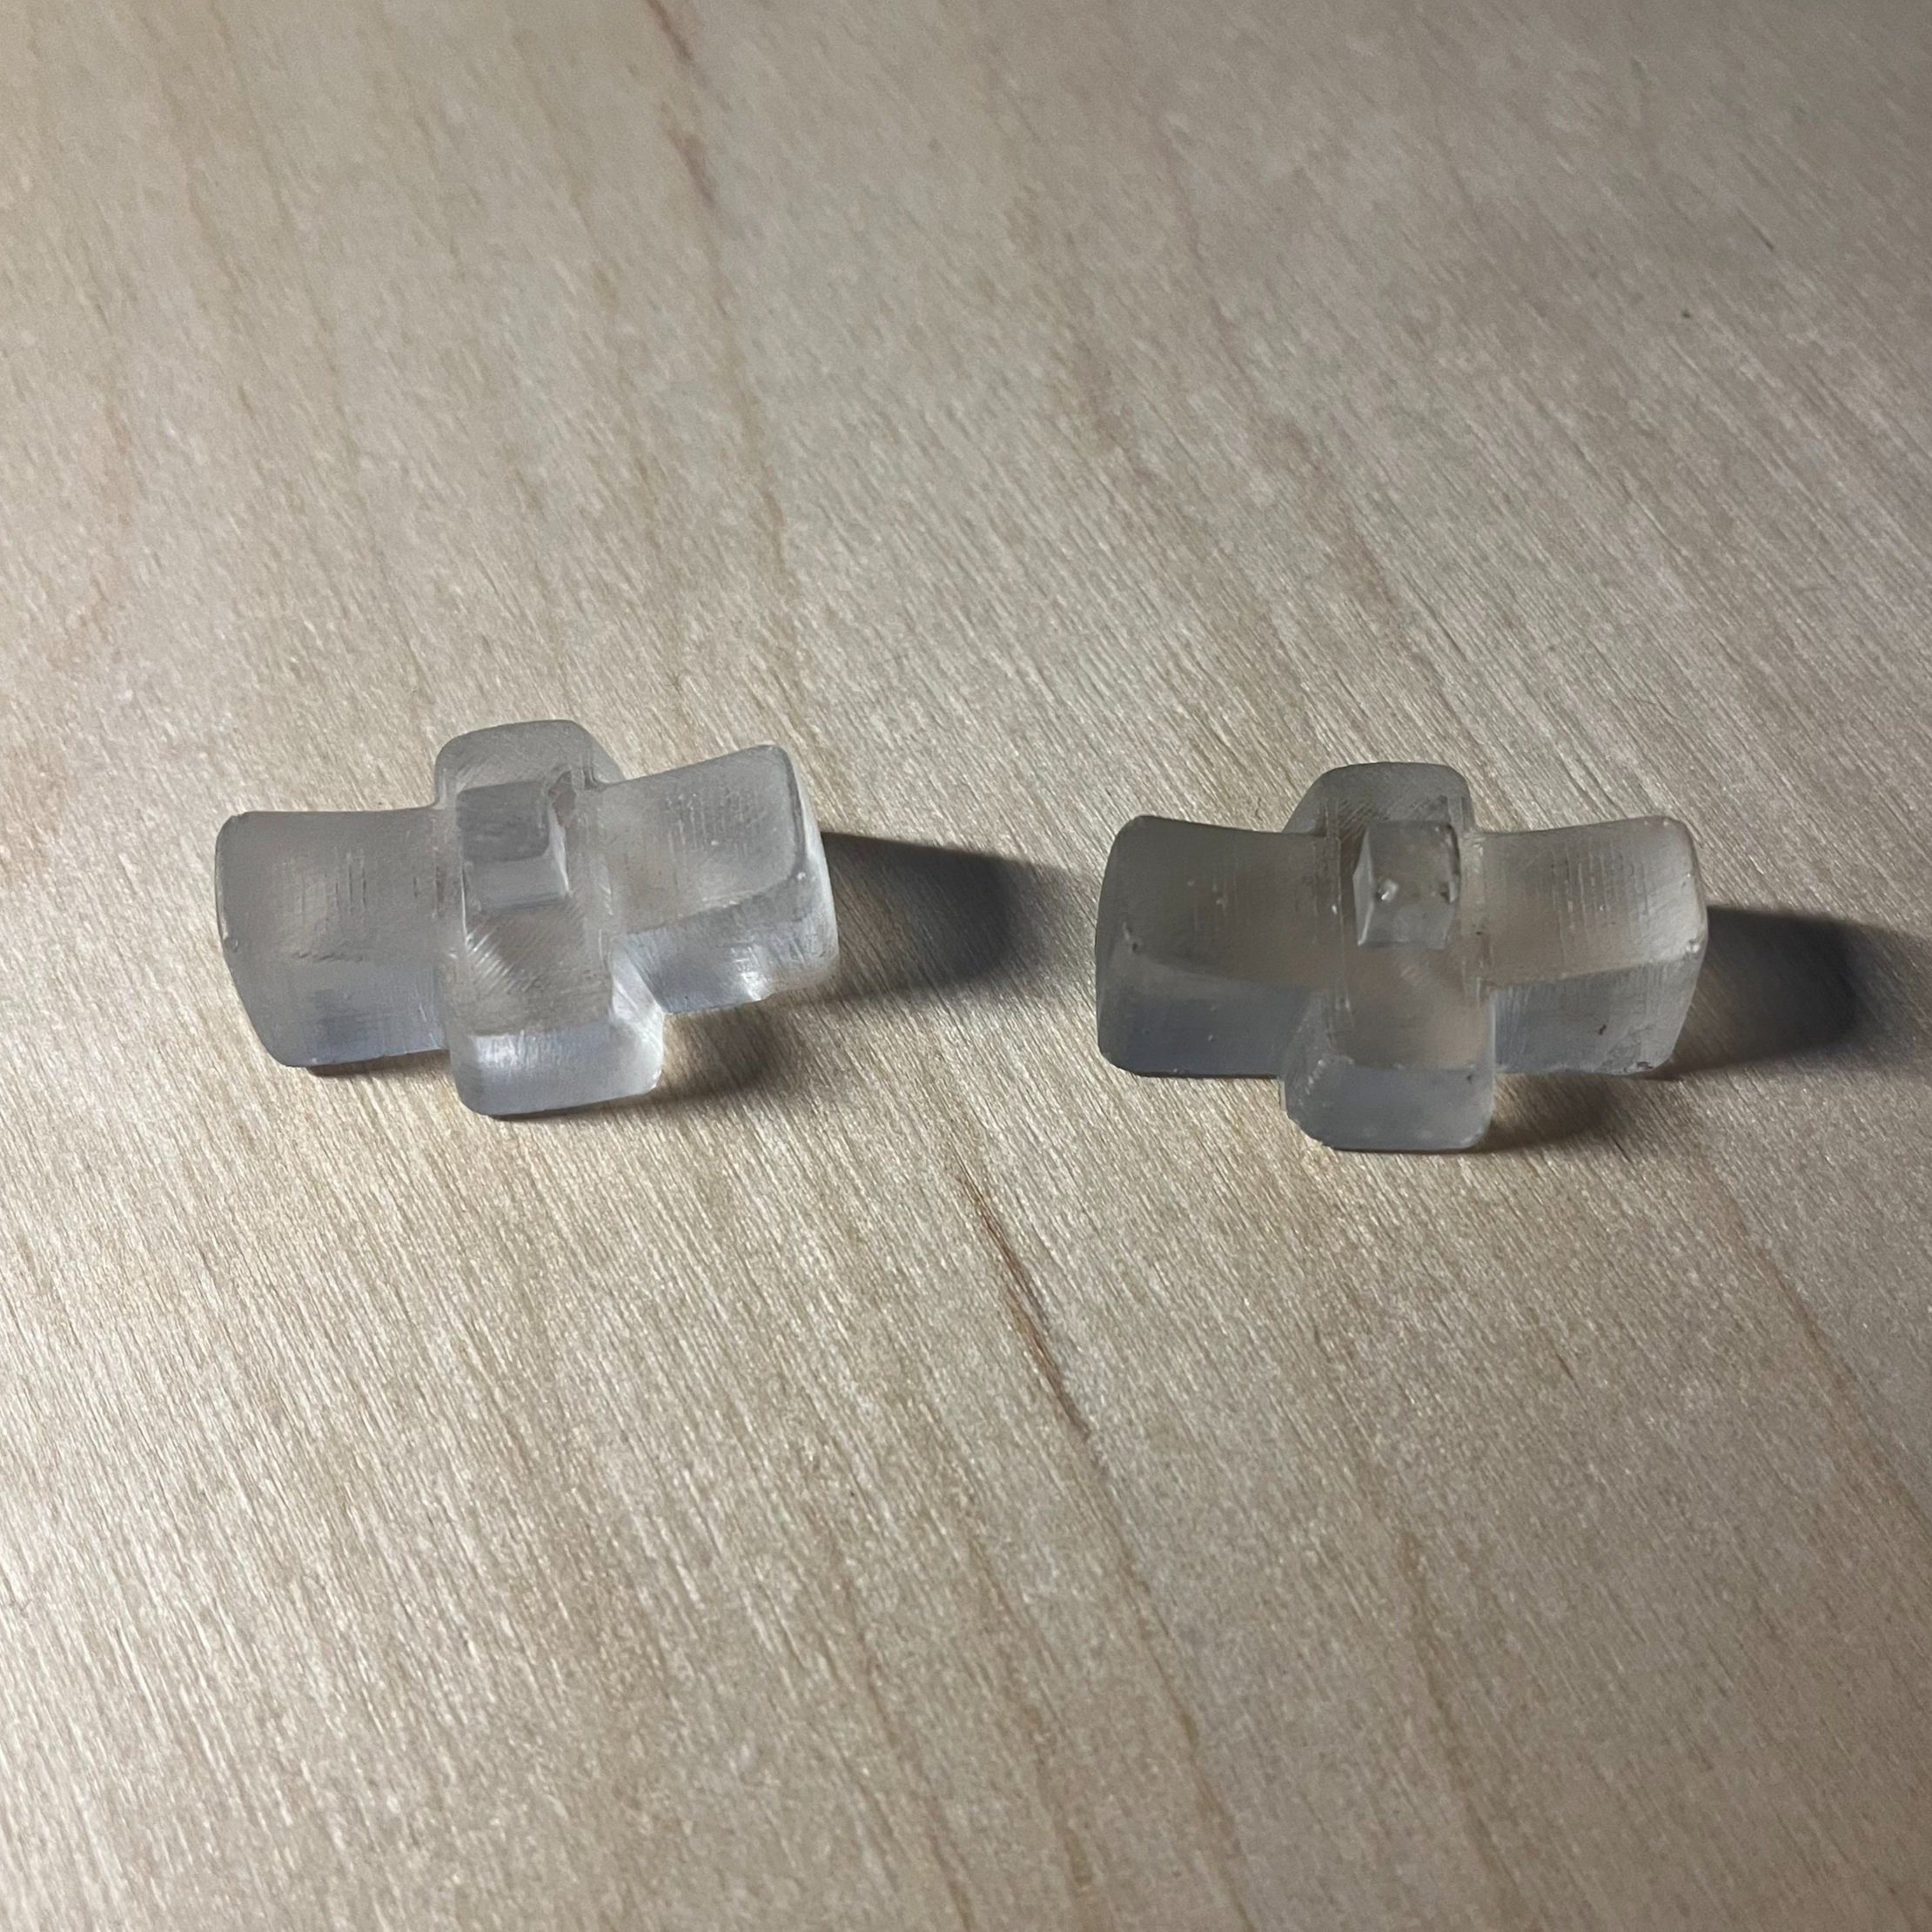
Molding and casting
I used one of my 3d printed pieces and sanded it to use as my master piece for my mold. For the resin, I experimented with several types, and eventually chose the oomoo brand resin because the other one I was experimenting with had problems with curing.


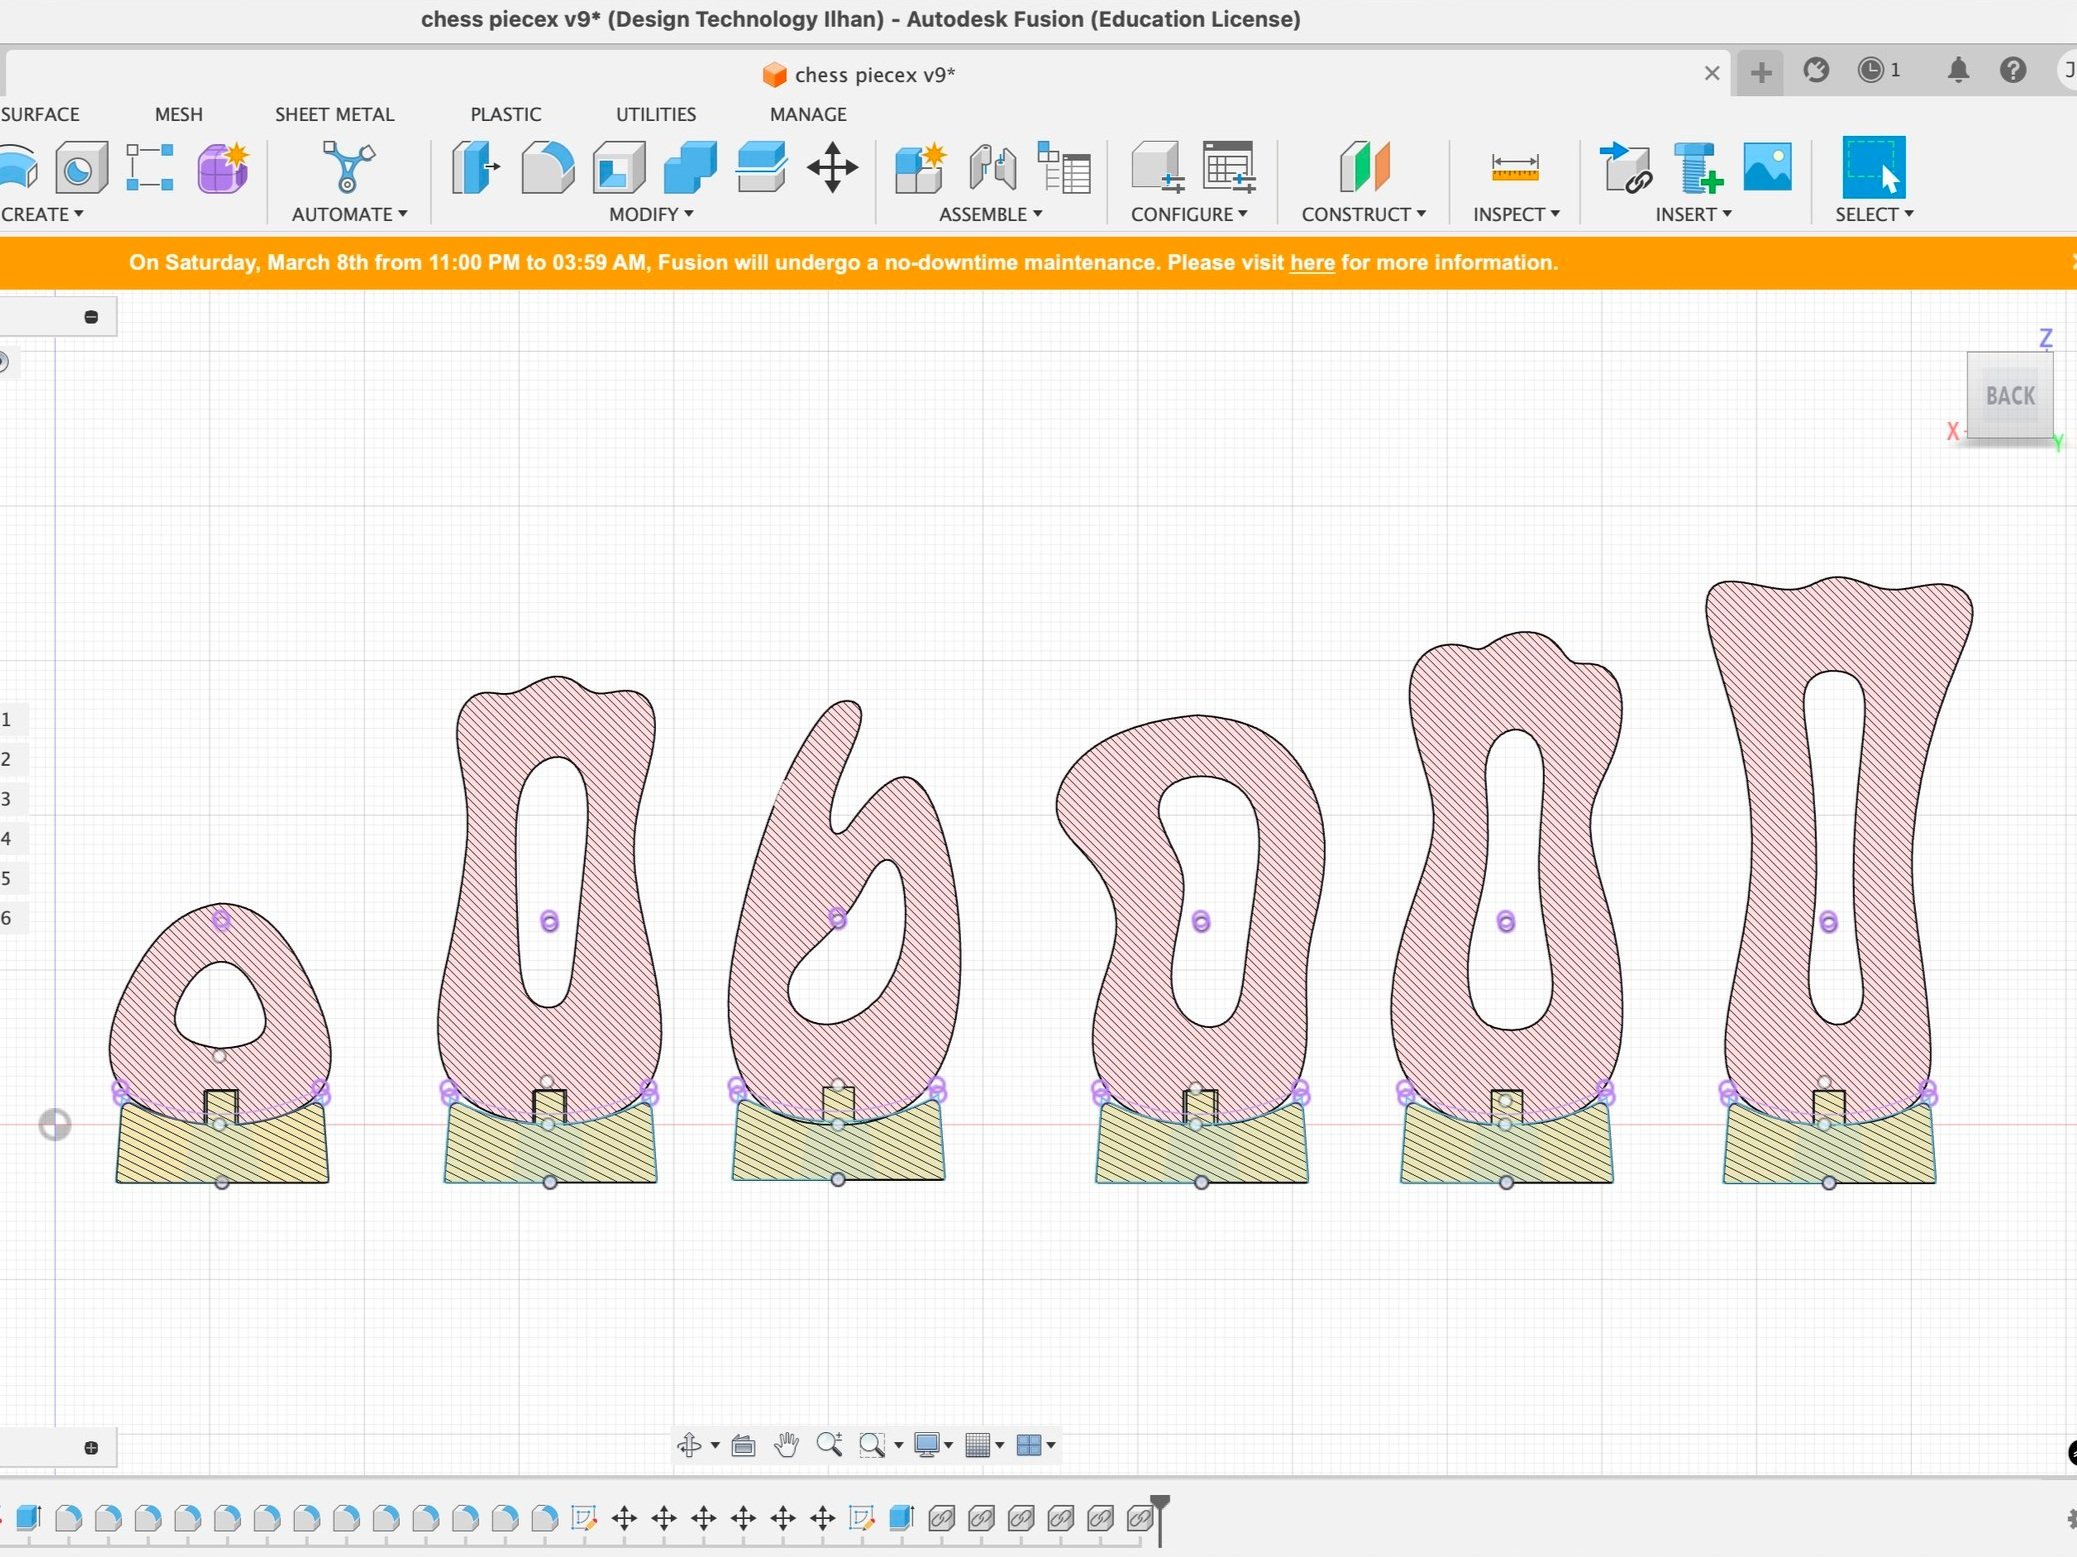
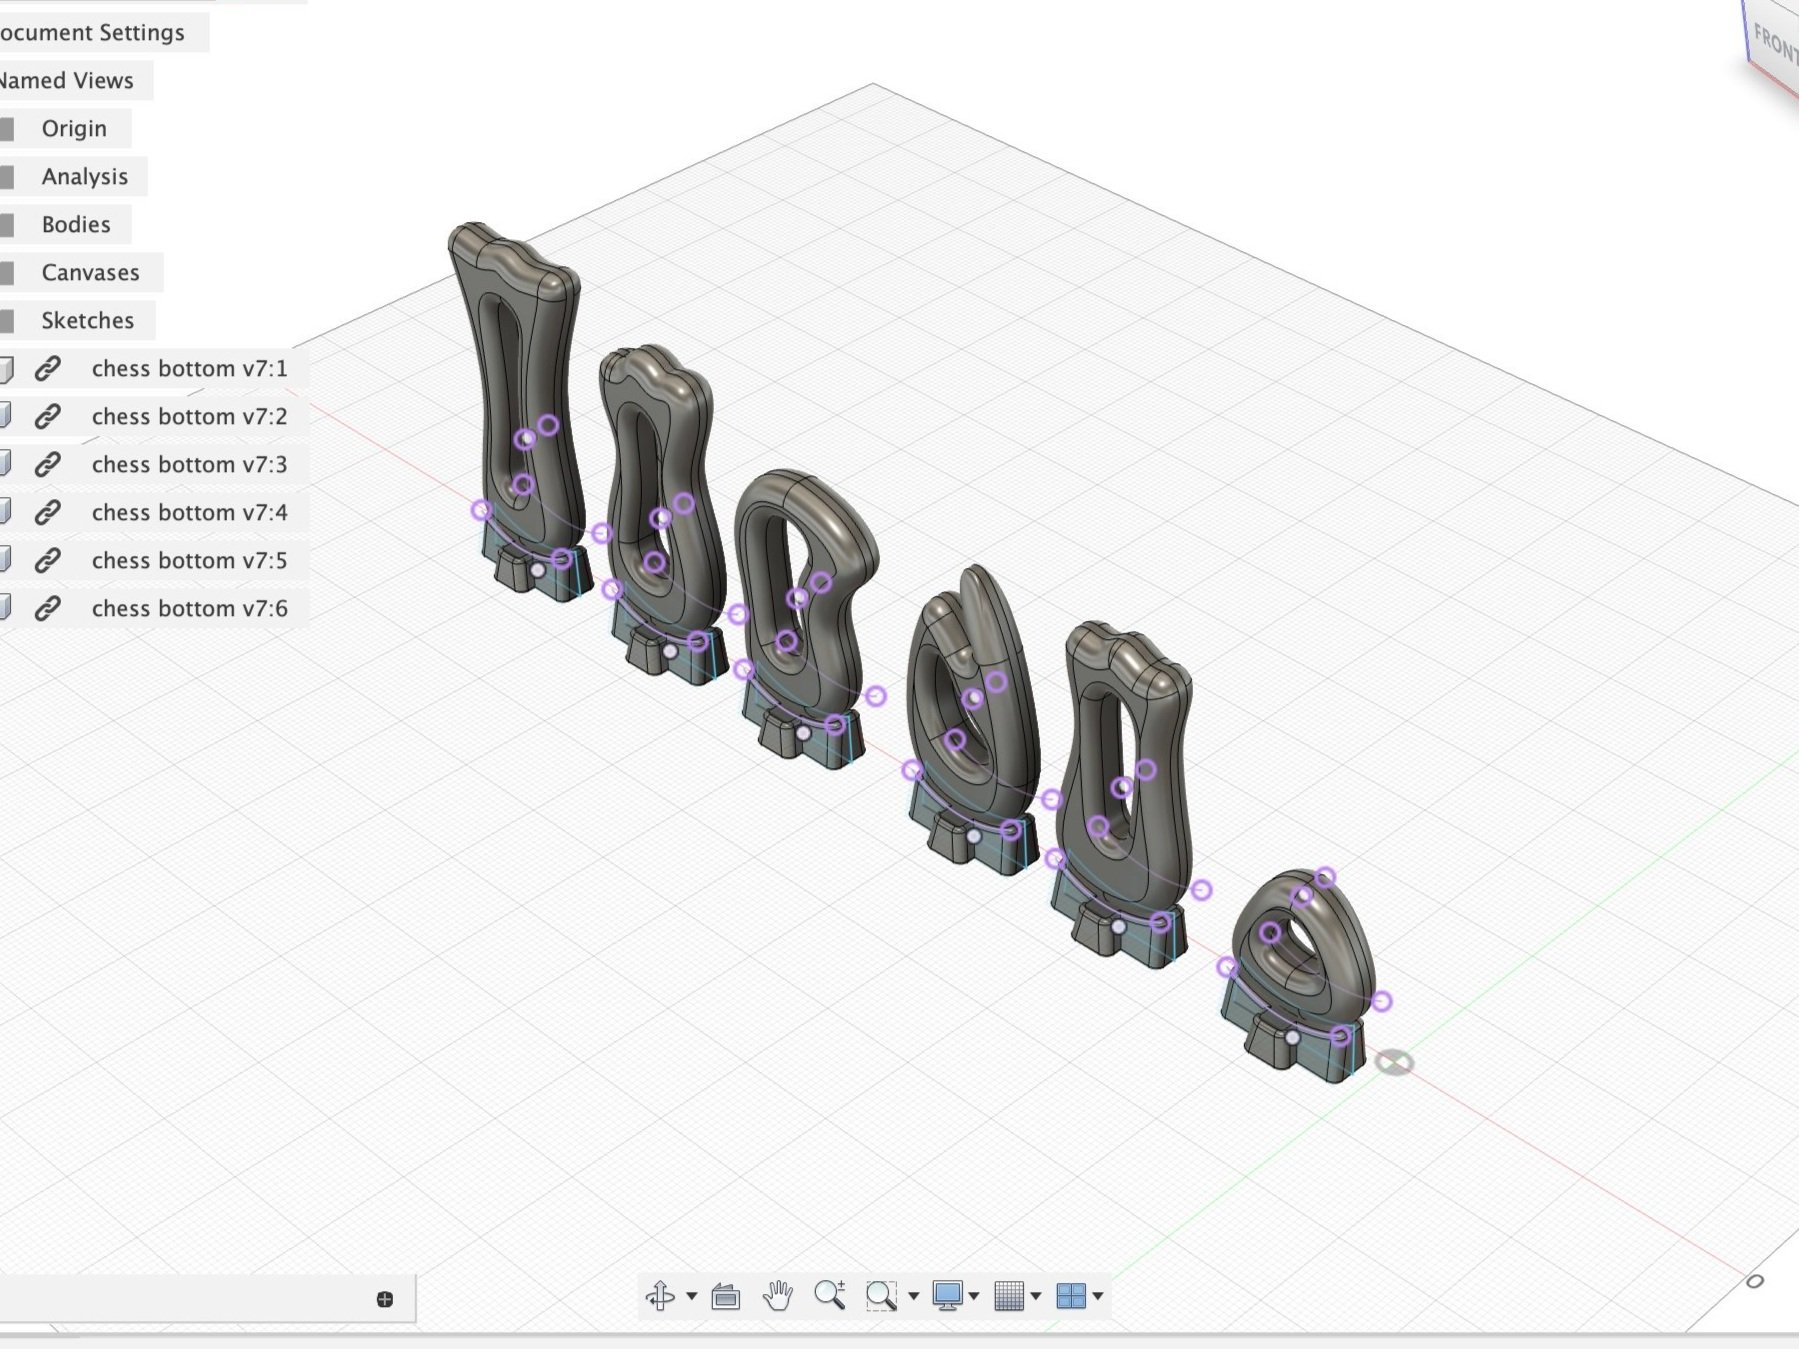
Laser cutting and 3d modeling
For my final pieces, I modeled them in fusion, as I could then export that sketch into illustrator to use for the laser cutter. I used the laser cutter to cut two pieces for each chess piece, which I would glue to each other.

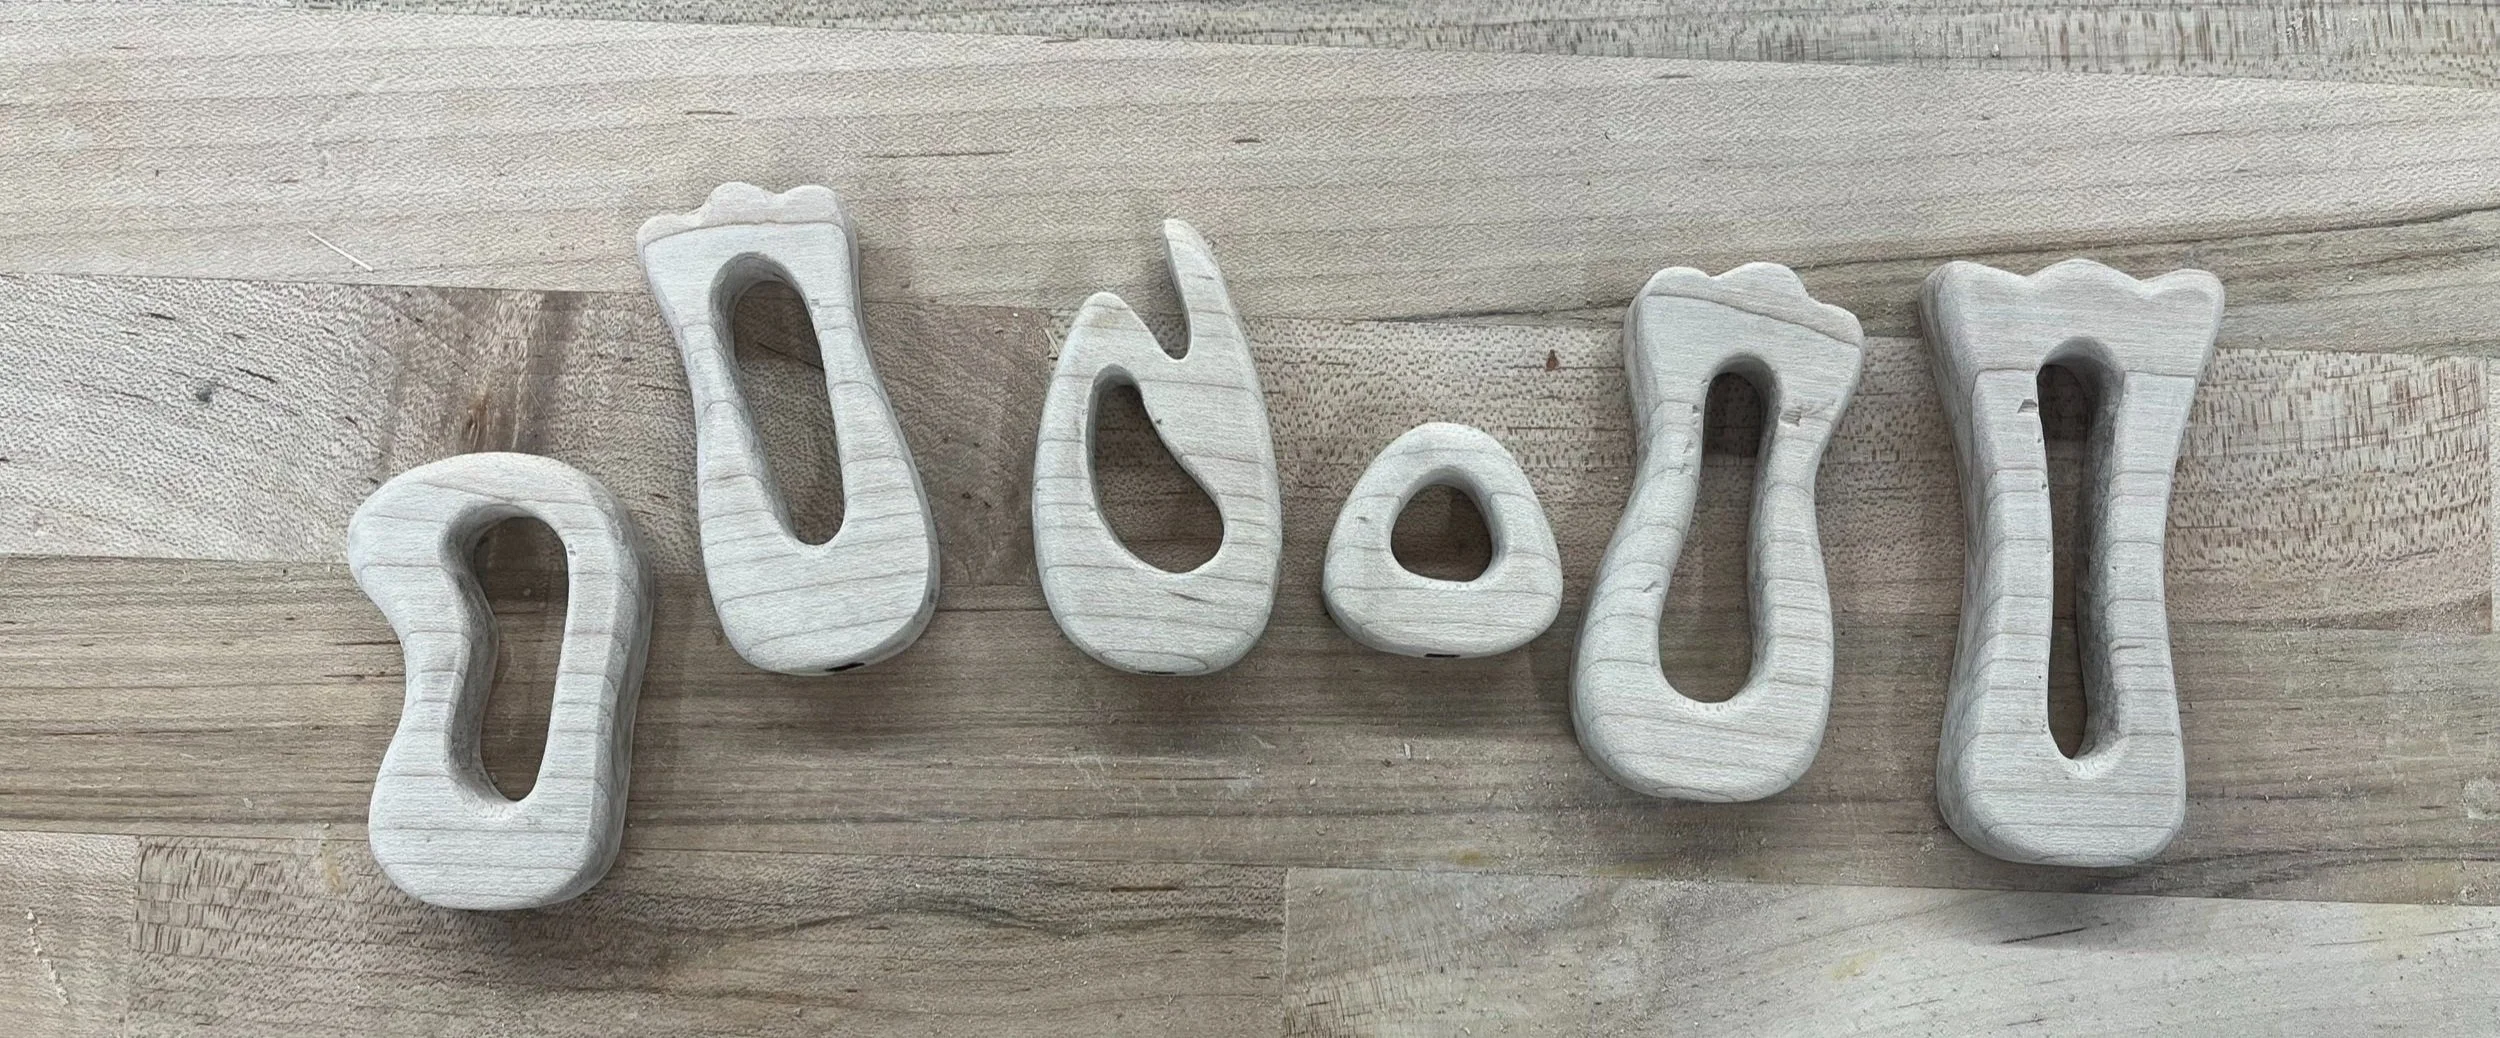
Sanding and gluing
Since I used a laser scan, which does not fully cut the wood, it made a hole in the bottom which I would use to put my resin pieces into. I glued the pieces together so this would work, and then I began sanding down the sides and inside. The process was time consuming, but well worth it to get the shape I desired.


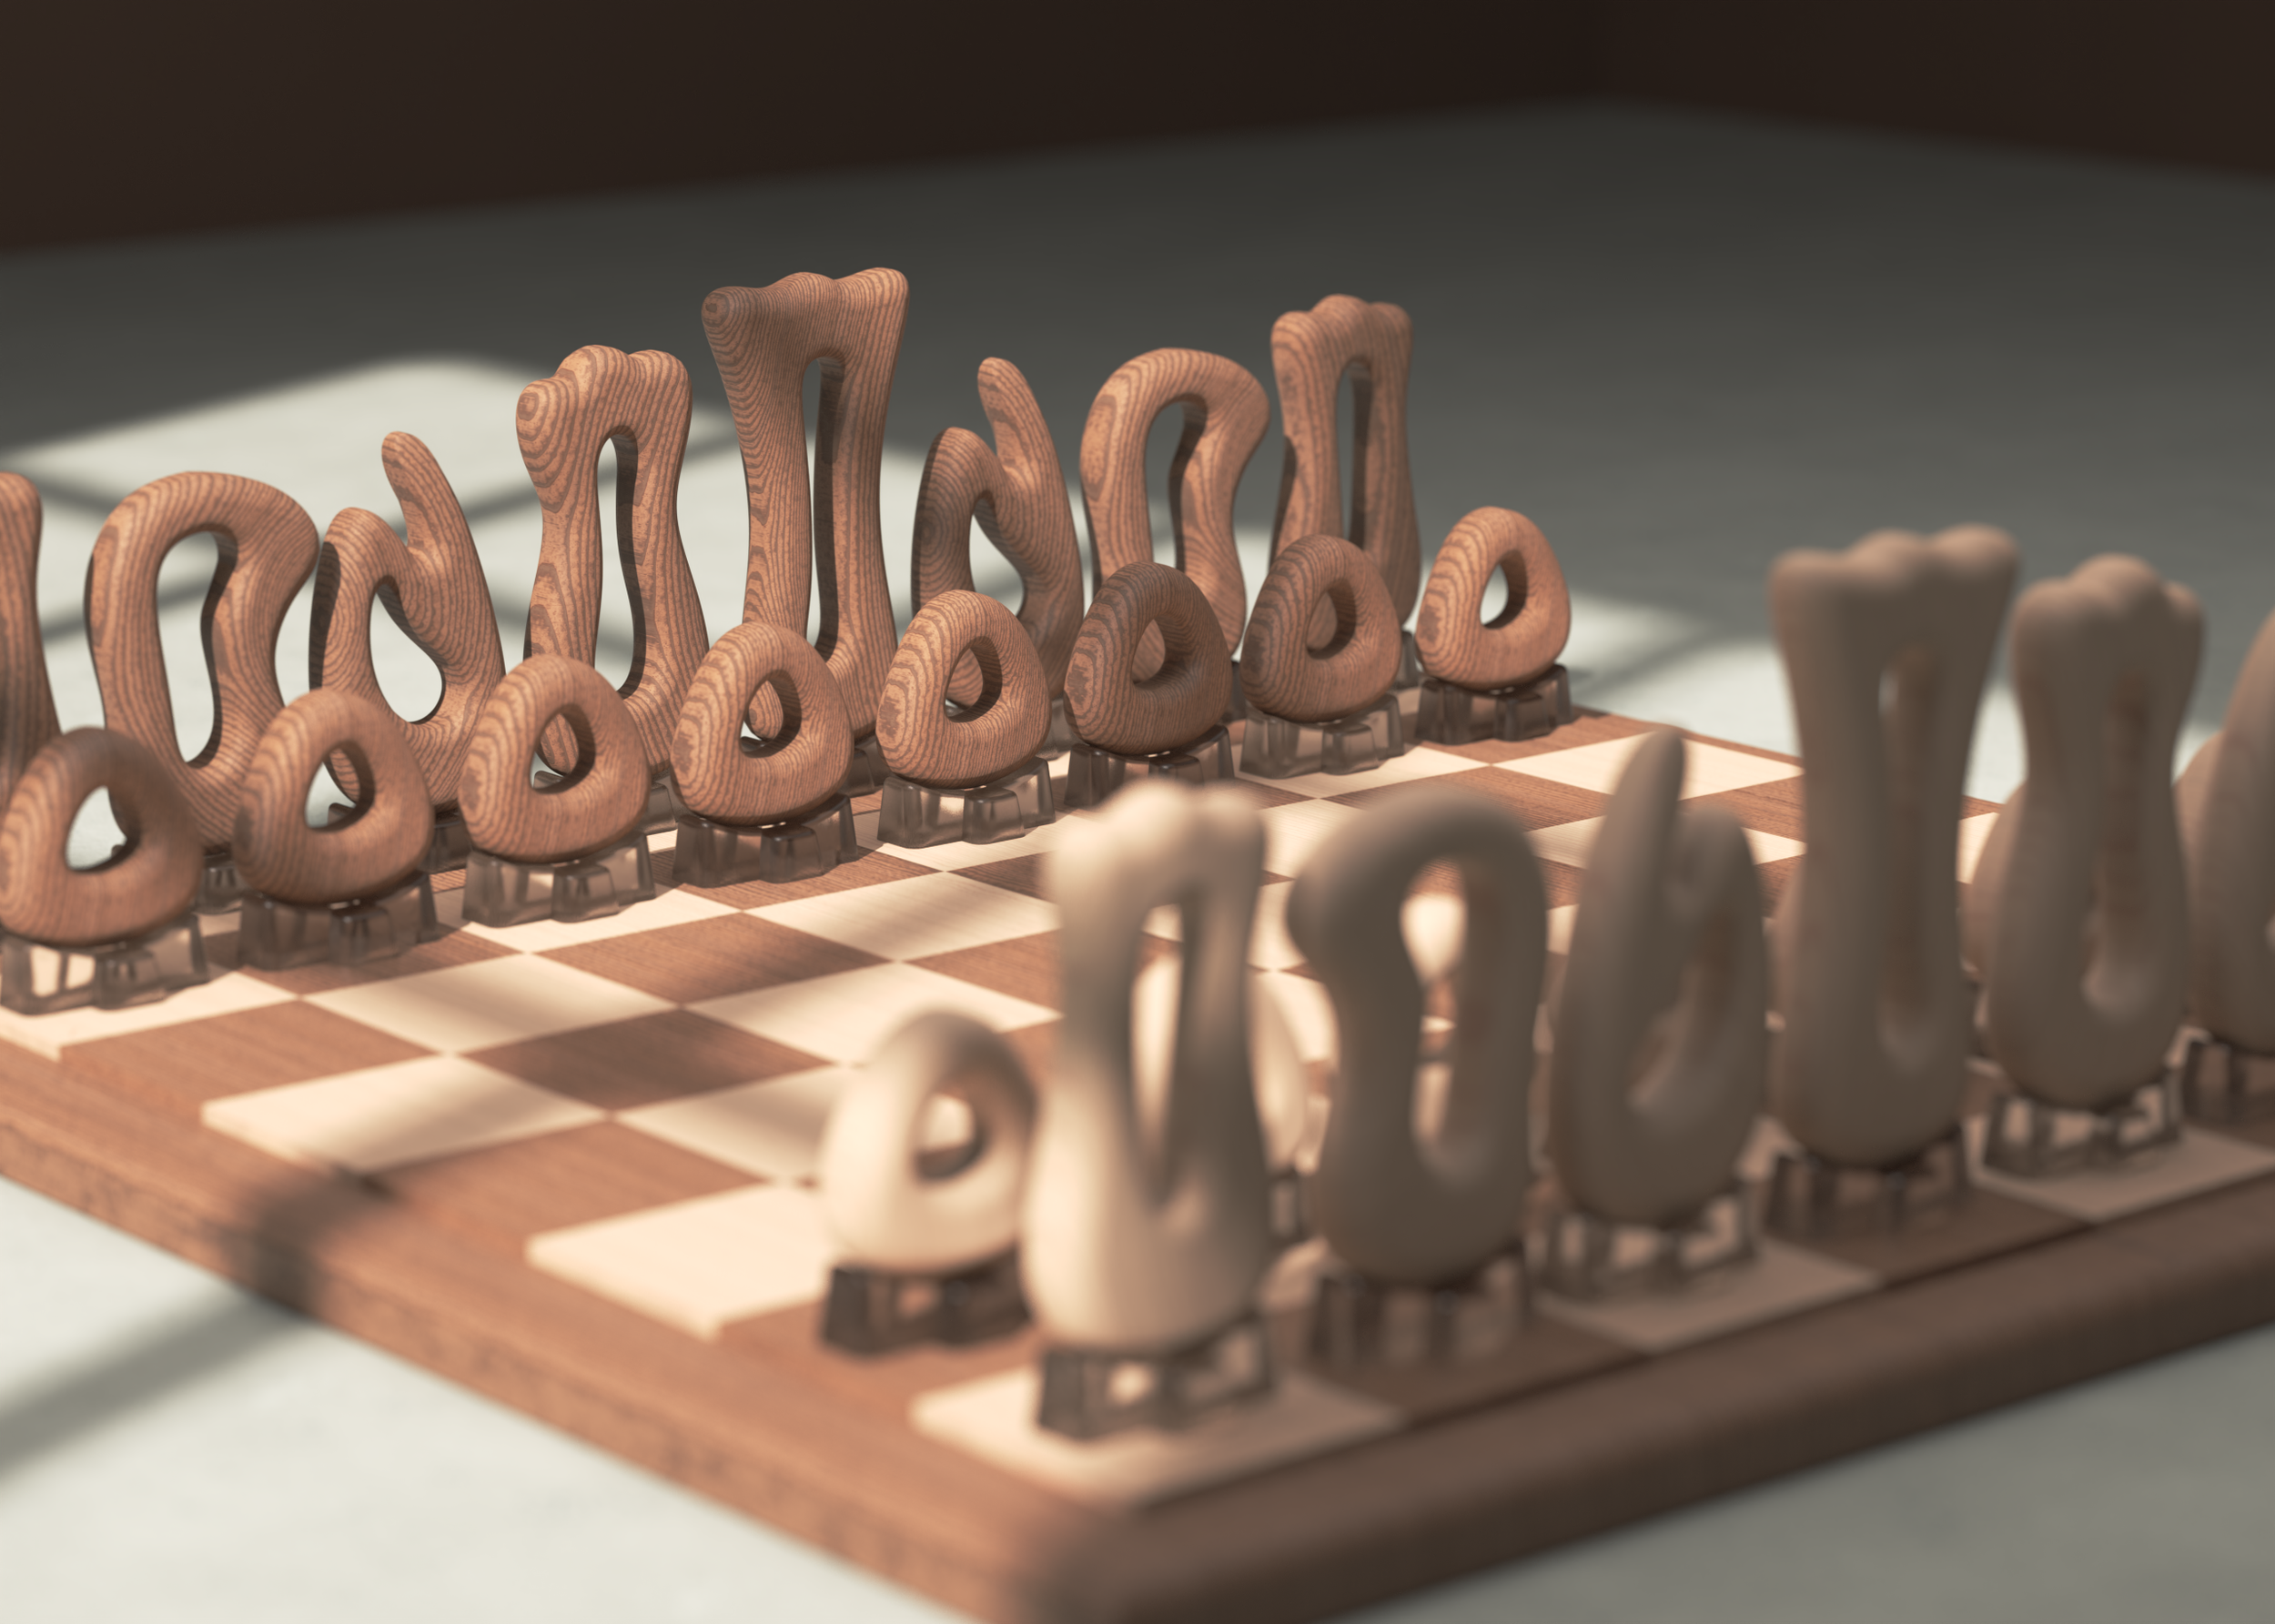
Final product
I created a render of what a full set of my design would look like, and rendered the board as well. I had fun experimenting with the lighting of the scene and the wood texture. For my final pieces, I did not finish them or glue the bottoms in place, as I plan on further sanding them, filling in a few chips that were caused during sanding, and then finishing them after.